It is Officially Summer and Time to Craft

Hello My Fellow Crafters,

Now that it is officially summer, and school is out, what kind of plans do you all have?  Hopefully crafting is on your list 🙂

I have been busy with lots of stuff lately, and I want to share with you some on my handmade greeting cards that I have been making.  This card I made for my mother-in-law for Mothers Day.

 closetomyheartkit

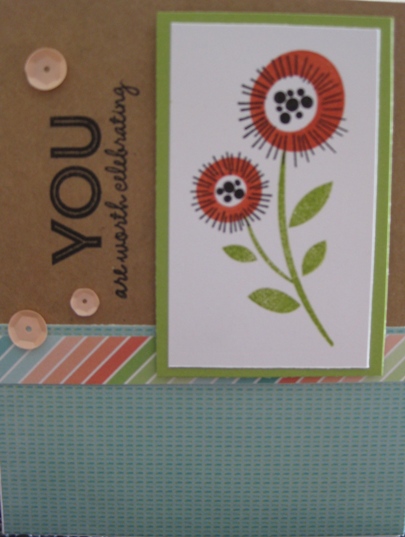
I think I told you already but just in case you missed it, My girlfriend Kim, is a Close To My Heart consultant and I ordered the Workshops On The Go, Blossom Cardmaking Kit.  I have always made cards from scratch, never from a kit, but let me tell you, this is AWESOME!

Everything that you need to make 15 cards is included.   Serious, all I needed was paper trimmer, stamp pad, acrylic block and adhesive.  And I have leftovers to make more 🙂

If you want to order this kit, please just click on this link and it will take you to Kim’s shopping page – Blosson Cardmaking Kit #G1095  Tell Kim I sent you 🙂

Make It A Great Day and Don’t Forget To Leave Time To Craft!


Happy Fall Ya’ll

Hello My Fellow Crafters.

Fall is my favorite time of year.  Pumpkins, scarecrows, beautiful colors of the leaves changing and the list can go on and on.  Today I want to share with you a fall handstamped/handmade greeting card that came out pretty darn cute 🙂

handmadegreetingcardscarecrow

This Scarecrow was stamped on white cardstock with tuxedo black memento ink, colored with Copic sketch markers, then cut out using cutter-bee scissors.  I wanted some texture and dimension to this card so I decided to use  the Cuttlebug.   I took the two blue panels and put them into an embossing folder of a tree, so when the card is closed you can see the entire tree.

As cool as that looked it still needed “something” so using a paper punch of small leaf I punched out some leaves and used small dots for some dimension.  Then I found some 3D stickers in my stash of this birdhouse and bird, so thought that would be the perfect addition.  Still this card needed some more color so I cut two panels of colorful fall leaf cardstock.  Once I added those panels the colors of the scarecrow came to life.  Finished it off with some raffia and a wooden heart shaped button.

~ Happy Fall Ya’ll ~

Make It A Great Day and Don’t Forget To Leave Time To Craft!

Using The Double-Z-Fold Technique For A Great Handmade Greeting Card

Hello My Fellow Crafters,

Today I want to share with you a great handmade card that I made for our dear friends.  I wanted it to be special and I also wanted to try out the Double-Z-Fold technique.

All I needed to do was get the cardstock cut into different size pieces:
~You will need one piece for the card base and cut to 5 1/4″ x 12″
~Next for the side panels you will need 2 pieces of cardstock cut to 1 3/4″ x 5″
~And one for the inside of the card cut at 3 3/4″ x 5″Now the next step is scoring the card base.  Using my Martha Stewart Score Board and bone folder, I scored at 2″ ~ 4″ ~ 8″~  10″

Now you fold the 4″ score in and the 2″ score back and then fold the 10″ fold in and the 8″ fold back.  I know this sounds weird but look at the picture below and you will understand what I am talking about 🙂

doublezfoldcardfoldlines

Next step is attaching the panels to the card base.  I used my ATG adhesive. You can use any type of adhesive that you like, as long as it sticks your good.

Wow this is starting to look really good. (the lighting must have changed this blue looks totally different in this picture)

doublezfoldsidepanels

Once the panel were all in place I cut another panel in the same color cardstock as the base and stamped a sentiment.

Then added a image that I stamped on some cardstock with Memento Ink and colored with Copic Sketch Markers.  I stamped the image twice and for the second one I just colored the wings and cut them out and added a small pop dot so the wings had a 3-D look. I layered this image into two other colors of cardstock.  Then again using the ATG adhesive but this time only adding adhesive to one side of this stamped image so the card could open.

doublezfoldcard techniqueinside

The card looks great but I needed some bling so I added some rhinestones to the inside sentiment and also some larger rhinestones to the dragonfly image on the outside.  Now it looks perfect!  This double-z-fold is really easy and it makes your card look so professional.  Give it a try and see for yourself how much fun it can be.

doublezfoldcardtechnique

Make It A Great Day and Don’t Forget To Leave Time To Craft!

Supplies:

Page 3 of 7
1 2 3 4 5 7