A Day At The Beach Handmade Birthday Card

Hello My Fellow Crafters,

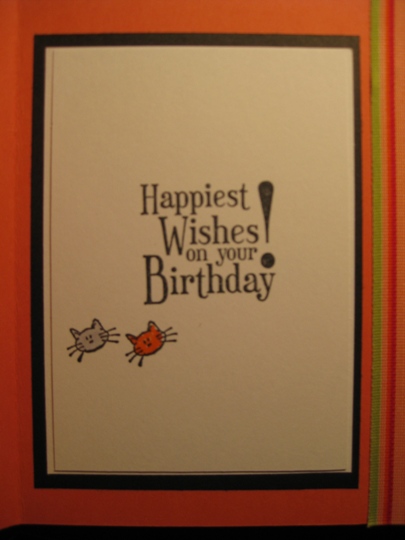
Today I want to share with you a birthday card that I hand stamped for my father-in-law aka Poppa.

I just think the stamps from Art Impression are so funny.  When I started designing this card I took this relaxed man sitting in a chair and decided to put him on the beach, under a palm tree.  That’s a good way to spend your birthday if you asked me 🙂

dayatbeachcard

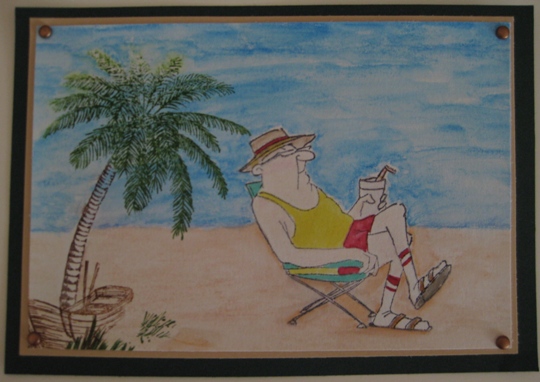
Since I don’t have an air brush and I didn’t want to use lots of different color cardstock for the background, I decided to take out my watercolor pencils that have been in this pouch for years and see what I could do.  I also used some Copic Sketch  markers to color this guys clothes.

watercolorpencils

Once I stamped the palm tree it looked like it was just growing in the middle of the sand, so I found a stamp of this boat in my stash of rubber stamps, and once I added it to the bottom of the tree it totally looked like it belongs.  Added some layers of cardstock to the base of the card, attached some brass brads to the corners and it’s done.

It still amazes me how by just using 3 rubber stamps you can make such a cool handmade/handstamped greeting card.

~ Hope you enjoyed your Day At The Beach ~

Make It A Great Day and Don’t Forget To Leave Time To Craft!

Handstamped Sympathy Card

Hello My Fellow Crafters,

Making a handmade card is not always fun, but it can still be beautiful.  Our family lost a beautiful women who always shared her love for life.

handstampedwithsympathycard

She taught me how to dance with our turkey on thanksgiving morning before cooking him,  have ice cream for dinner instead of waiting for dessert, and the list goes on.  Thanks Aunt Bubs for touching our lives and our hearts.  We will have these wonderful memories forever.

This card was made using a rubber stamp from Inkadinkado.  I stamped the image twice (since I wanted a layered card) with memento black ink on plain white cardstock.  Then colored the image with Copic sketch markers.  Then I stamped “With Sympathy” onto the top of the colored image using the same black ink, cut, then used some pop dots to make the flower stems have dimension.  Next, I wrapped some white ribbon around the layered piece and added a bow.  For the final touch I added some diamond Stickles to the flowers for a little shimmer.

Make It A Great Day and Don’t Forget To Leave Time To Craft!

Handstamped Birthday Card for a Wonderful Sister

Hello My Fellow Crafters,

Today I want to share with you a birthday card that I handmade for my wonderful sister.  I am so happy that I got to spend some time with her when I visited New Jersey last month.  Looking at this card I am laughing because when I was in New Jersey they had a snow storm and I was wishing that I was barefoot like this card shows 🙂

handstampedbirthdaycard

I wanted this card to be colorful and I thought of a stamp that I had from Suzy Toronto. This rubberstamp is named Friends and I don’t know about you, but my sister is my best friend.

I actually met Suzy years ago when I lived in New Mexico at a big arts & crafts fair during the yearly Albuquerque Balloon Fiesta.  Suzy Toronto has a line of artwork called Wonderful Wacky Women that I fell in love with.

Anyway, I stamped the image with Memento Black Ink then colored with Copic sketch markers.  Cardstock is from Stampin’ Up and I think the name of the base color is Calypso Coral, the white panel is Whisper White.  The ribbon used is from Dashes, Dots & Checks.

For the inside of the card I reversed the ribbon so when the card is standing you would be able to see the ribbon.

insidehandstampedbirthdaycard

Wishing the Best Sister in the world a Happy Birthday!

Make It A Great Day and Don’t Forget To Leave Time To Craft!

Supplies Used:

Using The Double-Z-Fold Technique For A Great Handmade Greeting Card

Hello My Fellow Crafters,

Today I want to share with you a great handmade card that I made for our dear friends.  I wanted it to be special and I also wanted to try out the Double-Z-Fold technique.

All I needed to do was get the cardstock cut into different size pieces:
~You will need one piece for the card base and cut to 5 1/4″ x 12″
~Next for the side panels you will need 2 pieces of cardstock cut to 1 3/4″ x 5″
~And one for the inside of the card cut at 3 3/4″ x 5″Now the next step is scoring the card base.  Using my Martha Stewart Score Board and bone folder, I scored at 2″ ~ 4″ ~ 8″~  10″

Now you fold the 4″ score in and the 2″ score back and then fold the 10″ fold in and the 8″ fold back.  I know this sounds weird but look at the picture below and you will understand what I am talking about 🙂

doublezfoldcardfoldlines

Next step is attaching the panels to the card base.  I used my ATG adhesive. You can use any type of adhesive that you like, as long as it sticks your good.

Wow this is starting to look really good. (the lighting must have changed this blue looks totally different in this picture)

doublezfoldsidepanels

Once the panel were all in place I cut another panel in the same color cardstock as the base and stamped a sentiment.

Then added a image that I stamped on some cardstock with Memento Ink and colored with Copic Sketch Markers.  I stamped the image twice and for the second one I just colored the wings and cut them out and added a small pop dot so the wings had a 3-D look. I layered this image into two other colors of cardstock.  Then again using the ATG adhesive but this time only adding adhesive to one side of this stamped image so the card could open.

doublezfoldcard techniqueinside

The card looks great but I needed some bling so I added some rhinestones to the inside sentiment and also some larger rhinestones to the dragonfly image on the outside.  Now it looks perfect!  This double-z-fold is really easy and it makes your card look so professional.  Give it a try and see for yourself how much fun it can be.

doublezfoldcardtechnique

Make It A Great Day and Don’t Forget To Leave Time To Craft!

Supplies:

A Handstamped Birthday Card With Some Fun Fiber Embellishments

Hello My Fellow Crafters,

Today I want to share with you a handstamped birthday card with some fun fiber embellishments that I made for my mother-in-law.  I wanted to make this card bright and colorful.

I had so many ideas for this card and instead of choosing one stamp set and theme, I put them all onto one card.  What women does does not like shoes and a matching purse 🙂

handstampedhappybirthdaycard

Using some stamp sets that I have had from Hero Arts, I stamped the sandal, woven bag and the sentiment with tuxedo black memento ink onto plain white cardstock.  Then using a square paper punch cut out each image.

Next step was to color them using a copic marker (dark suntan) and that’s it! But I just had to add some kind of embellishment.  So I  punched a tiny flower and using a styles tool just pressed down in the middle and it made a small indent in the middle of the flower and then I added a drop of silver stickles.

Since I wanted a layered look to this card I punched  a larger square from black cardstock for each image and stuck them together using my ATG gun.  Also had a scrap piece of lime green cardstock so I put that in the back of the Pink cardstock that had three squares cut out already.  (I got these card kits a few years ago from The Paper Cut company who were at a rubber stamp convention), it would have been really easy to make if I didn’t have this already cut out just by using a larger square punch. For an extra “pop” I added pop dots on the back of the black cardstock before I put onto the lime green.   Then for the finishing touch on the outside of this card I added some funky fiber that I had from EK Success that I found in my stash of ribbons, raffia, bakers twine…

insidehandstampedhappybirthdaycard

For the inside I kept the same colors and layering look, and added a strip of striped paper behind the layers.  Then added a rhinestone for that extra bling!

~ Happy Birthday Mom ~

Make It A Great Day and Don’t Forget To Leave Time To Craft!

Card Supplies:

Page 1 of 4
1 2 3 4