Handstamped Birthday Card For a Cat Lover

Hello My Fellow Crafters,

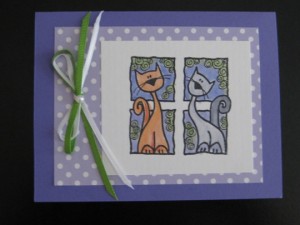
Most of you know that I have two furry children, and I am sure just like real children they can make you mad, sad but most of all happy.  Well this card just makes me happy.   I don’t know if it’s the colors that I used or just the image of these two cats but I really like how it turned out.

I stamped the image (Magenta cling stamp) with Memento black ink on white cardstock  and then colored in the image with just a few Copic markers.  I have no idea who makes the polka dot paper cause it was in my folder of scraps, and the solid lavender cardstock is from the Paper Cut.  The finishing touch was adding some ribbon and a pearl embellishment.

handstampedgreetingcardcatsinwindow

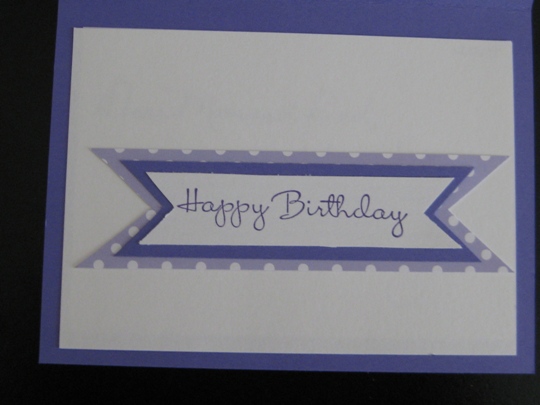
I still had some scraps left over so for the inside I stamped Happy Birthday and layered it on top of the same cardstock I used for the outside of the card.

handstampedgreetingcardsentiment

Hope you like this card. It was really fun to make, now I have to wait for someones birthday so I can send it out.  I think this is the first time I am ahead of the game in making a card 🙂

Make It A Great Day and Don’t Forget To Leave Time To Craft!


Card Supplies:

Sea Shells Make the Perfect Handmade Birthday Card

I am loving living at the beach and having so much fun collecting shells.  My sisters birthday is coming soon so I need to make her a handmade birthday card.  I don’t know what she would do if I bought her a card, but she NEVER has to worry about that since I love making cards.

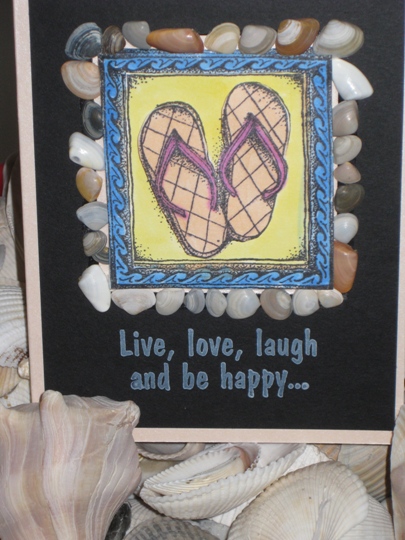
I will be using a rubber stamp from Peddler’s Pack of a pair of flip flops (beach theme again LOL)  I stamped this image 2 times on plain white cardstock, because I wanted to add some dimension with layers.  The sentiment stamp Live, love, laugh and be happy… is from Stampabilities.

I used one image for the base and colored using Copic sketch markers.  Then with the other image I cut out the wave border and the flip flops.  I used small pop dots on those images so they really looked like they were popping off the card. (of course I took the photo straight on so you really can’t see the dimension, sorry)

But now comes the really fun part.  I glued tiny shells that I found at the beach onto the frame of the card, and since I raised that wave border the shells sit really nicely on the card.

handmade greeting card

~ Happy Birthday Lori ~

Make it a Great Day and don’t forget to leave time to Craft!

It’s Time For Our 2011 Handmade Christmas Cards using Joys of the Season Cricut Cartridge

Time has been flying since we moved.  Getting adjusted to the new town and even the new time zone for us has been exciting.  But with all of the great distractions, it is time to get started and make time for getting creative and to make our handmade Christmas Cards.

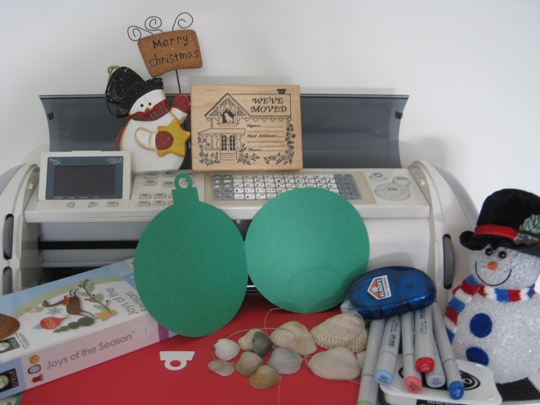
This year I need to incorporate our new address along with a Christmas theme.  So I decided to make a Christmas ornament using the Joys of the Season Cricut Cartridge, and a We’ve Moved rubber stamp from PSX. (I just wish this stamp had two cats in the window to represent my two boys).

Now deciding what color to make the ornament and back panel.  I choose………. Christmas green and red (how appropriate – LOL)

I used the Cricut Expression Machine to cut the ornaments.  Then I used a Cutter Bee paper trimmer to cut the red back panel.

cricutcartridgejoysoftheseason

Some other supplies that I will use is Copic Sketch markers, Elmer’s permanent dot runner, pop dots, natural polished hemp rope, Memento tuxedo black dye ink, and some sea shells from our beach (if you don’t have a beach near by, then you can always purchase shell online or in a craft store).

joanscraftworldhandmadechristmascard

I printed our address on blue cardstock and used an oval paper punch from punch bunch to cut them out.  The reason why I had to do that was the space that the stamp provided was way to small for our address and if I did write that tiny, no one would have been able to read it.  So when I stamped the image on white cardstock I just masked that part of the image so it wouldn’t stamp.   Then to add some dimension I used a pop dot to raise the address from the card.  The finishing touch was attaching the sea shell with the hemp rope along with our inside message.

Wishing All Of Your Dreams Come True This Holiday Season

Merry Christmas Everyone

Making A Handmade Mother’s Day Card Using Copic Markers And A Rubber Stamp

Wanting to send some sunshine to our Mom’s this year for Mother’s Day.  This was a simple card to make but it turned out really nice.  I used a rubber stamp from Outlines rubber stamp company and stamped it 3 times (since I was going to cut out images and layer with pop dots) on white cardstock and tuxedo black memento ink.

So for the first stamped image I colored it completely using Copic Sketch markers.

The second stamped image I only colored the inner square with the sun and palm tree. Then I cut it out and layered onto the first image.

Then on the third stamped image I only colored the palm tree and the circle of the sun.  I cut out the palm tree and using pop dots placed it on top of the second stamped image and did the same for the center of the sun.

I used black cardstock as the base for the stamped images then coordinated some blue cardstock for the last layer.

I’m always looking for that 3D look.

handmademothersdaycard

Wishing all the Mother’s a Wonderful Day Today & Always!

Making Handmade Easter Cards Using Rubber Stamps ~ Copic Sketch Markers & Cricut Expression Machine

Ever since I went to my local rubber stamp convention, I have so many new ideas for handmade cards.  And the best part is that it is not costing any more money, since I have all the supplies.  I am using all of the stamps that I have already owned but am using them in a totally different way.  I went from just stamping on cardstock to making 3D images.

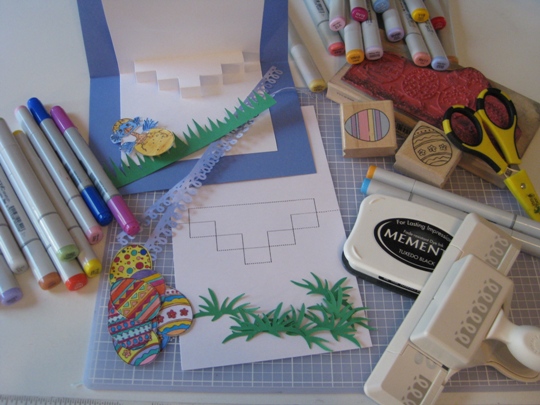
So here is a bunch of supplies that I have used to make this Easter Card.  Rubber stamps from Stamps Happen Inc, and StampabilitiesMemento Tuxedo Black Ink, Cutter Bee Scissors, Martha Stewart Punch Around the Page paper punch, Cardstock and alot of Copic Sketch Markers.

2011EasterCardSupplies

I also used my Cricut Expression machine to cut out the border grass from the Plantin Schoolbook cartridge and also used the Pooh and Friends Cricut cartridge for the small patches of grass.

The template was used to cut (with X-Acto knife) small lines and then folded to make a 3-D platform.  It took awhile to get the folds just right, but it was sure worth the effort.

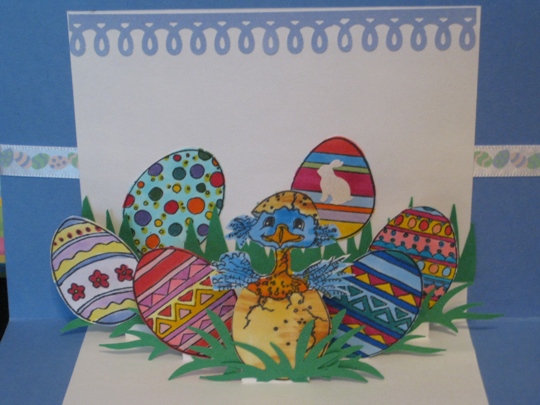
It was so much fun coloring these stamped Easter eggs, then I cut them out and added them  onto the card.

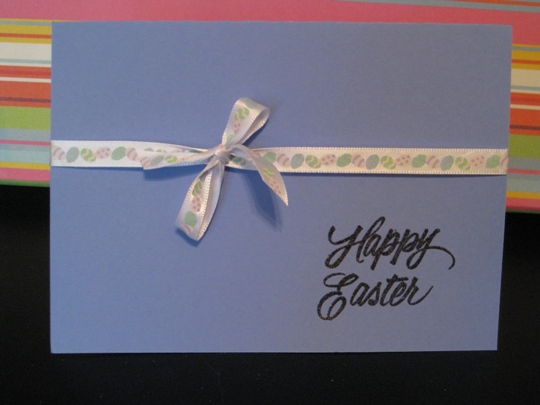
I almost forgot to tell you.  I wanted the front of the Easter card to be really simple since the inside had all of the fun stuff .  So all I did was stamped Happy Easter on the bottom corner and then I used some Easter egg ribbon from Bobbin Ribbon, that I wrapped around the card and made a bow on the front.  That’s it really simple.

2011Front EasterCard

Look how cute this Easter card came out.  This little chick is so adorable.

2011EasterCard

Happy Easter Everyone!

Page 2 of 4
1 2 3 4