A Happy Birthday Card Idea Using Close To My Heart Products

Hello My Fellow Crafters,

Hope you all had a great week and are done eating all the Halloween candy from last weekend 🙂

This week I have been busy creating birthday cards for my sister-in-law and also my nephew.  I will share that one with you next week.

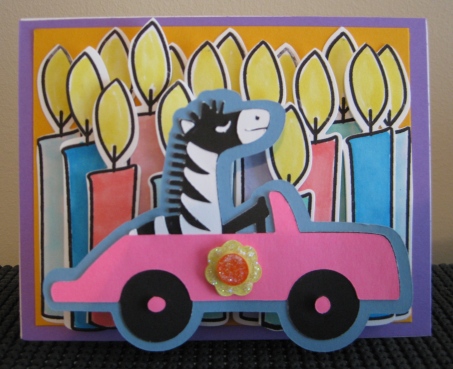
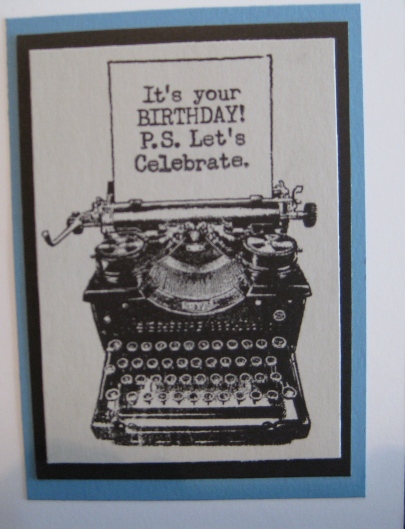
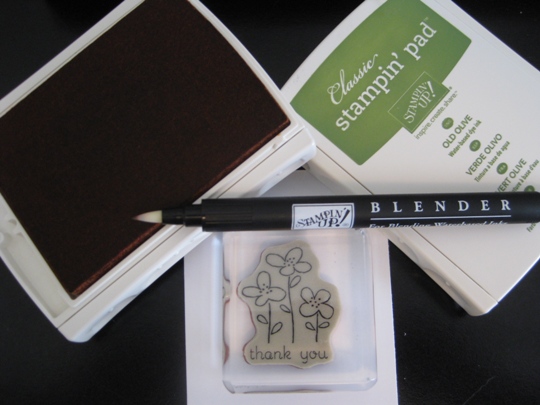
So today I want to share with you my sister-in-laws card that I created using the  So Many Smiles  stamp set and also the happy birthday stamp sentiment from The Cricut Artfully Sent Collection .

somanysmileshappybirthday (1)

I just love how all the papers and inks all coordinate together perfectly, and if you have a Cricut cutting machine and use this set from the Cricut Collection, it really makes creating cards and scrapbook pages so super easy, and it looks perfect too!

Well that’s it for today ~ Hope you all have a great weekend 🙂

~ Happy Birthday Fran ~

Make It A Great Day and Don’t Forget To Leave Time To Craft!

Sweet Sixteen Birthday Cricut Card Idea

Hello My Fellow Crafters,

Today I want to share with you a birthday card that I made for our niece Riley.  When you live in Florida you get your drivers license when you are sixteen.  So I wanted to make a super cute card that had 16 candles plus some kind of car to celebrate this special birthday.

handmadecricutcardidea

I wasn’t sure on the color theme so decided to just make it really colorful since we are celebrating a sweet sixteen birthday 🙂

I used the Cricut Expression to cut the image of a zebra driving a car from the Paisley Cricut Cartridge. Then using the new Sizzix Big Shot Plus machine and a thin metal die of a candle,  I cut out 16 candles on white cardstock and then stamped the outline of the candle in Memento Tuxedo Black ink and colored each one with all different colors of Copic markers.  (the stamp set and metal dies are from The Stamps of Life)

Now for the fun part.  Putting all these pieces together using all different size pot dots to layer the candles and the car onto the base of the card for a really “pop off the card” look.  I think I accomplished what I wanted to do 🙂

~ Happy Birthday Riley ~

Make It A Great Day and Don’t Forget To Leave Time To Craft!

A Simple Birthday Card That Looks Great!

Hello My Fellow Crafters,

It has been a busy time in my craft room making all kinds of cards, but I love this kind of busy 🙂

Today I want to share with you a birthday card that I made for our nephew.  And to be honest I really want to make a simple card, but just because its simple doesn’t mean it will not look good.

ctmhstampofthe month


I used the April Stamp of the Month stamp set from Close to my Heart.  A really great thing that Close To My Heart does is every month they have a stamp special.  If you spend $50.00 you can purchase the stamp of the month for just $5.00, otherwise you can purchase it anytime for $17.95 USD.  I know that the catalog that I have ends this month, so not sure what’s in the new idea book.

This stamp set is called Typed Note #S1504  and it comes in a set of 19 stamps.  If you want to order this stamp set just click on the link and it will take you to my friend Kim’s Close To My Heart website 🙂

Ok back to the card.  I stamped the typewrite and the sentiment that goes inside the “paper” with the Close to my Heart Archival Black Exclusive Ink #44751 on white cardstock and then just layered that image on two layers of colored cardstock.  This was simple, but I think it turned out great.

~ Happy Birthday Luke ~

Make It A Great Day and Don’t Forget To Leave Time To Craft!


A Handmade Greeting Card Sending Happy Birthday Wishes

Hello My Fellow Crafters,

I want to share with you a handstamped birthday card that I just finished for my brother-in-law.  I don’t know who ever came up with the in-law part,  I feel that I gained more brothers and sisters once I got married (25 years ago)  Anyway, let’s get back to the card 🙂

handstampedbirthdaycardidea

Giving this handstamped birthday card alot of though, I decided to use the triple time stamping technique.  I didn’t take pictures of each step but here are the sizes for each layer.

White – three pieces cut into 2″  x 3  1/4″, 3″  x 4 1/4″ and 4″  x 5 1/4″

Bubble Gum Green – three pieces cut into 2 1/4″ x 3 1/2″, 3 1/4″ x 4 1/2″ and  5 1/2″

Then for the base of the card I used Midnight Muse cardstock cut 8 1/2″ x 6″

If you want to see all the steps you can reference post: Handstamped Greeting Card Using Triple Time Stamping Technique

For the inside of the card I wanted to bring some of the great colors from the outside in, so I cut some strips of the cardstock and added to just the one corner.

The best part about making handmade cards is that you can keep adding fun embellishments until you slip the card into the envelope and put it into the mailbox.

handstampedbirthdaycardinside

All the rubber stamps and cardstock are from my stash of Stampin’ Up supplies.  What I love about all of the stamps, ink and cardstock is that they all coordinate perfectly.

~ Happy Birthday Bruce ~

Make It A Great Day and Don’t Forget To Leave Time To Craft!

Coloring Your Handstamped Greeting Card With A Blender Pen

Hello My Stamping Friends,

Using layers for a card is so easy but makes your card look so good.  With this type of layering you don’t even have to own a paper punch, just a pair of scissors and a steady hand (that’s when it’s good to have a paper punch 🙂  if you tend to not cut a straight line).

The bottom layer was cut using a paper with a pattern.  Then I added olive cardstock.  I didn’t want a uniform edge so I tore the edges and got the perfect edge that I was looking for.

Then on white cardstock I stamped the image using classic basic black ink.

Now for the fun part.  Using the Blender Pen, I colored my flowers,  just by brushing the tip of the pen into the ink pad just enough to get the ink onto the blender pen and then brush it onto the image you want to color.  This is such a fun way to color in an image.

To get the ink off of the blender pen all you need do is on a scrap piece of paper, brush the pen back and forth a few times till the color on your paper is clear.

I was just about to put the white cardstock onto the olive and thought it looks “boring” so I brushed the edges of the paper along the ink pad for just a hint of color.  I think it added the perfect colored edge, by bringing all the colors together.

Now I think it looks great.  I used pop dots on the back of the olive cardstock to give the layers a little boost.  Try out this technique and tell me what you think.  I think you’ll love it!

Wishing You A Day Filled With Sunshine & Stamps

Page 1 of 4
1 2 3 4