Hello My Stamping Friends,
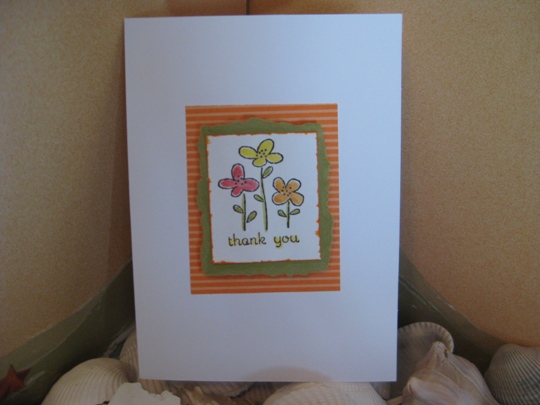
Using layers for a card is so easy but makes your card look so good. With this type of layering you don’t even have to own a paper punch, just a pair of scissors and a steady hand (that’s when it’s good to have a paper punch 🙂 if you tend to not cut a straight line).
The bottom layer was cut using a paper with a pattern. Then I added olive cardstock. I didn’t want a uniform edge so I tore the edges and got the perfect edge that I was looking for.
Then on white cardstock I stamped the image using classic basic black ink.
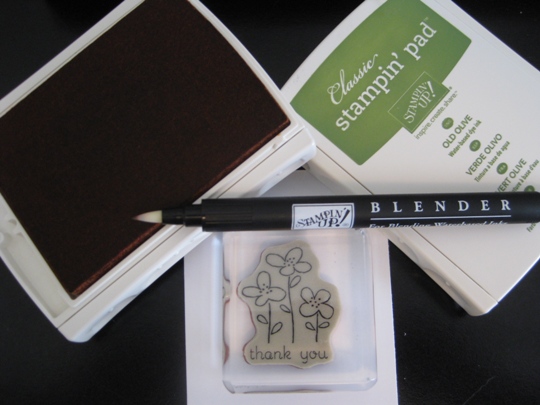
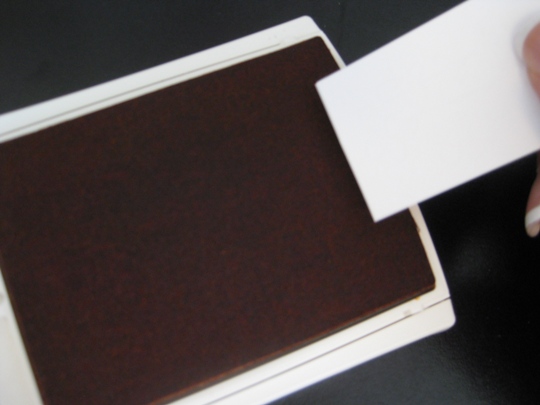
Now for the fun part. Using the Blender Pen, I colored my flowers, just by brushing the tip of the pen into the ink pad just enough to get the ink onto the blender pen and then brush it onto the image you want to color. This is such a fun way to color in an image.

To get the ink off of the blender pen all you need do is on a scrap piece of paper, brush the pen back and forth a few times till the color on your paper is clear.
I was just about to put the white cardstock onto the olive and thought it looks “boring” so I brushed the edges of the paper along the ink pad for just a hint of color. I think it added the perfect colored edge, by bringing all the colors together.
Now I think it looks great. I used pop dots on the back of the olive cardstock to give the layers a little boost. Try out this technique and tell me what you think. I think you’ll love it!