It’s Time For Our 2011 Handmade Christmas Cards using Joys of the Season Cricut Cartridge

Time has been flying since we moved.  Getting adjusted to the new town and even the new time zone for us has been exciting.  But with all of the great distractions, it is time to get started and make time for getting creative and to make our handmade Christmas Cards.

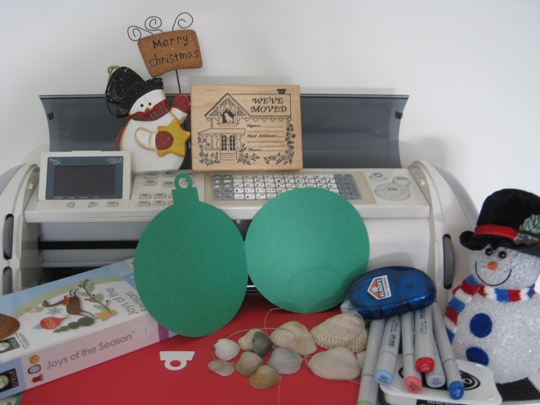
This year I need to incorporate our new address along with a Christmas theme.  So I decided to make a Christmas ornament using the Joys of the Season Cricut Cartridge, and a We’ve Moved rubber stamp from PSX. (I just wish this stamp had two cats in the window to represent my two boys).

Now deciding what color to make the ornament and back panel.  I choose………. Christmas green and red (how appropriate – LOL)

I used the Cricut Expression Machine to cut the ornaments.  Then I used a Cutter Bee paper trimmer to cut the red back panel.

cricutcartridgejoysoftheseason

Some other supplies that I will use is Copic Sketch markers, Elmer’s permanent dot runner, pop dots, natural polished hemp rope, Memento tuxedo black dye ink, and some sea shells from our beach (if you don’t have a beach near by, then you can always purchase shell online or in a craft store).

joanscraftworldhandmadechristmascard

I printed our address on blue cardstock and used an oval paper punch from punch bunch to cut them out.  The reason why I had to do that was the space that the stamp provided was way to small for our address and if I did write that tiny, no one would have been able to read it.  So when I stamped the image on white cardstock I just masked that part of the image so it wouldn’t stamp.   Then to add some dimension I used a pop dot to raise the address from the card.  The finishing touch was attaching the sea shell with the hemp rope along with our inside message.

Wishing All Of Your Dreams Come True This Holiday Season

Merry Christmas Everyone

How to Make Paper Pumpkins

I just love this time of year ~ And the first thing that I think of when fall comes around are Halloween pumpkins.  I have so many Halloween crafts to share with you but today I started making paper pumpkins and I want to share them with you.

These are the supplies that I used to make these great paper pumpkins:

suppliespaperpumpkin

  • 12 strips of paper that is 1 inch x 6 inches (I think this project would be perfect if you have alot of scrap paper that you can cut  1 inch x 6 inches strips)
  • 2 brads
  • paper leaves
  • brown paper cut into really thin strips
  • adhesive
  • dye ink pad

I am so excited, so let me show you How To  Make Paper Pumpkins!

What I did first was cut the paper strips using my Purple Cows paper trimmer.  As you can see I used a solid and pattern paper.

paperstripsforpaperpumpkin

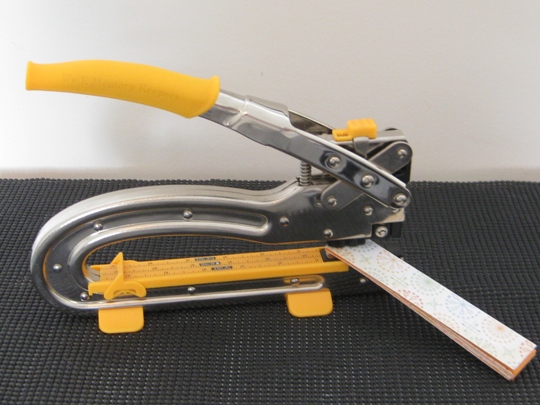
Then with my Crop-A-Dile II from We R Memory Keepers, I punched holes on both ends of the paper strips.  The reason I used the Crop-A-Dile is that it was able to cut all of the cardstock with one punch so that they were all even.
paperpunchforpaperpumpkin

Now put one brad through all the paper strips and fasten – just do this on one side

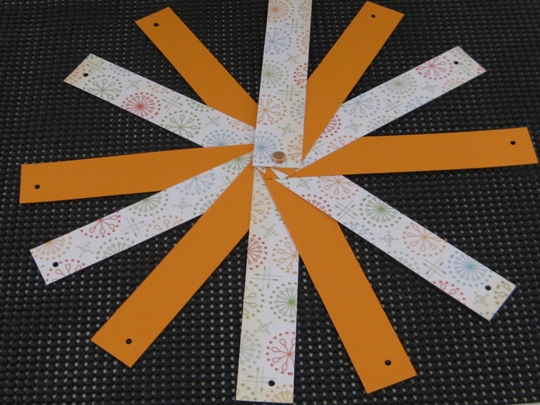
Next you need to fan out the paper this makes the next step easier
fanniingoutpaperstrips

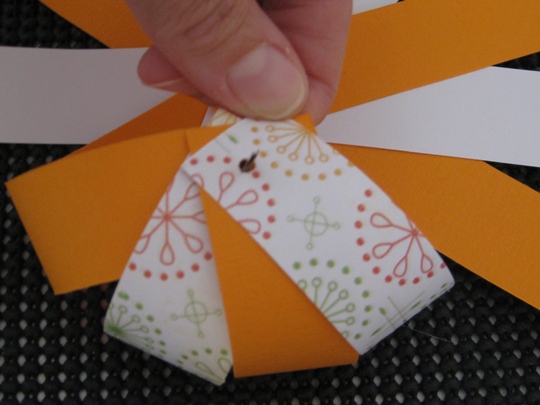
Put the brad into one piece of paper and now go around and add each strip to the brad ~ You may have to push down and wiggle the paper to fit onto the brad but don’t worry they all will go on.
layeringstripsforpaperpumpkin

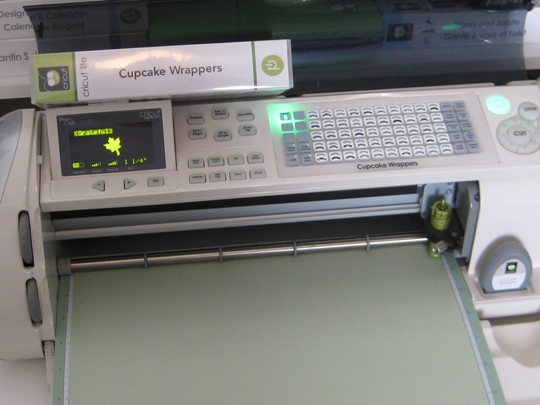
For the leaves I used my Cricut Expression machine.  Looking through all of the cartridges I ended up using the leaf from the Cricut Lite Cupcake Wrapper cartridge.  I cut the same leaf out in all different sizes.
cricutexpressionforcuttingleaves

Then using Memento Dye Ink I brushed (well not really brushed I just turned the ink pad upside down and rubbed it onto the paper) color onto the cut leaf to give it a “real look” of all different shades of green.  Remember this time of year leaves can be yellow, red, orange… so pick the colors that you want.

coloringleavespaperpumpkin

Now the brown for the stem.  I used Memento Rich Cocoa dye ink.  You can use as much or as little ink as you like. If you don’t have brown ink you can use dark green or even a burgundy red.

coloringstempaperpumpkin

The next step is to put the leaves together with some type of adhesive. I used Elmer’s Dot Runner and also small clear adhesive Dots from Zots (Therm O Web).  I also cut a very thin piece of brown paper wrapped it around a stylus and ran it under water to get the paper wet.  When it dried it gave me curly paper that I also added to the top of the pumpkin with the leaves.  You can also use raffia if you like.  I wanted to keep this project all paper.

adheringleavespaperpumpkin

Next step is to put the leaves onto your paper pumpkin and what did was bend the leaves in the center to give them more of a real leaf look.  You can do crumple them up to before you glue them together.  Always remember that this is your handmade project so add your personal touch.  With that being said after I made my first paper pumpkin it just looked like something was missing and I finally figured it out.  The stem of the pumpkin.  I have bought pumpkins that didn’t have a stem or one that looked really bad, but I wanted to see what it would look like with a stem.  I just took a small piece of the brown cardstock and rolled it up, and left a flat end on the bottom so that I would be able to use the glue dot to put onto the pumpkin.  It worked and looks good.

completedcpaperpumpkin

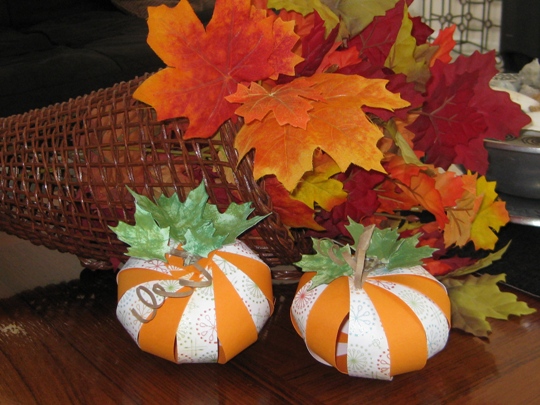
Now your Handmade Paper Pumpkins are ready for your Holiday centerpiece or anyplace to decorate for the Fall Season.  There are so many different Halloween Crafts and I just thought this one could be used for the entire Autumn Season.  Thanks for letting me share this fun project with you.
paperpumpkincenterpiece

~ Happy Fall Everyone ~

Make it a Great Day and don’t forget to leave time to Craft!

Moving & Organizing Your Craft Room in a New Home

Hello all of my crafting friends ~ I know that it has been awhile but I am back and ready to have some fun.

I have a new “craft world” I moved from the high desert in New Mexico to now living on an island in Florida and loving it.  I really forgot how much I love the ocean.  The sound of the waves is so calming and also gives you time to reflect on what is really important in ones life.  Well at least that is what it has done for me.

Anyway, the moving of the old craft studio to the new one has been very exciting.  When I was packing up the old studio, I found things that I forgot that I had or didn’t even know that I had to things that I knew was time to give away.  My girlfriend who is also very crafty works in a large company with alot of crafty people so I gave her scrapbooking magazines, card making magazines and even hard cover books of different kinds of crafts that I knew that I would not need and would be of help to some other crafter.

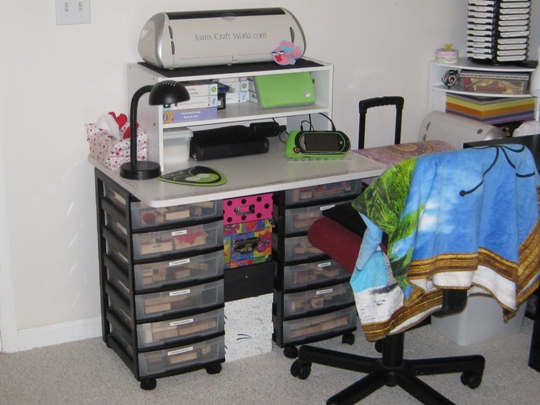
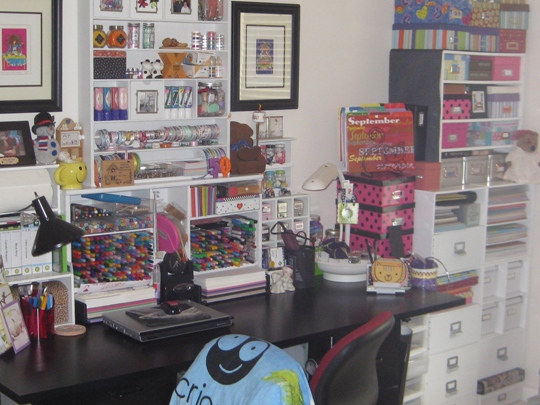
I do have to say that being organized really helped alot.  And also having the white cubes scrapbook organizers/furniture, are the best for having to change the shape and size of each work station to accommodate a new space.  It took a couple of moving things to different walls but I think I figured it out (for now at least)

I made a workstation just for my Cricut Expression, Gypsy and accessories, and when the rest of my cubes are delivered I will do the same for my Cuttlebug and all of the accessories that go with it such as my embossing folders.  I also have some of my rubber stamp ink pads on the carousel from Stampin’ Up and as you can see the base for this Cricut workstation is storage containers with drawers  for some of my rubber stamps and rubber stamp supplies.

joanscraftworld1

joanscraftworld3

joanscraftworld2

Believe it or not I still don’t have all of my scrapbook cubes or all of my supplies they are on a second shipment from our move.  I can’t wait for them to arrive so I can finish organizing everything.

The natural light in this room is great and it’s also good that I have some lamps around too.

Well let me get back to setting up so I can start making my notes to all of our family and friends with the new stamp that my hubby got me for my birthday.  It’s a We Moved stamp.  I will show it to you in the next post.

Make it a Great Day and don’t forget to leave time to Craft!

Making Handmade Easter Cards Using Rubber Stamps ~ Copic Sketch Markers & Cricut Expression Machine

Ever since I went to my local rubber stamp convention, I have so many new ideas for handmade cards.  And the best part is that it is not costing any more money, since I have all the supplies.  I am using all of the stamps that I have already owned but am using them in a totally different way.  I went from just stamping on cardstock to making 3D images.

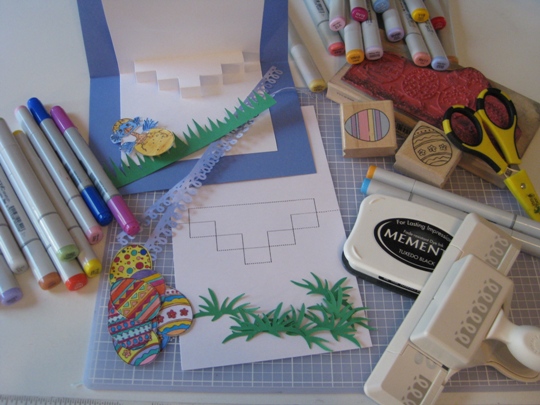
So here is a bunch of supplies that I have used to make this Easter Card.  Rubber stamps from Stamps Happen Inc, and StampabilitiesMemento Tuxedo Black Ink, Cutter Bee Scissors, Martha Stewart Punch Around the Page paper punch, Cardstock and alot of Copic Sketch Markers.

2011EasterCardSupplies

I also used my Cricut Expression machine to cut out the border grass from the Plantin Schoolbook cartridge and also used the Pooh and Friends Cricut cartridge for the small patches of grass.

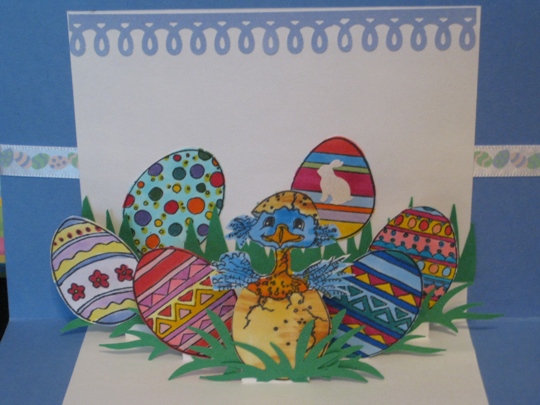
The template was used to cut (with X-Acto knife) small lines and then folded to make a 3-D platform.  It took awhile to get the folds just right, but it was sure worth the effort.

It was so much fun coloring these stamped Easter eggs, then I cut them out and added them  onto the card.

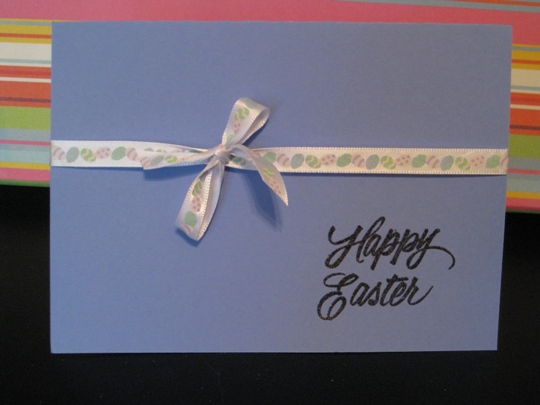
I almost forgot to tell you.  I wanted the front of the Easter card to be really simple since the inside had all of the fun stuff .  So all I did was stamped Happy Easter on the bottom corner and then I used some Easter egg ribbon from Bobbin Ribbon, that I wrapped around the card and made a bow on the front.  That’s it really simple.

2011Front EasterCard

Look how cute this Easter card came out.  This little chick is so adorable.

2011EasterCard

Happy Easter Everyone!

Making a Handmade Birthday Card Using Rubber Stamps & Cricut Expression Cutting Machine

I went to the local rubber stamp show a few weeks ago and I could not believe how much rubber was in one place LOL ~ Anyway, I got so many great ideas for card making that I just have to share a birthday card that I made.

minimonogrambirthdaycard

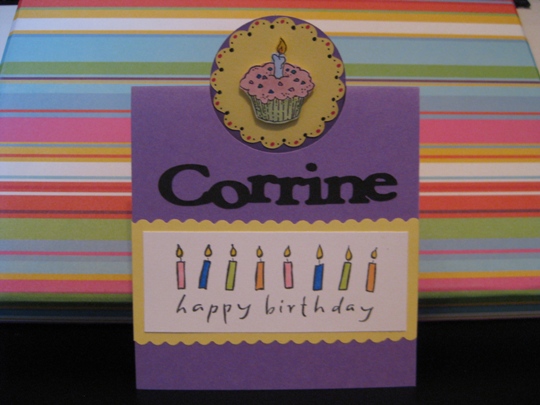
I used my Cricut Expression with the Mini Monograms Cartridge for the scalloped circle on the top.  I then stamped the cupcake with a rubber stamp from Stampendous on white cardstock using Memento tuxedo black dye ink, colored with Copic Sketch markers and then cut it out and used pop dots to adhere onto the scalloped circle.

For the happy birthday I stamped this Hero Arts stamp on white cardstock, again Memento tuxedo black ink and coloring the images Copic Sketch markers.  I went to put it onto the card and it looked “boring” so decided to layer it also.  Instead of using my Cricut Expression to cut the scalloped edge, I used Fiskars Paper Edgers scissors and got the same look. (it was also alot quicker).

Oh, I forgot to tell you.  The purple cardstock was cut using the Creative Memories Circle Cutter.  Since I only needed a half of circle cut to make this look, I couldn’t use a paper punch or my Cricut Expression, so this worked out perfect. (Yeah Creative Memories!) Then I scored the cardstock using the Martha Stewart scoring board.

When I finished this card it looked great but I wanted it to be even more special, so I took out my Cricut Gypsy and used the Plantin Schoolbook cartridge with the roly poly feature and typed the birthday girls name, welded it together, cut it out with the Cricut Expression machine and “wala” a really special personalized card.

personalizedminimonogramcricutcard

Make it a Great Day and don’t forget to leave time to Craft!

Page 5 of 16
1 3 4 5 6 7 16