Making Handmade Greeting Cards Are The Best Way To Say Happy Birthday

Happy Spring Everyone!

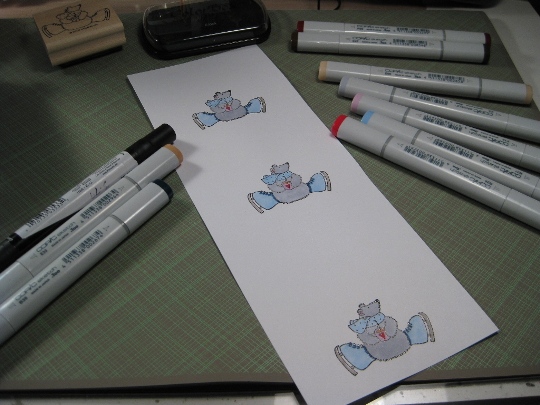
I’ve been making some birthday cards for my Mom and Sister-in-law who’s birthdays are this month and a day apart.  I’ve been doing so much with my Cricut Expression, that I wanted to change things up and rubber stamp these cards and use  Copic Sketch markers to color them in.

I think the best way to say Happy Birthday is with making Handmade Greeting Cards.  When you take the time to make a handmade card,  it is not just a card that you are giving  but it’s also a gift from the heart.

So for the first card I stamped this cute House Mouse Bunny with black Memento Ink and then used Copic Sketch markers for the coloring.  I then cut out this bunny and attached it with pop dots onto the dark blue cardstock panel that was layered on a white card.  With silver ink I stamped the sentiment on the front and inside of this card.  I think this handmade greeting card came out really cute.  I hope that Lin Marie likes her card.

handmadegreetingcardsstampedcopicmarkers

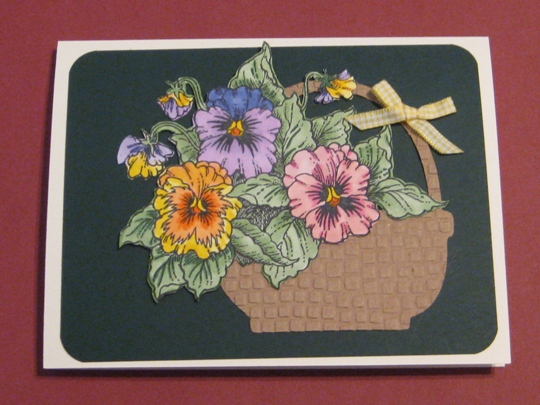
Now for the second card I stamped these beautiful pansy flowers, again with Memento black ink on white cardstock, and colored with Copic Sketch markers.  Then I cut the flowers out and attached to dark green cardstock that was layered on a cream colored  card.  Then I was thinking of what to do next and decided to put these flowers into a basket so I just had to use my Cricut Expression machine to cut out a basket from the Doodlecharms Cricut cartridge, then used my Cuttlebug with a Cuttlebug and embossing folder to put some texture on the basket.  I arranged the flowers on the basket and finished it off with a tiny bow on the handle of the basket.  My Mom is going to love her basket of flowers.

handmadegreetingcardshandstampedandcricutexpression

It is so much fun when you incorporate different techniques when making handmade greeting cards.  You sure don’t get caught in a rut this way, and the results are fantastic!

~Wishing my Mom and Lin Marie a Very Happy Birthday~

Make it a Great Day and don’t forget to leave time to Craft!

Annual Rubber Stamp Show

I almost forgot to tell you that I went to our local Rubber Stamp Show this weekend with my girlfriend Kim.  This was her first show and she was like a kid in a candy store.  She was only use to the rubber stamps and the stamping supplies that you see in the local craft stores.

I’m not sure what’s going on with this wonderful craft, but boy did this show get smaller then it was in previous years and to boot they are only have one show this year not two.

I did notice that one vendor in particular was busy.  They were selling Copic markers.  It seems like people are just finding or hearing about these markers, hey you know that I love them.   Anyway, I found just a few things this year that I needed (we all need some new stamps right?).  One was a cute stamp set that has just four stamps but it is of the four seasons which I thought was cute and also a stamp of my two favorite things a cat holding a cup of coffee.  I also got some good deals on ink pads and embossing paste, other than that Kim got the rest. She bought so many different kinds of things that she’s going to have to show me how they turn out.  For instance, blank domino (no dots) that she is going to stamp on with her new butterfly stamps, she also got some chip board blocks to stamp on, lots of brass stencils, and I better stop telling you all the cool stuff she got just in case her hubby is reading this post  ~ LOL.

Check out rubber stamp events online to see if they will be in your area, and if they are go check out the different kind of things that you just don’t find in your local craft store.

Make it a Great Day and don’t forget to leave time to Craft!

Cricut Card Making Ideas Using Mini Monograms Cartridge

Having so many Cricut card ideas is so much fun when using the Mini Monograms Cricut Cartridge.  I also added some Penny Black Zoophabet stamps for that personalized touch.  Colored with Copic Sketch and Prismacolor markers for a clean, professional look.

Why would anyone who owns a Cricut Expression cutting machine, some rubber stamps ever purchase a greeting card from a store again.   I have not purchased a greeting card from a store in at least 12 years.  I love sending cards with my personal touch.  I think that it means so much more, since alot of thought has to be put into handmade vs store bought.  Don’t you think so?  Handmade Greeting Cards are the way to go.           So lets go and make some Cards!

Make it a Great Day and don’t forget to leave time to Craft!

What Can You Make Using The Plantin Schoolbook Cricut Cartridge, A Cricut Expression Cutting Machine And The New Cricut Gypsy?

The answer is a really cool birthday card.

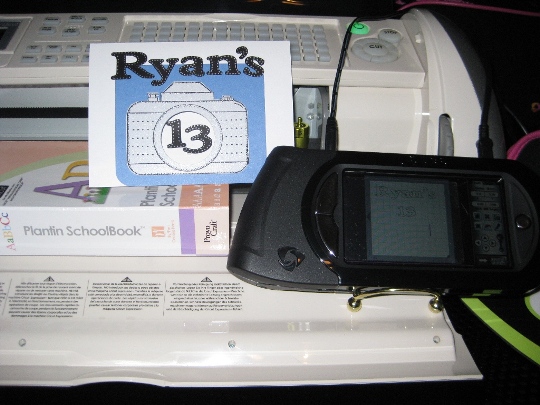
The Plantin Schoolbook Cricut cartridge is what I used to make a birthday card for my nephew Ryan who is turning 13.  I had to make something “cool” and not cute since he is now a teenager.  His parents (my sister) got him a digital camera and I wanted to keep that theme for his card.  So I looked at all my cricut cartridges and wouldn’t you know it, I didn’t have any of the cartridges that have an image of a camera.  Guess I need to make another wish list.

So I looked though all of my rubber stamps and if you have followed my blog, you know that I have stamps.  And I was in luck.  I have a stamp of a camera from a company called scrapbookin’ stamps that is no longer in business.

So I stamped the camera on silver paper (his camera is silver) and used black pigment ink and clear embossing powder to set the ink.

Then I used a circle paper punch and I was in luck, it was the correct size to punch the lens out of the camera.  I also punched a circle in the blue paper that I mounted the camera onto, and also the white card cover.  I rounded the corners of the blue paper so they matched the rounded edges of the camera.

usingplantinschoolbookcricutcartridgetomakehandmadegreetingcard

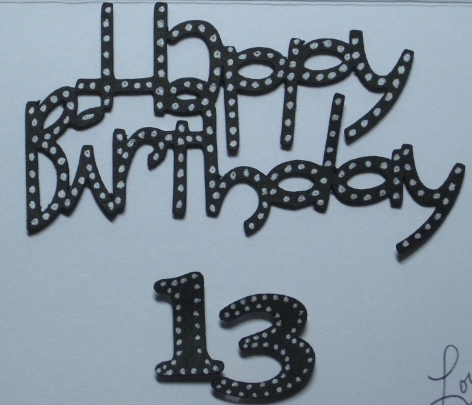
I then took out my Cricut Gypsy and looked though the cartridges and chose the Plantin Schoolbook cricut cartridge to cut out the letters and numbers for this card.  I really like the Roly Poly feature for this.  I used my Cricut Expression cutting machine to cut these out.  After I cut out Ryan’s name and the numbers 13, I wanted to add just a little “bling” to them so I used a silver gelly pen and outlined them with dots.  I think it turned out pretty cool.

messageinsidehandmadegreetingcardusing cricutcartridge

Did I forget to tell you how much I love my new Cricut Gypsy!

I used my permanent adhesive glue glider to put Ryan’s name down then I used dimensional adhesive dots for the 13 because I wanted it to pop out of the camera.  Remember, I cut the hole so that when he opens the card the 13 will be in the inside of the card also.

Wishing Ryan a Fantastic 13th Birthday ~ Wish we could be there to celebrate!

Make it a Great Day and don’t forget to leave time to Craft!

Coloring Christmas Cards with Copic Sketch Markers & Prismacolor Markers. Which Marker Won My Challenge?

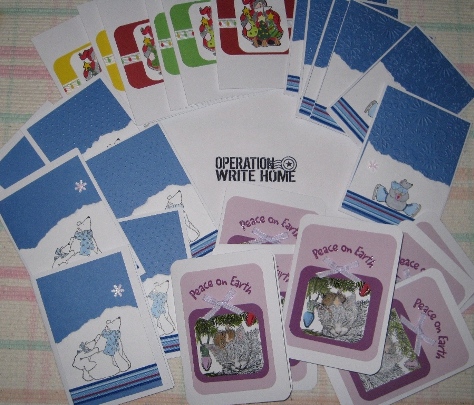
Today I mailed a batch of Christmas cards for Operation Write Home.  I just love making cards for this organization.  I looked through my Christmas stamps and found some really cute ones from Stampin Up, House Mouse, Uptown Rubber Stamps and an unknown Santa.  I also used Stampin Up paper, and some cute ribbons from Bobbin ribbon.  I colored them all in using Copic sketch markers and Prismacolor markers.

Here is a picture of some of the cards that I made.

makingchristmascardsusingcopicsketchandprismacolormarkers

I first stamped the image with black pigment ink and used clear embossing powder to set the ink from smudging.

Then I used my Copic sketch markers along with some PrismaColor markers to color the images.  It was fun using these markers.  I’ve been hooked on using embossing markers with clear embossing powder for such awhile that this was a great change of pace using something different.

christmascardsusingcopicsketchandprismacolormarkerssupplies

Awhile back, before I purchased some alcohol ink markers, and I raised the question to my fellow crafters, which is a better marker, the Copic sketch or Prismacolor?  I received all different answers from the cost to the colors available.  While I was coloring with both markers on these cards, I came to my own personal conclusion.  Copic sketch markers go on like butter.  It was like the colors went on so smooth, and effortless, while the Prismacolor markers seemed a little rough and hard.

Another difference was the size of the markers. The Copic sketch marker has a thin oval shape (that will not roll off of your work area) and it felt nice in your hand, while the Prismacolor marker is round and a little fat, for a not so comfy feel.

So for me the winner is Copic Sketch markers.  But that doesn’t mean I not use my Prismacolor markers because I will.  It just means that I really like the Copic ones better.

Make it a Great Day and don’t forget to leave time to Craft!

Page 16 of 19
1 14 15 16 17 18 19