Love You A Bunch Handstamped Birthday Card

Hello My Fellow Crafters,

Have you ever had so much fun making a card that you totally get lost in your own little world?  Well I have and I just did 🙂

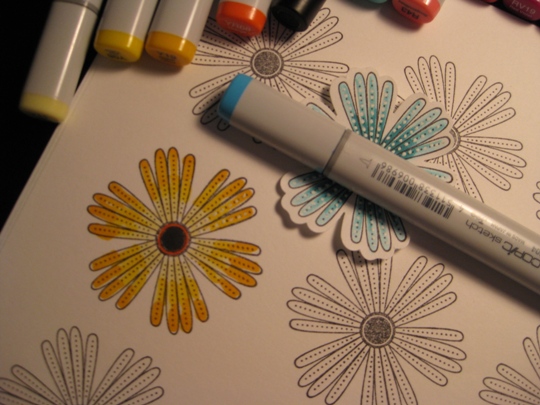
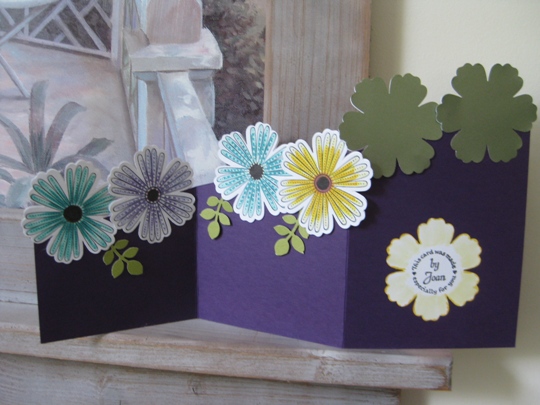
I took a piece of cardstock and stamped the same flower image in it until it filled up the page. then just started coloring with every Copic marker that I have.  When I was done I punched  each one out with the paper punch.

coloringcopics

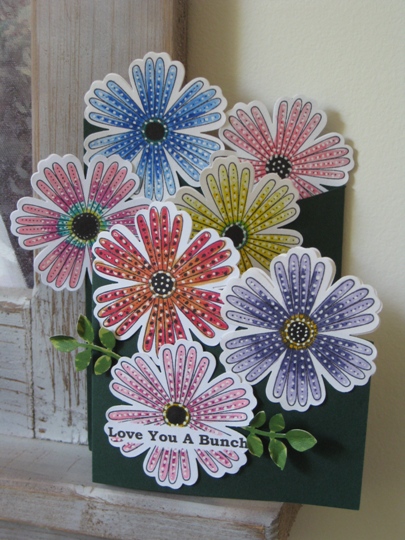
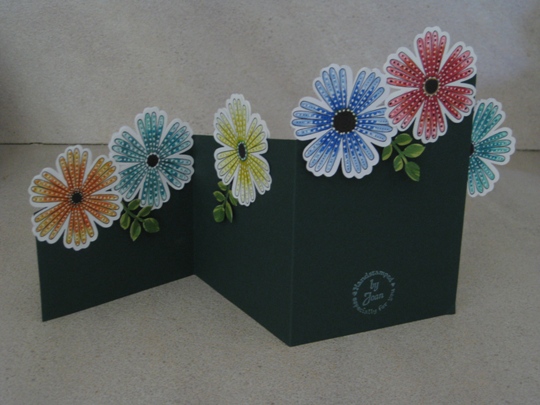
So now I had this pile of flowers and needed to create some kind of card so put these beautiful flowers on.  I remember seeing a card that was cut on an angle and then folded into thirds.  I cut a piece of cardstock 12″ x 5 1/2″.  Then I marked the cardstock on the right side at 2 1/2″  and from that point to the point at the top of the card at 5 1/2″ I cut the cardstock on that angle.  Then scored at 4″ 8″ and folded with peaks and valley fold.

Once I put the flowers onto the card, I noticed once it was open that that backs of the flowers were just plain white cardstock and really didn’t like the way it looked.  So, I  colored more flowers and used adhesive to make a double sided flower.  Now it looks great from all angles.

2014 love you a bunch green

2014 green back

I also had a paper punch of leaves and just added some randomly around the card for the final special touch and dimension.

This was a great card to make when you just feel like coloring.  You can use Copic markers like I did, or colored pencils, watercolors, anything that you like to color with will work great!  Remember it’s you artwork and you can do anything that makes you happy when you create.

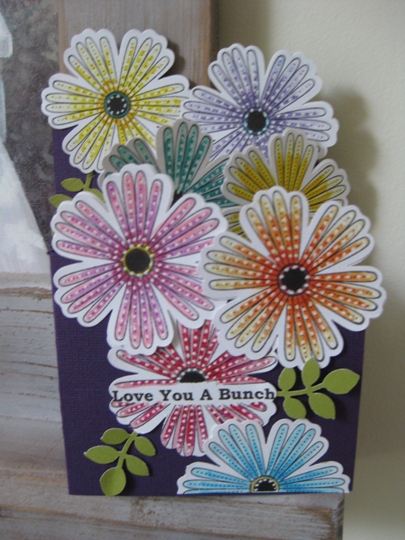
2014 purple love you a bunch

2014 back purple love you a bunch

I really had fun so decided to make another card but just changed the base of the cardstock.  Also I added my circle handmade stamp and made it the center of the flower.

~ Sending Happy Birthday Wishes to my niece Nicole and also to my Mother-In-Law ~

Make It A Great Day and Don’t Forget To Leave Time To Craft!

Cuttlebug Birthday Card

Hello My Fellow Crafters,

This is a busy month for Birthdays in our family and I have to also make some cards for birthdays that were last month (sorry Luke and Riley)  So I really have to be creative and not make the same card over and over.  I am loving this bakers twine, it adds such a perfect accent to all kinds of creations 🙂

2014 rileys birthday card

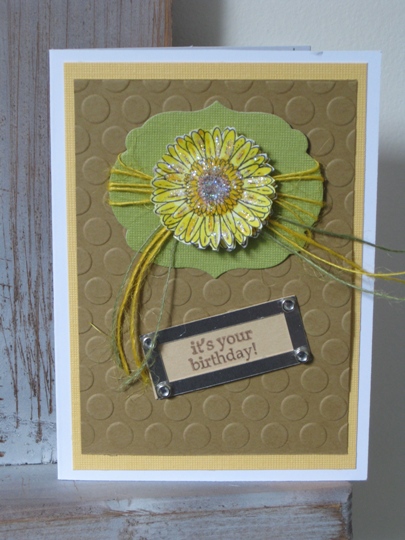
Using Memento tuxedo place ink I stamped the image of the flower twice, since I wanted to use a pop dot for a layered look.  Colored the flower with Copic sketch markers, and added some Stickles for the extra shimmer.

Then took out the Cuttlebug and cut the green cardstock using a Framelit Labels die from Sizzix.   Added some bakers twine by just wrapping around the paper and tied a knot.  Put the pop dot on top of the knot and added the stamped flower.

The card just needed more, so again I used the Cuttlebug but this time used an embossing folder of Big Dots, and craft cardstock.  I still needed to stamp happy birthday someplace, and I found some metal frames in a container with some rhinestone brads. This wound be perfect.  Since the brads went in the back of the Big Dot embossed cardstock I put another layer of cardstock behind so it wouldn’t tear the white base card.

The great thing about using a Cuttlebug is that you can cut images with thin metal dies (Framelits) and also emboss with all of the embossing folders on the market.

Thanks for stopping by today.  Hope this birthday card gives you some good ideas when you are making your own handmade greeting card.

~ Happy Birthday Riley ~

Make It A Great Day and Don’t Forget To Leave Time To Craft!

Handmade Confirmation Card Using the Cricut Expression

Hello My Fellow Crafters,

Today I want to share with you a Handmade Confirmation Card that I made for our Godson Tyler.

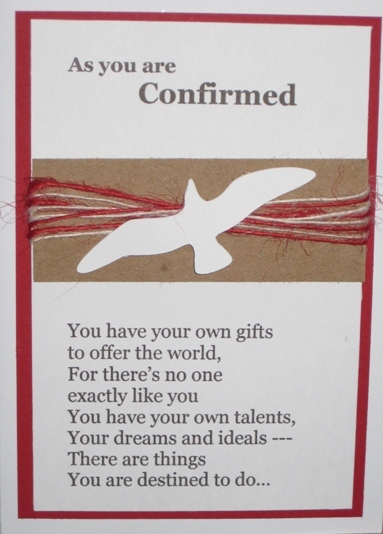
I wasn’t sure how to go about making this card since I really didn’t have any rubber stamps for Confirmation, but I wanted it to be simple yet perfect.  Looking around my “craft world” I saw some American Crafts bakers twine and of course my Cricut Expression machine.  I knew that there had to be an image of the Holy Spirit in one of my many Cricut Cartridges, and I found it.  Using the Life is a Beach Cricut Cartridge, and the images of seagulls would work great.

2014 tylers confirmation card

Cutting the image onto white cardstock using the Cricut Expression and then layered onto a strip of craft paper that I wrapped in the bakers twine.  I then computer generated the wording and printed on the same white cardstock that I used for the Holy Spirit (seagull).  One more layer of red cardstock and I think this card turned out just the way I expected.  The Cricut never lets me down, another great Cricut card idea!

2014 inside confirmation card

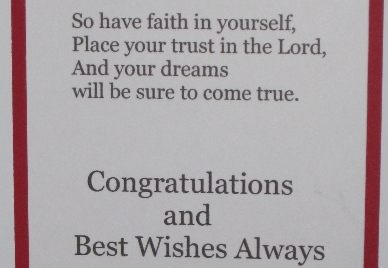
For the inside I layered the same white on red with the computer generated message.  I forgot to take the picture before I wrote my personal message inside so that’s why the picture is cropped 🙂

~ Congratulation Tyler on this Very Special Day ~

Make It A Great Day and Don’t Forget To Leave Time To Craft!

Handstamped Sympathy Card

Hello My Fellow Crafters,

Making a handmade card is not always fun, but it can still be beautiful.  Our family lost a beautiful women who always shared her love for life.

handstampedwithsympathycard

She taught me how to dance with our turkey on thanksgiving morning before cooking him,  have ice cream for dinner instead of waiting for dessert, and the list goes on.  Thanks Aunt Bubs for touching our lives and our hearts.  We will have these wonderful memories forever.

This card was made using a rubber stamp from Inkadinkado.  I stamped the image twice (since I wanted a layered card) with memento black ink on plain white cardstock.  Then colored the image with Copic sketch markers.  Then I stamped “With Sympathy” onto the top of the colored image using the same black ink, cut, then used some pop dots to make the flower stems have dimension.  Next, I wrapped some white ribbon around the layered piece and added a bow.  For the final touch I added some diamond Stickles to the flowers for a little shimmer.

Make It A Great Day and Don’t Forget To Leave Time To Craft!

Happy Valentine’s Day

Hello My Fellow Crafters,

Today I want to share super easy Valentine’s card that I made for my husband, The Love Of My Life!   Since we have two cats I thought this would be the perfect card for this Valentine’s Day.

handmadevalentinesdaycard

The stamp is called tossing hearts, and what a great day to toss some hearts around ~ Whether you are spending the day with your spouse, significant other or by yourself curled up in a cozy blanket watching a great movie eating pizza or Chinese food, just know that someone out there Loves Ya!  🙂

Wishing Everyone A Happy Valentine’s Day!

Page 12 of 31
1 10 11 12 13 14 31