Handmade Card For A Book and Cat Lover

Hello My Fellow Crafters,

My Godson is having a birthday this week and he is such an awesome writer.  He has written such fantastic short stories and articles that his teachers want to have them published, that’s how good he is.  So when I thinking of what kind of handmade card I was going to make for him, this rubber stamp was the perfect choice.  I know when he gets older he will have some books published and this is what my bookcase would look like with our Norwegian Forrest Cat 🙂

handstampedgreetingcard

This stamp is from Stamps Happen, Inc./artist Charles Wysocki.   I first stamped the image with Memento Tuxedo Black ink on white cardstock. I used white because I knew I was going to color every inch of this image using Copic markers.  Then for the layered look, attached the image to blue cardstock then to a white card base.  This card was really fun to color.  Get yourself a large detailed rubberstamp and you can have some fun coloring too!  If you don’t have Copic markers you can use water based markers, pencils or even crayons if you like.  Just be creative and enjoy 🙂

~ Happy Birthday Tyler ~

Make It A Great Day and Don’t Forget To Leave Time To Craft!

Supplies Used:

Using The Double-Z-Fold Technique For A Great Handmade Greeting Card

Hello My Fellow Crafters,

Today I want to share with you a great handmade card that I made for our dear friends.  I wanted it to be special and I also wanted to try out the Double-Z-Fold technique.

All I needed to do was get the cardstock cut into different size pieces:
~You will need one piece for the card base and cut to 5 1/4″ x 12″
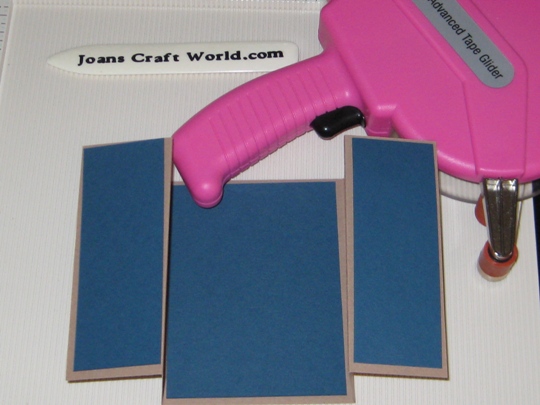
~Next for the side panels you will need 2 pieces of cardstock cut to 1 3/4″ x 5″
~And one for the inside of the card cut at 3 3/4″ x 5″Now the next step is scoring the card base.  Using my Martha Stewart Score Board and bone folder, I scored at 2″ ~ 4″ ~ 8″~  10″

Now you fold the 4″ score in and the 2″ score back and then fold the 10″ fold in and the 8″ fold back.  I know this sounds weird but look at the picture below and you will understand what I am talking about 🙂

doublezfoldcardfoldlines

Next step is attaching the panels to the card base.  I used my ATG adhesive. You can use any type of adhesive that you like, as long as it sticks your good.

Wow this is starting to look really good. (the lighting must have changed this blue looks totally different in this picture)

doublezfoldsidepanels

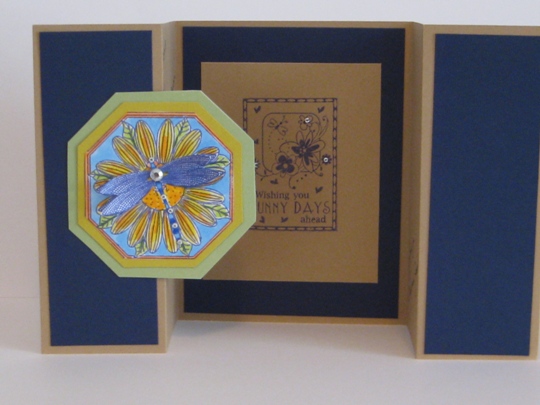
Once the panel were all in place I cut another panel in the same color cardstock as the base and stamped a sentiment.

Then added a image that I stamped on some cardstock with Memento Ink and colored with Copic Sketch Markers.  I stamped the image twice and for the second one I just colored the wings and cut them out and added a small pop dot so the wings had a 3-D look. I layered this image into two other colors of cardstock.  Then again using the ATG adhesive but this time only adding adhesive to one side of this stamped image so the card could open.

doublezfoldcard techniqueinside

The card looks great but I needed some bling so I added some rhinestones to the inside sentiment and also some larger rhinestones to the dragonfly image on the outside.  Now it looks perfect!  This double-z-fold is really easy and it makes your card look so professional.  Give it a try and see for yourself how much fun it can be.

doublezfoldcardtechnique

Make It A Great Day and Don’t Forget To Leave Time To Craft!

Supplies:

A Birthday Cricut Card Ideas Using Flower Shoppe

Hello My Friends,

I have to start this post by saying Wow!!!!!

I know that this cricut cartridge has been out for awhile now but I just got my hands on it and I will never let it go 🙂

Anyone who loves flowers, paper, and of course the Cricut Expression or any Cricut cutting machine, will absolutely love this Art Cartridge Flower Shoppe from Cricut.

My Mom just had a very special birthday and I wanted to make her the most perfect handmade card ever…..and since I was enclosing the card into a box along with her present I didn’t care if it would be a little bulky.

cricutcartridgeflowershoppe

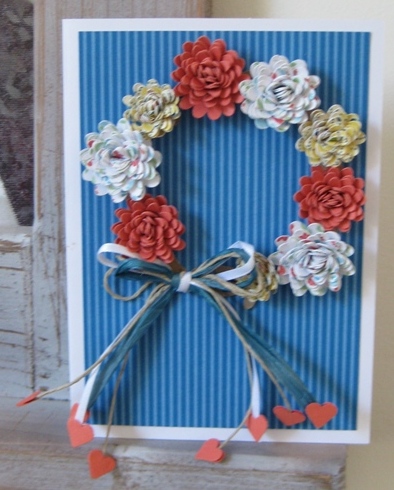
Using the Cricut Expression machine I cut out several different sizes of the Daisy1 flower onto different colors and patterns of cardstock.  To think that a piece of paper cut into a circle spiral and when rolled up can make such great looking  flowers is pretty cool 🙂  All it takes is some adhesive to keep it together and WA-la a flower.  I also use the Cricut spatula to remove the flowers from the Cricut cutting mat, it made it so much easier using the spatula and not worrying about the paper tearing.

I also added some white ribbon, blue raffia and twine to make the bow.  Of course that wasn’t enough I had to cut out some heats and attach to the bottom of the ribbon.

~ Happy Birthday  Mom ~

Make It A Great Day and Don’t Forget To Leave Time To Craft!

Card Supplies:

Flower Stamp Birthday Card Idea

Hello My Stamping Friends,

Have you ever made a card and when it was complete said to yourself or out loud “Wow that looks Fantastic”?  Well, that’s what  just did ~ LOL

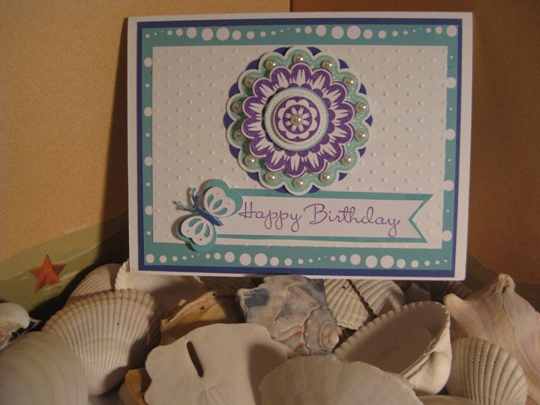
Using just one stamp, a few paper punches, and embellishments and look how beautiful this card is 🙂

I recently found a box in my craft room that had alot of “old” stamping products.  I mean like maybe 10 years old.  Anyway, it was filled with lots of cardstock and ink pads (I use to love to emboss everything and I purchased every color that was available in pigment inks)

This very special Birthday Card below was made with the a Flower stamp and a Happy Birthday stamp, but i just had to use some of the old products that I found.

Wishing You A Day Filled With Sunshine & Stamps

Making Handmade Greeting Cards Are The Best Way To Say Happy Birthday

Happy Spring Everyone!

I’ve been making some birthday cards for my Mom and Sister-in-law who’s birthdays are this month and a day apart.  I’ve been doing so much with my Cricut Expression, that I wanted to change things up and rubber stamp these cards and use  Copic Sketch markers to color them in.

I think the best way to say Happy Birthday is with making Handmade Greeting Cards.  When you take the time to make a handmade card,  it is not just a card that you are giving  but it’s also a gift from the heart.

So for the first card I stamped this cute House Mouse Bunny with black Memento Ink and then used Copic Sketch markers for the coloring.  I then cut out this bunny and attached it with pop dots onto the dark blue cardstock panel that was layered on a white card.  With silver ink I stamped the sentiment on the front and inside of this card.  I think this handmade greeting card came out really cute.  I hope that Lin Marie likes her card.

handmadegreetingcardsstampedcopicmarkers

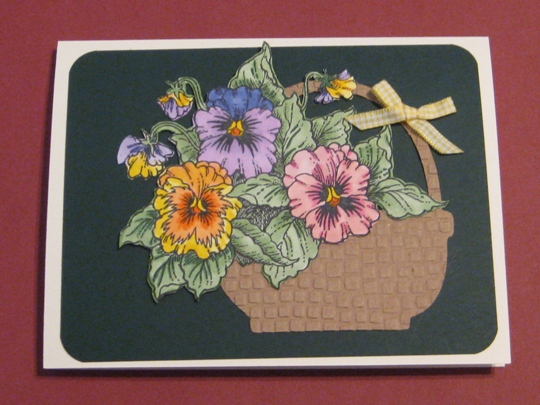
Now for the second card I stamped these beautiful pansy flowers, again with Memento black ink on white cardstock, and colored with Copic Sketch markers.  Then I cut the flowers out and attached to dark green cardstock that was layered on a cream colored  card.  Then I was thinking of what to do next and decided to put these flowers into a basket so I just had to use my Cricut Expression machine to cut out a basket from the Doodlecharms Cricut cartridge, then used my Cuttlebug with a Cuttlebug and embossing folder to put some texture on the basket.  I arranged the flowers on the basket and finished it off with a tiny bow on the handle of the basket.  My Mom is going to love her basket of flowers.

handmadegreetingcardshandstampedandcricutexpression

It is so much fun when you incorporate different techniques when making handmade greeting cards.  You sure don’t get caught in a rut this way, and the results are fantastic!

~Wishing my Mom and Lin Marie a Very Happy Birthday~

Make it a Great Day and don’t forget to leave time to Craft!

Page 2 of 2
1 2