Handmade Birthday Cards Are Fun To Make with a Cuttlebug, Copic Markers and a Rubber Stamp

Making handmade Birthday cards are so much fun.  My nephew is turning 14 tomorrow.  I can’t believe how fast that went and I am only the Aunt, I can’t imagine how my sister feels.  Well, I really didn’t know what kind of card to make.  I’m wasn’t sure if I want to use my Cricut Expression or to rubber stamp this card.  After a couple of days contemplating,  it turned out that rubber stamping won.

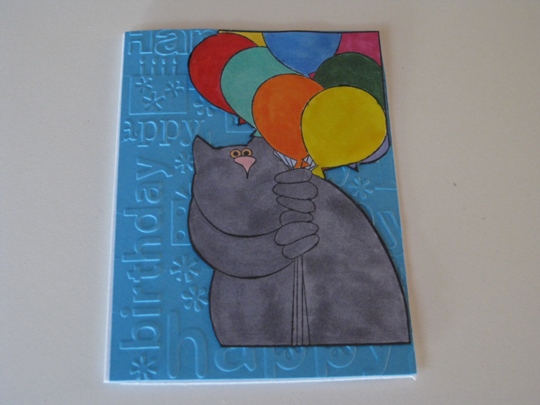
I found a stamp by Stamps Happen, Inc of a cat holding alot of balloons.  I stamped the image using Tuxedo Black Ink from Memento Ink and then colored with Copic Sketch Markers.  It looked a little “dull” so for a few of the balloons I added 3-D Crystal Lacquer for a cool effect.

It still wasn’t the look that I wanted so I decided to use my Cuttlebug with the Happy Birthday embossing folder.  I then cut the stamped image and glued it to the top of the embossed piece of cardstock with my new pink ATG gun (Advanced Tape Glider).  Now that’s what I wanted it to look like.

cuttlebugembossedbirthdaycard

I hope Ryan likes his handmade birthday card.  I know he will not get another one like it!  Happy Birthday Ryan, enjoy your Birthday.

Make it a Great Day and don’t forget to leave time to Craft!

Another Cute Birthday Cricut Card Idea Made With The Celebrations And Designer Calendar Cricut Cartridges

Our niece Riley’s 11th birthday is next week and again I wanted to made a cute card using my cricut.  What 11 year old girl doesn’t like cake and presents?

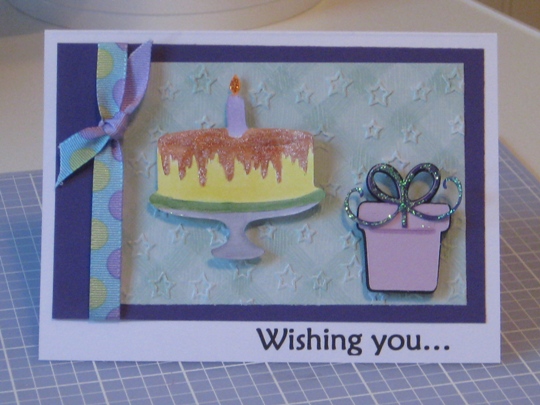
So I used those two things for the front of the card.  I cut out the cake  from the Designer’s Calendar Cricut cartridge and the present from the Celebrations Cricut cartridge, both using my Cricut Expression machine.

I cut the cake on plain white cardstock then colored in the image with Copic Sketch markers and then added some “bling” with stickles to the frosting of the cake and the flame of the candle.

The present I cut out on two different shades of purple but again added Stickles onto the bow to add a little sparkle to the present.

I then used my Cuttlebug and embossed a light green plaid piece of cardstock with a star embossing folder, layered that onto a solid piece of purple cardstock and finished with a polka dot bow, using American Craft ribbon.

I think this came out really cute and for the inside saying I printed on the computer:  Happy Cake and Presents Day!

Wishing Riley a Very Happy Birthday!

cricutcardidea

Make it a Great Day and don’t forget to leave time to Craft!

Making Handmade Greeting Cards Are The Best Way To Say Happy Birthday

Happy Spring Everyone!

I’ve been making some birthday cards for my Mom and Sister-in-law who’s birthdays are this month and a day apart.  I’ve been doing so much with my Cricut Expression, that I wanted to change things up and rubber stamp these cards and use  Copic Sketch markers to color them in.

I think the best way to say Happy Birthday is with making Handmade Greeting Cards.  When you take the time to make a handmade card,  it is not just a card that you are giving  but it’s also a gift from the heart.

So for the first card I stamped this cute House Mouse Bunny with black Memento Ink and then used Copic Sketch markers for the coloring.  I then cut out this bunny and attached it with pop dots onto the dark blue cardstock panel that was layered on a white card.  With silver ink I stamped the sentiment on the front and inside of this card.  I think this handmade greeting card came out really cute.  I hope that Lin Marie likes her card.

handmadegreetingcardsstampedcopicmarkers

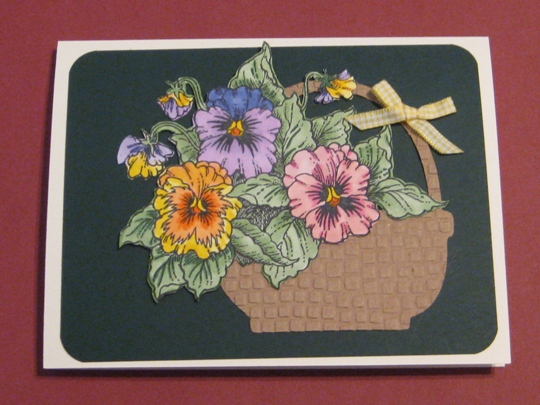
Now for the second card I stamped these beautiful pansy flowers, again with Memento black ink on white cardstock, and colored with Copic Sketch markers.  Then I cut the flowers out and attached to dark green cardstock that was layered on a cream colored  card.  Then I was thinking of what to do next and decided to put these flowers into a basket so I just had to use my Cricut Expression machine to cut out a basket from the Doodlecharms Cricut cartridge, then used my Cuttlebug with a Cuttlebug and embossing folder to put some texture on the basket.  I arranged the flowers on the basket and finished it off with a tiny bow on the handle of the basket.  My Mom is going to love her basket of flowers.

handmadegreetingcardshandstampedandcricutexpression

It is so much fun when you incorporate different techniques when making handmade greeting cards.  You sure don’t get caught in a rut this way, and the results are fantastic!

~Wishing my Mom and Lin Marie a Very Happy Birthday~

Make it a Great Day and don’t forget to leave time to Craft!

Making a Birthday Card Using your Cricut Expression Cutting Machine with the Plantin SchoolBook cartridge and your Cuttlebug Machine too!

Here is an easy card to make that looks pretty classy too!

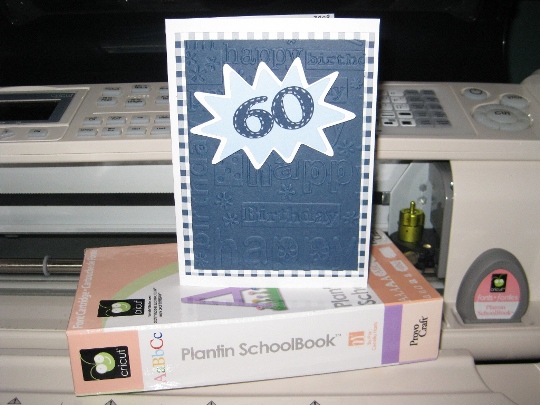
I had to make a special birthday card for our brother-in-law who was turning 60.  I went looking through all of my cartridges and nothing popped out and said this is the one.  So what I ended up doing was combining my Cricut Expression cutting machine, along with the Plantin SchoolBook cartridge and Cuttlebug machine using the happy birthday cuttlebug embossing folder for a fun card.

plantinschoolbookbirthdaycard

Here is how I made this card:

I used a white 4 x 5.5” note card.

Cut a piece of checkered paper just a little smaller than then the card.

Cut a piece of solid blue paper smaller then the checkered paper.

Now the fun part.

I ran the blue paper through my cuttlebug machine using the birthday cuttlebug embossing folder.

cuttlebugandembossingfolder

Then using my Cricut Expression cutting machine, and the Plantin SchoolBook cartridge, I cut out the numbers 60, using the “Roly Poly” feature at one inch.

Next I selected the “blast” shape from the cartridge and cut the white one at 2.5” and the light blue one at 2”

I put them all together with the Glue Glider Pro, and then I added some dimensional adhesive dots to the 60, since I wanted that to pop out of the card.  And for the finishing touch I added a stitched look on the 60 using a silver gelly roll pen.

Wishing Bruce a Wonderful 60th!

Make it a Great Day and don’t forget to leave time to Craft!

Page 2 of 2
1 2