Coloring Christmas Cards with Copic Sketch Markers & Prismacolor Markers. Which Marker Won My Challenge?

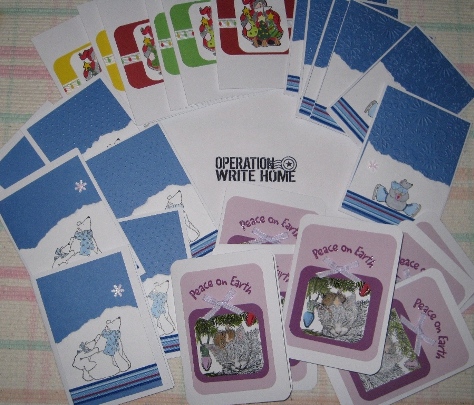
Today I mailed a batch of Christmas cards for Operation Write Home.  I just love making cards for this organization.  I looked through my Christmas stamps and found some really cute ones from Stampin Up, House Mouse, Uptown Rubber Stamps and an unknown Santa.  I also used Stampin Up paper, and some cute ribbons from Bobbin ribbon.  I colored them all in using Copic sketch markers and Prismacolor markers.

Here is a picture of some of the cards that I made.

makingchristmascardsusingcopicsketchandprismacolormarkers

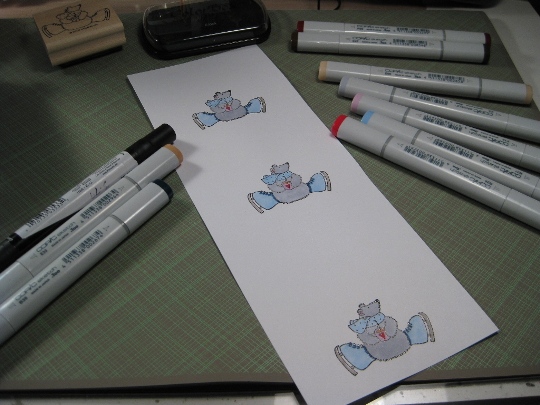
I first stamped the image with black pigment ink and used clear embossing powder to set the ink from smudging.

Then I used my Copic sketch markers along with some PrismaColor markers to color the images.  It was fun using these markers.  I’ve been hooked on using embossing markers with clear embossing powder for such awhile that this was a great change of pace using something different.

christmascardsusingcopicsketchandprismacolormarkerssupplies

Awhile back, before I purchased some alcohol ink markers, and I raised the question to my fellow crafters, which is a better marker, the Copic sketch or Prismacolor?  I received all different answers from the cost to the colors available.  While I was coloring with both markers on these cards, I came to my own personal conclusion.  Copic sketch markers go on like butter.  It was like the colors went on so smooth, and effortless, while the Prismacolor markers seemed a little rough and hard.

Another difference was the size of the markers. The Copic sketch marker has a thin oval shape (that will not roll off of your work area) and it felt nice in your hand, while the Prismacolor marker is round and a little fat, for a not so comfy feel.

So for me the winner is Copic Sketch markers.  But that doesn’t mean I not use my Prismacolor markers because I will.  It just means that I really like the Copic ones better.

Make it a Great Day and don’t forget to leave time to Craft!

Making a Birthday Card Using your Cricut Expression Cutting Machine with the Plantin SchoolBook cartridge and your Cuttlebug Machine too!

Here is an easy card to make that looks pretty classy too!

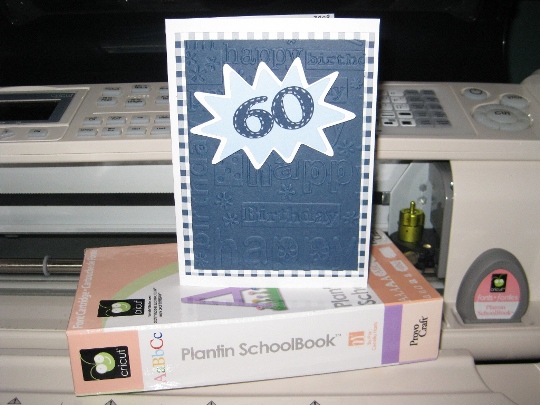
I had to make a special birthday card for our brother-in-law who was turning 60.  I went looking through all of my cartridges and nothing popped out and said this is the one.  So what I ended up doing was combining my Cricut Expression cutting machine, along with the Plantin SchoolBook cartridge and Cuttlebug machine using the happy birthday cuttlebug embossing folder for a fun card.

plantinschoolbookbirthdaycard

Here is how I made this card:

I used a white 4 x 5.5” note card.

Cut a piece of checkered paper just a little smaller than then the card.

Cut a piece of solid blue paper smaller then the checkered paper.

Now the fun part.

I ran the blue paper through my cuttlebug machine using the birthday cuttlebug embossing folder.

cuttlebugandembossingfolder

Then using my Cricut Expression cutting machine, and the Plantin SchoolBook cartridge, I cut out the numbers 60, using the “Roly Poly” feature at one inch.

Next I selected the “blast” shape from the cartridge and cut the white one at 2.5” and the light blue one at 2”

I put them all together with the Glue Glider Pro, and then I added some dimensional adhesive dots to the 60, since I wanted that to pop out of the card.  And for the finishing touch I added a stitched look on the 60 using a silver gelly roll pen.

Wishing Bruce a Wonderful 60th!

Make it a Great Day and don’t forget to leave time to Craft!

Using the Cricut Gypsy Wanderings Cartridge for a Great Scrapbook Page

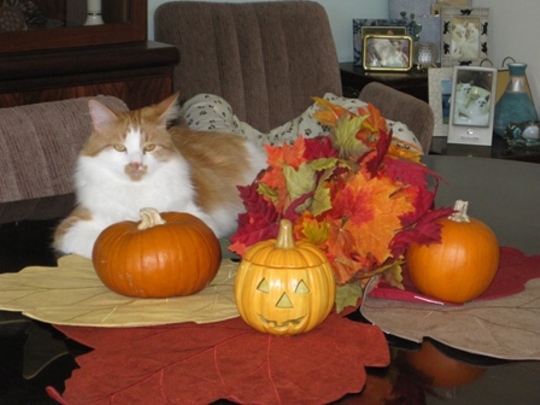
I want to share this picture with you.  As you may know, this is my favorite time of year.  I decorated my dining room table with some fall things and next thing I knew my really cute orange cat decided to be part of my table centerpiece.

cricutgypsywanderingscartride1

So besides decorating for the fall season, I just finished an order of Christmas cards.  They came out really good and I know that my friend who ordered them will be really pleased.  Now I need to continue on this path and get a lot more Christmas cards done.

But, today is Saturday, a day when others have a day off from work and want to “play”, well I wanted to play too, so I got out my Cricut Gypsy and I did just that.   This machine makes creating so fun & easy.  I just cut out some pumpkins and cool color leaves from the Cricut Gypsy Wandering cartridge, and am going to put together a quick scrapbook page and add this picture of my centerpiece.

Here is how I did it.

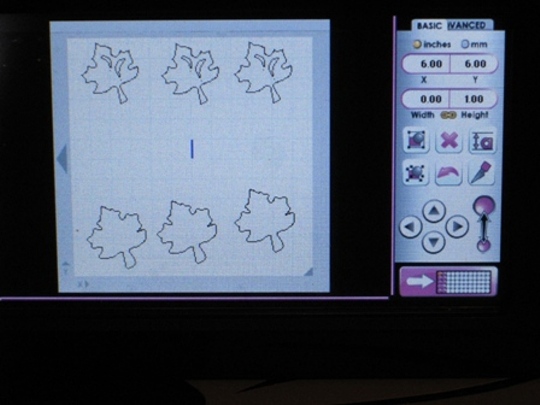
First I picked out the leaves that I wanted to cut and arranged them on the Gypsy screen.

cricutgypsywanderingscartridgescreen

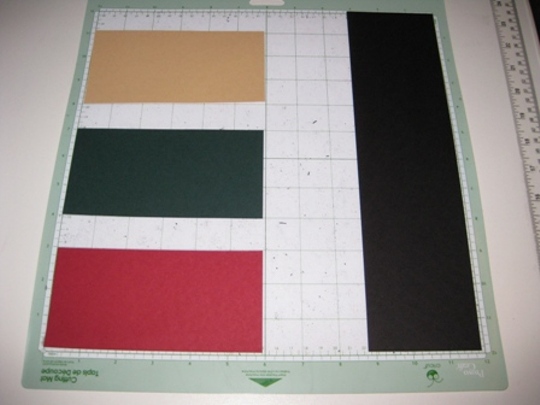
Then I arranged the paper onto the cutting mat in the same places as shown on the Gypsy screen.

cricutgypsywanderingscartridgepaperplacement

Followed the prompts on the Gypsy to load the paper, and to check all the pressure settings, and pressed cut and it started cutting out the images on my Cricut Expression.

cricutgypsywanderingscartridgeprinting

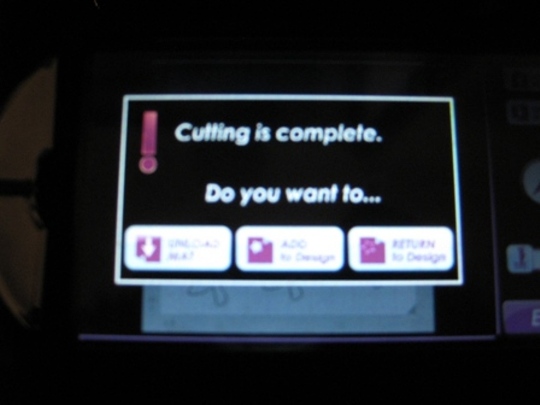
When it was done the Gypsy prompted me that it was done cutting and what would I like to do next.

cricutgypsywanderingscartridgecuttingusinggypsy

I unloaded the mat, took off the leaves, and as you can see one of the black shadow leaves had its top cut off since I didn’t have the image aligned correctly on the mat for the size paper that I loaded. Oh well, I’ll cover it up somehow.

cricutgypsywanderingscartridgecutleaves

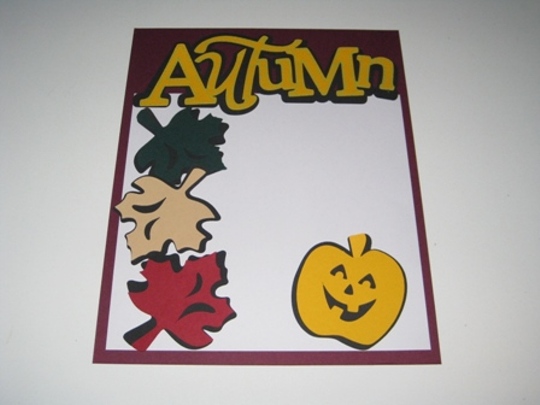
The final page looks pretty good ~ I just have to print my picture and add to this scrapbook  page.

cricutgypsywanderingscartridgescrapbookpage

This was so much fun to make ~ Thanks for letting me share this with you.

Make it a Great Day and don’t forget to leave time to Craft!

Still Wondering What is the Cricut Gypsy?

So people have been asking, what is the Cricut Gypsy? In a nutshell, it is a handheld cricut design studio, but better. Better because the cricut gypsy is portable and does not need a computer to design your layouts.

I was one of the lucky ones to get a Cricut Gypsy, and it arrived on my doorstep last Thursday and I Love it!  It is lighter than I thought it would be which is great since it will be in my hands a lot.  I posted on the message board yesterday that I am starting to like football.  I watched a game with my hubby; well I sat with him while I designed with my Cricut Gypsy.  How cool is this I can spend quality time with Hubby and we are both doing something that we enjoy!

I know that the first thing you want to do when you take it out of the box is turn it on.  I also bet that a lot of you thought that it didn’t work when you hit the big silver button on the front of the machine.  That is because that is not the on/off switch.  The on/off switch is on the side of the machine.  But you would have known that if you read the manual.  I have also been reading the message board good & bad.  All I can say is read the manual on line, (yes it is online, it didn’t come with the machine) but lots of companies are doing that now.  It does keep the cost down and easier for updates too! If you don’t want to read the entire manual before you start then don’t complain when something supposedly goes wrong.

Still wondering what is the Cricut Gypsy and how it can help you? It gives you more time to be creative because you can use it pretty much everywhere.  Also, you don’t need to go to the eye doctor.  You can make the images larger on your screen.  Read the manual and it will explain how to change the default size of the images.

The one thing I do have to say is you better really love or like your Cricut Gypsy a lot, before you link your cartridges to it.  First because once you link a cartridge, it’s for that Cricut Gypsy only. Your cartridges will never work in another Cricut Gypsy machine again.  It WILL work on your Cricut cutting machines. And I also heard that if you link, you can not return your Cricut Gypsy.  So think before you link. (I’m a poet and I didn’t even know it).

I have also learned that since you can sit and relax anywhere using the Cricut Gypsy, you can really get into looking at all the cartridges out there that you do not own, and even design pages with them, so that when you do have some money saved up, or your birthday rolls around you will know what to ask for.

I hope that answers the question, What is the Cricut Gypsy? Everyone, even me, have a lot of questions on how to do this and that.  It’s called learning a new piece of equipment.  Remember when you first got your Cricut cutting machine?  You had ton of questions then too.  It was the same as with your Design Studio.  All I can say is practice makes perfect.

So pick up that beautiful Cricut Gypsy and start learning all there is to learn about it/her/him.  And I betcha you will love it.

Make it a Great Day and don’t forget to leave time to Craft!