Oreo Cookie Cricut Card Idea

Hello My Friends,

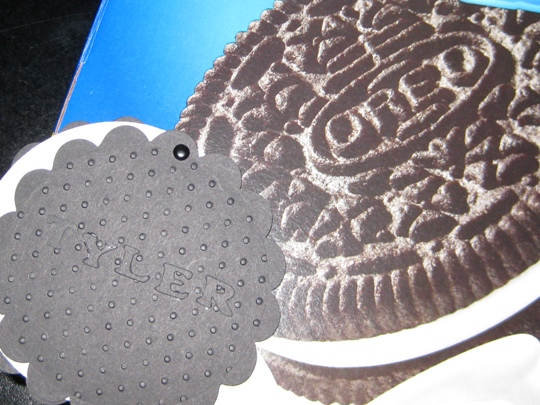
My Godson’s birthday is this month and I wanted to make him a special card.  He loves cookies and we sent him a big box of Oreo cookies as part of his present.  As I was looking the box it gave me a great idea.  Make a Oreo cookie card.

The Picture didn’t come out that good but the card looked great!

cricutcardideacookie

I made the cookie using the Cricut Expression along with the Mini Monograms Cricut Cartridge.  The circle scallop shape was great  for the cookie top and bottom and just a circle for the cream.  Also using the Cuttlebug I embossed the top with the polka dot embossing folder.

Then to make it a personal cookie instead of cutting out the letters for Oreo I used the Plantin SchoolBook Cricut Cartridge and cut out Tyler’s name for the top of the cookie.  Attached the top and bottom with a mini brad.

Looking at this picture as I am writing this post is making me want a big glass of milk and some cookies 🙂

Wishing Tyler A Very Happy Birthday!

Make It A Great Day and Don’t Forget to Leave Time To Craft!

Card Supplies:


Making Handmade Easter Cards Using Rubber Stamps ~ Copic Sketch Markers & Cricut Expression Machine

Ever since I went to my local rubber stamp convention, I have so many new ideas for handmade cards.  And the best part is that it is not costing any more money, since I have all the supplies.  I am using all of the stamps that I have already owned but am using them in a totally different way.  I went from just stamping on cardstock to making 3D images.

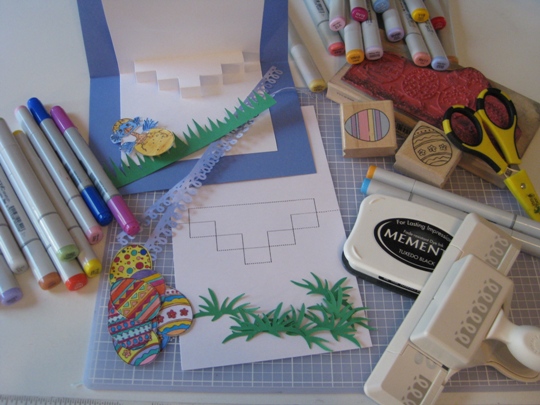
So here is a bunch of supplies that I have used to make this Easter Card.  Rubber stamps from Stamps Happen Inc, and StampabilitiesMemento Tuxedo Black Ink, Cutter Bee Scissors, Martha Stewart Punch Around the Page paper punch, Cardstock and alot of Copic Sketch Markers.

2011EasterCardSupplies

I also used my Cricut Expression machine to cut out the border grass from the Plantin Schoolbook cartridge and also used the Pooh and Friends Cricut cartridge for the small patches of grass.

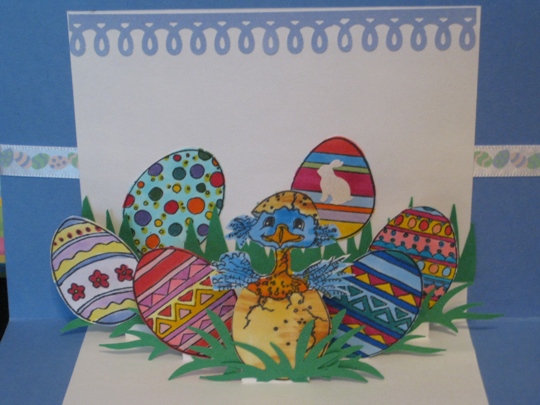
The template was used to cut (with X-Acto knife) small lines and then folded to make a 3-D platform.  It took awhile to get the folds just right, but it was sure worth the effort.

It was so much fun coloring these stamped Easter eggs, then I cut them out and added them  onto the card.

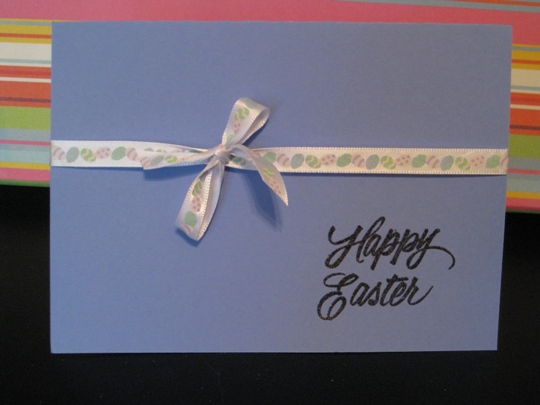
I almost forgot to tell you.  I wanted the front of the Easter card to be really simple since the inside had all of the fun stuff .  So all I did was stamped Happy Easter on the bottom corner and then I used some Easter egg ribbon from Bobbin Ribbon, that I wrapped around the card and made a bow on the front.  That’s it really simple.

2011Front EasterCard

Look how cute this Easter card came out.  This little chick is so adorable.

2011EasterCard

Happy Easter Everyone!

My Favorite Cricut Card Ideas from 2010

I have had so much fun this year making and sharing the cards that I have made with my Cricut Expression Machine with all of you.  I can’t believe all the Cricut Card Ideas that you can have with just one cartridge, then when you have alot of cricut cartridges the possibilities are endless.

But looking though all of the posts that I have made, I think that my favorite  Cricut Card is….drum roll

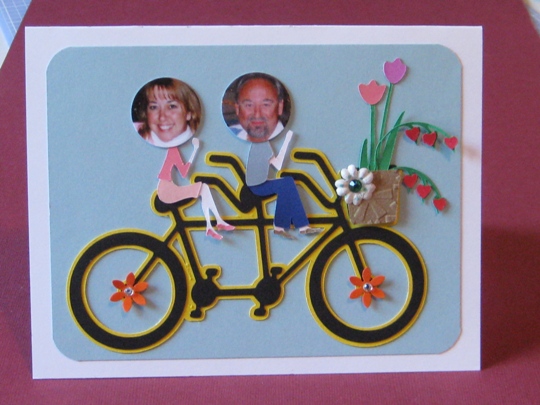
sweetheartscricutcartridgemothersdaycard

This was the card that I made for Mother’s Day.  I used the Sweethearts Cricut cartridge for this and some flowers from Walk in my Garden cartridge.  Our Mom’s loved it I think because they were able to see our faces on a card.

My second place favorite Cricut Card is….

paisleycricutcartridgesneaker

I made this birthday card for my brother-in-law after he ran the New York City marathon.  I used the Paisley Cricut cartridge for the sneaker and for the background was a city border from Plantin Schoolbook cartridge.  I put his running number on the back along with the same medallion that he received on the side of the sneaker. It looked like a subway token.

I have always said that making handmade greeting cards is like you are giving a present too!

Make it a Great Day and don’t forget to leave time to Craft!

Cricut Card Idea That Turned Into A Housewarming Gift

Our friends just moved into their new home and invited us over for dinner.  I wanted to make a handmade housewarming gift using my Cricut Expression Machine.

Since my Gypsy has been sick and is going into the Provo Craft hospital next week, I have been using my Cricut Design Studio.  It works great but you have to sit at your computer to design which when you have a Gypsy you get spoiled designing any place that you like.   Anyway, I started to design a cricut card and it turned into a framed plaque.

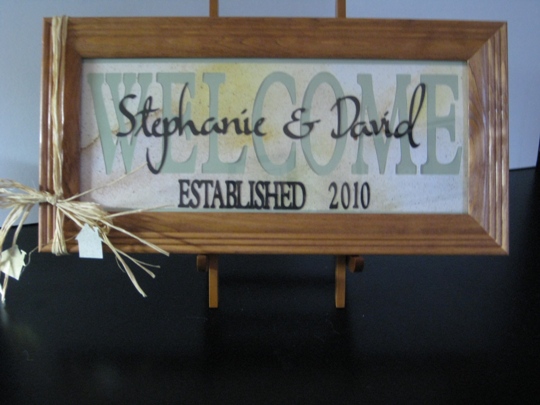
plantinschoolbookandjasminecricutcartridge

I used a neutral paper, since I was not sure what colors they were using in the house.  Then I cut the word Welcome using the Plantin Schoolbook Cricut Cartridge.  I altered the welcome with my Design Studio to get the perfect size that I needed to fit inside of the frame.  Then  I cut it out with my Cricut Expression Machine I really liked the way it looked using the “negative” piece of paper. (instead of using each individual letter separately.  Using the same cartridge Plantin Schoolbook I cut out the word Established and 2010 and again altered it with the Design Studio for a perfect fit.

For there names I wanted to use a Cricut Cartridge that had a script font.  So looking thought my library of Cricut Cartridges I decided to use the Jasmin Cricut Cartridge.

I glued it all together with the Zig 2 Way glue pen for the words cut in the black cardstock and for the large Welcome piece, I used my new pink ATG gun to put onto the light aqua green cardstock.  Put it all in a frame. I completed this project by using some raffia that I tied around the frame and then used a paper punch from Family Treasurers of a house that I added to some of the ends of the raffia.

I love the way this turned out and I hope they enjoy there handmade house warming gift, and many years of happiness together.

Make it a Great Day and don’t forget to leave time to Craft!

Two Cricut Cartridges Makes For One Perfect Pear Cricut Card Idea

I just love these machines, that is my Cricut Expression and Gypsy.  If you have the smallest Cricut Card Idea, you can make it into the best card idea ever.

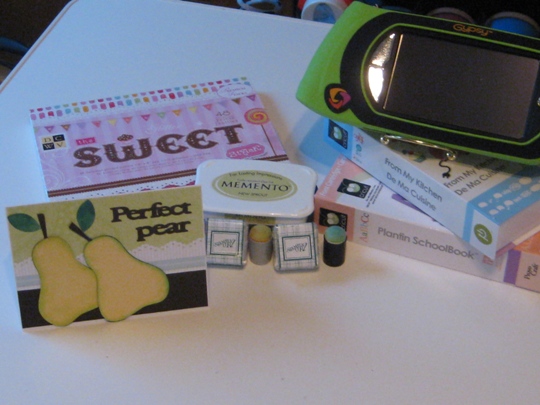
cricutcartridgesandsupplies usedperfectpearanniversarycard

If you are in the “crafty world” you have seen this pear before.  But when you actually make it yourself it is sooo perfect, cute and also quick.

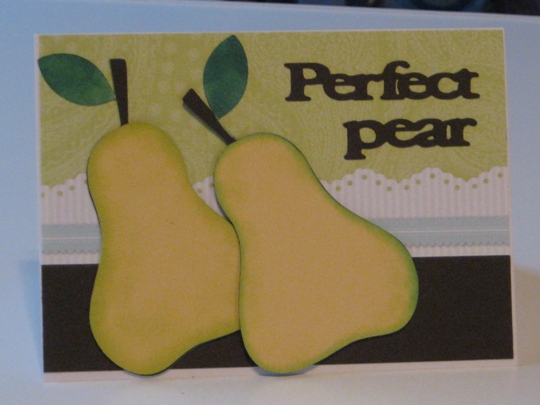
All I did was cut out two pears using the From My Kitchen Cricut Cartridge using the Cricut Expression machine. Then using my Gypsy and the Plantin Schoolbook Cricut cartridge I typed the words and also welded them together so that they would cut out in one piece instead of individual letters (makes it so much better when adhering to the card).

I then used some Memento Dye Ink color New Sprout and Stampin Up Dye Ink colors Glorious Green and Forest Foliage.  Using some  blenders to add some color to the edges of the pear for the soft real look.

For the background I choose paper from DCWV and also just a scrap piece of brown paper that I had left over from the shadow pieces that I used for the pear, for the bottom border of the card.

Look how great this card looks.  You will be able to send this to any perfect couple on your list for an Anniversary or just because they are a Perfect pear!

cricutcardideasanniversarycard

Make it a Great Day and don’t forget to leave time to Craft!

Page 1 of 2
1 2