Making a Handmade Birthday Card Using Rubber Stamps & Cricut Expression Cutting Machine

I went to the local rubber stamp show a few weeks ago and I could not believe how much rubber was in one place LOL ~ Anyway, I got so many great ideas for card making that I just have to share a birthday card that I made.

minimonogrambirthdaycard

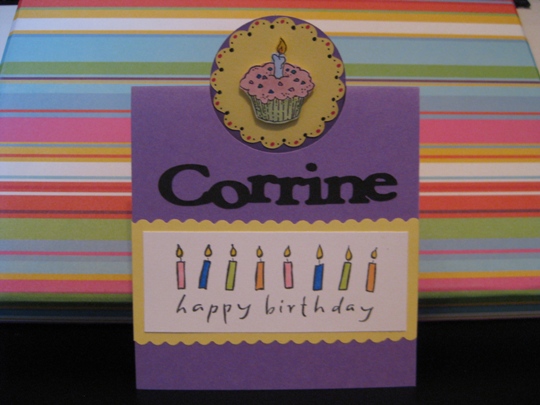
I used my Cricut Expression with the Mini Monograms Cartridge for the scalloped circle on the top.  I then stamped the cupcake with a rubber stamp from Stampendous on white cardstock using Memento tuxedo black dye ink, colored with Copic Sketch markers and then cut it out and used pop dots to adhere onto the scalloped circle.

For the happy birthday I stamped this Hero Arts stamp on white cardstock, again Memento tuxedo black ink and coloring the images Copic Sketch markers.  I went to put it onto the card and it looked “boring” so decided to layer it also.  Instead of using my Cricut Expression to cut the scalloped edge, I used Fiskars Paper Edgers scissors and got the same look. (it was also alot quicker).

Oh, I forgot to tell you.  The purple cardstock was cut using the Creative Memories Circle Cutter.  Since I only needed a half of circle cut to make this look, I couldn’t use a paper punch or my Cricut Expression, so this worked out perfect. (Yeah Creative Memories!) Then I scored the cardstock using the Martha Stewart scoring board.

When I finished this card it looked great but I wanted it to be even more special, so I took out my Cricut Gypsy and used the Plantin Schoolbook cartridge with the roly poly feature and typed the birthday girls name, welded it together, cut it out with the Cricut Expression machine and “wala” a really special personalized card.

personalizedminimonogramcricutcard

Make it a Great Day and don’t forget to leave time to Craft!

Cricut Card Idea For A Birthday Card That Will Make You Smile

My Godson’s birthday is this week and I need to make a handmade birthday card for him.  I wanted to use my Cricut Expression machine for this card.

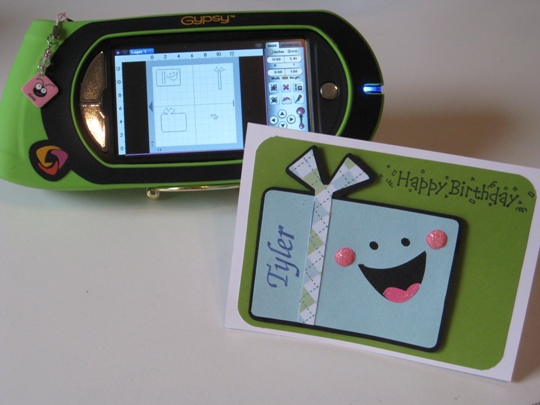
After looking though all of my Cricut Cartridges, I decided to use my Gypsy and the download cartridge called Smiley Cards.  There is an image of a present that has the cutest smiley face, and I know that it will make Tyler smile when he opens up this card.

cricutsmileycardscartridge

What I did to put some “bling” on this card was used some Stickles (cotton candy color) on the cheeks and mouth to give this smile a little shimmer.  I also used two rubber stamps.  One is from Inkadinkado with Tyler’s name and the other is the Happy Birthday rubber stamp from Hero Arts.  The ink that I used is Memento and the color is Paris Dusk (dark blue).

I just think that this cricut card idea turned out fantastic.  Making handmade greeting cards is the way to go!  Wishing Tyler a Very Happy Birthday.

Make it a Great Day and don’t forget to leave time to Craft!

Making a Handmade Get Well Card Using Copic Sketch Markers and House Mouse Rubber Stamp

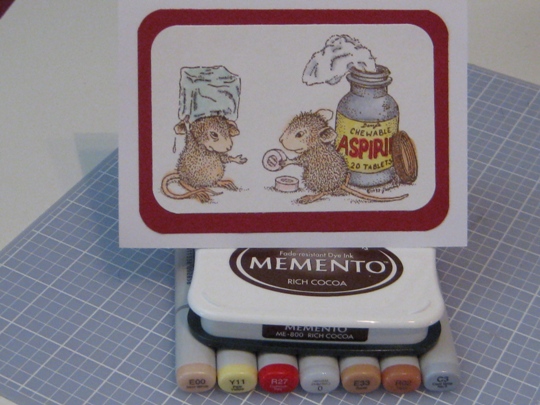
Hope everyone is having a great week so far.  Today I needed to make a get well card and wanted a change of pace from using my Cricut Expression to using rubber stamps.  I knew that I had the cutest House Mouse stamp that would be perfect to use with Copic Sketch markers.

So I stamped the image of white card stock using Memento Rich Cocoa ink.  Colored in the image with some Copic Sketch markers.

I then cut the stamped image to 4 1/2 ” x  2 3/4″ and with my EK Success corner punch I rounded the edges.  I placed that layer onto a burgundy piece of cardstock and again rounded the edges with the corner punch.  I adhered them all together using the Ad-tech permanent bond tape runner.

I almost forget, for the ice cube.  I used a clear/blue tinted embossing marker then added clear embossing powder and using my heat gun melted the powder to give the ice cube a shiny look.

This was a fun and also quick handmade card to make and hoping that it will make our friend feel a little better knowing that we are thinking of him.

HouseMouseGetWellHandmadeGreetingCard

Make it a Great Day and don’t forget to leave time to Craft!

Page 2 of 2
1 2