Handstamped Greeting Card Using Triple Time Stamping Technique

Hello My Friends,

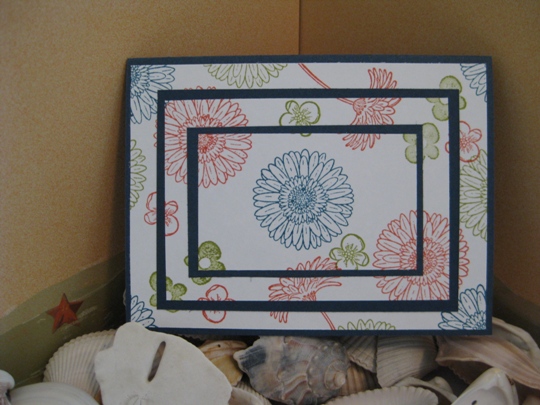
I have a new handstamped greeting card idea with a new technique that I just learned and it looks great so I just had to share with you.  It’s called the triple time stamping.  I’m sure you can stamp as many layers as you like but this one is done in triple layers.

You can use any colors that you want I just loved the combination of these colors.

The first thing you need to do is cut some card stock.

White – three pieces cut into 2″  x 3″  1/4″, 3″  x 4 1/4″ and 4″  x 5 1/4″

Navy – three pieces cut into 2 1/4″ x 3 1/2″, 3 1/4″ x 4 1/2″ and 8 1/2″ x 5 1/2″

Now the fun part begins.  Take the three pieces of the  white cardstock and put just one little spot of adhesive on the back of each one (just enough to hold it down but not really stick, cause you will be removing it) and then layer each piece on top of one another

tripletimestampingtechniquestep1

Now all you need to do is stamp the image as if it was a single sheet of cardstock.  You will see the white lines around the stamped image but don’t worry you will never know once we are done.

When you are all done stamping, gently take apart each layer and put them onto the Navy cardstock.

Since the inside of the card is Navy card you may want to cut a piece of white cardstock and stamp a little something inside to bring the card all together.

To finish the card you just have to layer the pieces on top of each other, matching the design.  It feels like I am making a  stamping puzzle.

tripletimestampingtechniquejoanscraftworld

Well, what do you think?  Doesn’t it look great?  And it really wasn’t hard to make either.  Hope you enjoyed this new triple time stamping technique.

Make It A Great Day & Don’t Forget to Leave Time To Craft!

Handmade Christmas Card Ideas

Hello My Crafty Friends,

I am having so much fun creating Christmas Cards with all of the supplies that I shared with you the other day.

If you have alot of cards to make this year and want to make it look like you spent hours making each card, when it only took a few minutes, then this is the card you need to make.

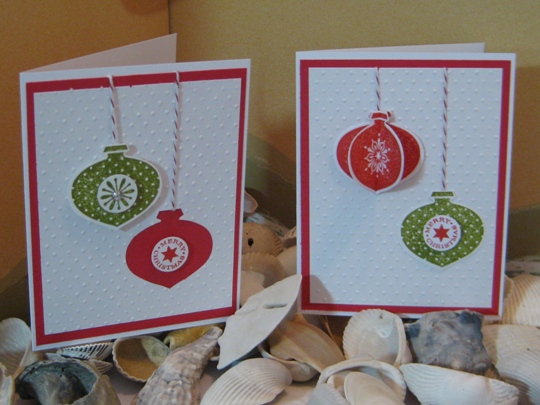
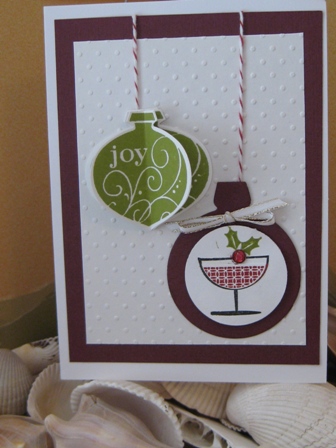
I just love making 3 dimensional cards.  It’s amazing how just one pop dot can change the entire look of a card, and when you use more it makes it even better 🙂  Having 3 dimensional card ideas then actually making your idea into a beautiful Christmas card is such a gratifying feeling

Also, for another kind of look, I stamped and punched 4 ornament images.  Then folded 3 of them in half, glued the sides together and then glued them to the image that wasn’t folded and this ornament is now popping off the card!

Come back for a visit soon to see more Christmas Card Ideas, until then…

Make It A Great Day & Don’t Forget to Leave Time To Craft!

Sea Shells Make the Perfect Handmade Birthday Card

I am loving living at the beach and having so much fun collecting shells.  My sisters birthday is coming soon so I need to make her a handmade birthday card.  I don’t know what she would do if I bought her a card, but she NEVER has to worry about that since I love making cards.

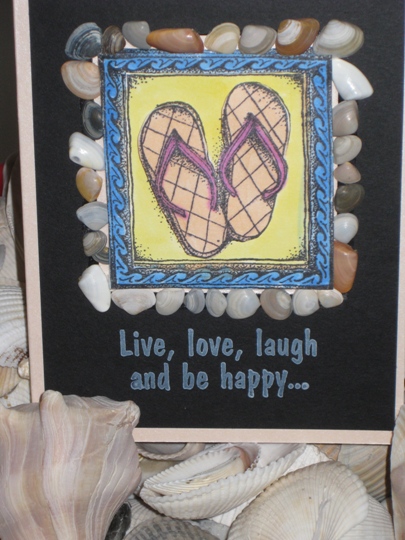
I will be using a rubber stamp from Peddler’s Pack of a pair of flip flops (beach theme again LOL)  I stamped this image 2 times on plain white cardstock, because I wanted to add some dimension with layers.  The sentiment stamp Live, love, laugh and be happy… is from Stampabilities.

I used one image for the base and colored using Copic sketch markers.  Then with the other image I cut out the wave border and the flip flops.  I used small pop dots on those images so they really looked like they were popping off the card. (of course I took the photo straight on so you really can’t see the dimension, sorry)

But now comes the really fun part.  I glued tiny shells that I found at the beach onto the frame of the card, and since I raised that wave border the shells sit really nicely on the card.

handmade greeting card

~ Happy Birthday Lori ~

Make it a Great Day and don’t forget to leave time to Craft!

Handmade Birthday Card Using a Sea Shell & Beach Theme

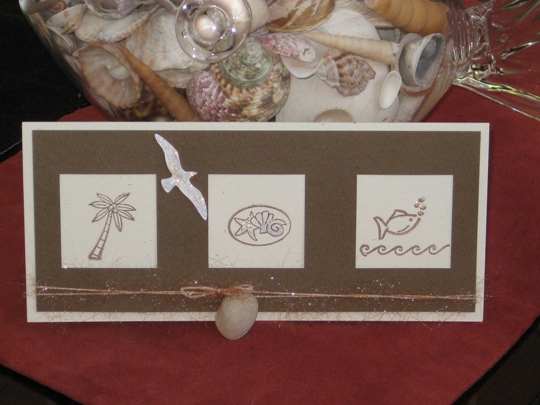
I needed to get creative and make a birthday card for my nephew. When he came to visit this past summer we had so much fun at the beach, so I decided to make that the theme of his card.

handstamped greeting card

I used some 12 x 12 ivory cardstock for the base of the card that I cut to 9 x 8 the scored in half.

Then cut a piece of chocolate brown cardstock 8 1/2 x 3 1/2 then using a 2″ square paper punch I punched three squares in a row.  Layered it on top of the ivory card and used my ATG gun to put it all together.  I had some funky fiber in my drawer and decided to put a shell that I found on our beach for the perfect accent.

Of course I needed to use my Cricut Expression machine so I found the perfect seagull on the Life is a Beach cricut cartridge and cut it on ivory cardstock and then put Star Dust Stickles all over for a shimmery look.

I still didn’t know what stamp set I was using  and as I was going though all of acrylic stamps I found these three images on one sheet.  I have no idea who made them or where they came from.  All I knew is that they were perfect.  I stamped them with Rich Cocoa Memento Dye Ink and Wa-La my card is complete.

Thanks so much for allowing me to share this fun and easy birthday card with you.

~Happy Birthday Ryan~

Make it a Great Day and don’t forget to leave time to Craft!

Making A Handmade Mother’s Day Card Using Copic Markers And A Rubber Stamp

Wanting to send some sunshine to our Mom’s this year for Mother’s Day.  This was a simple card to make but it turned out really nice.  I used a rubber stamp from Outlines rubber stamp company and stamped it 3 times (since I was going to cut out images and layer with pop dots) on white cardstock and tuxedo black memento ink.

So for the first stamped image I colored it completely using Copic Sketch markers.

The second stamped image I only colored the inner square with the sun and palm tree. Then I cut it out and layered onto the first image.

Then on the third stamped image I only colored the palm tree and the circle of the sun.  I cut out the palm tree and using pop dots placed it on top of the second stamped image and did the same for the center of the sun.

I used black cardstock as the base for the stamped images then coordinated some blue cardstock for the last layer.

I’m always looking for that 3D look.

handmademothersdaycard

Wishing all the Mother’s a Wonderful Day Today & Always!

Page 2 of 2
1 2