Quickutz Nativity 2×2 Dies vs Cricut Cutting Machine

12 Days of Christmas with Joans Craft World

On the fifth day of Christmas…

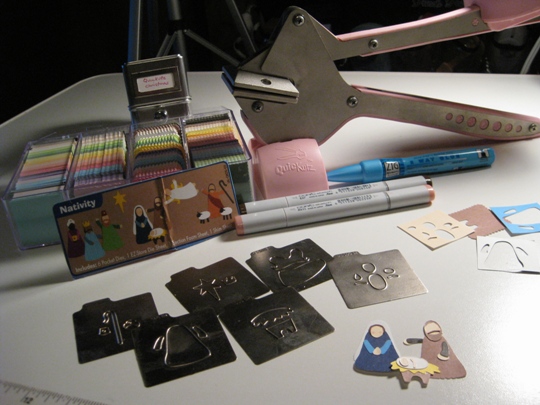
Many years ago, before I got my first original Cricut machine, I had (and still do have) a Quickutz Squeeze.  I started with the original blue one then of course upgraded to the pink (easier to use) one.  Anyway, I was going through all of the 2×2 metal dies that I have and came across the set of the Nativity.

So I decided for this Christmas craft that I would put this Nativity scene together.

I need to tell you all something I LOVE MY CRICUT EXPRESSION MACHINE!!!!!!!!!!!!!

I cut each image out by using the pink squeeze and my hand hurts already.  I know that I could use the Cuttlebug with the A, B and C plates to cut with these dies, but I want to make the entire Quickutz project with the Quickutz.  I have these small pieces of paper that fit perfectly over the metal dies so I’ going to use them and save paper.

The cutting part worked out OK, but holy cow, it’s really hard putting this all together since it is sooo small, and you have to figure out what piece to use over and over again for different parts of the scene.  If I didn’t save the piece of cardboard with the picture on it of what each image is suppose to look like, I would never have been able to put this together.  Well I gave up and only made Mary, Joseph and the baby Jesus.  I don’t even think that I put them together correctly.

quickutznativitypinksqueeze

That is why I love the Cricut Expression machine because you can make the shapes any size that you want.  Also the images are so much easier to put together.  Cricut takes the guess work out of how to put images together.

I’m not saying that the 2×2 Quickutz shapes are bad, I’m just saying the the Cricut cartridges are the best!

Make it a Great Day and don’t forget to leave time to Craft!

Cricut Card Idea for Easy Christmas Cards Using The Cricut Cartridge Christmas

12 Days of Christmas with Joans Craft World

On the fourth day of Christmas…

Handmade Christmas Cards do not have to be hard to make.  As a matter of fact this card was so simple to make but came out really good.

All I used for create this Christmas card was black cardstock, white glitter paper from doodlebug design, inc, and some greeting cards that I purchased with a background design already printed on the front.

I used my Cricut Expression machine to cut the images.  The sparkly moon was made using the circle image from Mini Monograms Cricut cartridge, and Santa with his sleigh and reindeer from Christmas solutions cartridge.  I put the moon on the card using the pink ATG gun and then for the Santa I used a Zig 2 way glue pen since it is really delicate and I think a tape runner would have definitely torn the paper.

That’s it.  I’m done and it looks perfect!

christmasnoelcricutcartridge

Make it a Great Day and don’t forget to leave time to Craft!

A Cricut Idea For Decorating a 2 Year Planner Using the Doodlecharms Cartridge

12 Days of Christmas with Joans Craft World

On the third day of Christmas…..

Today we are creating Cricut covers for 2 year planners.

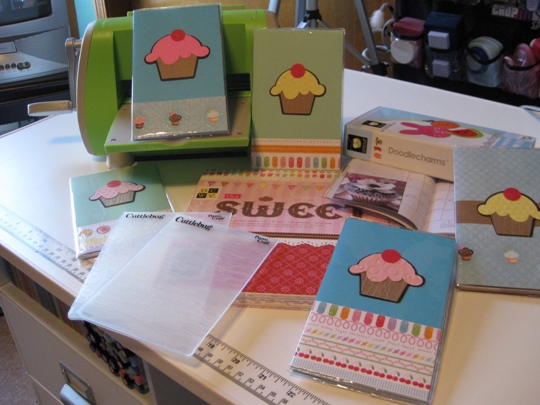
This is so much fun.  I will be using the Cricut Expression machine,  Cricut Doodlecharms cartridge, Cuttlebug with embossing folders and paper from DCWV called the Sweet stack.

Ooops I forgot also a 2 year day planner calendar.  I found these planners by Studio18.  They are so cute because of all the themes that they have.  Since I decided to make cupcakes Studo18 had a cupcake planner with each month showing a different decorated cupcake.  So all I did was decorate the outside cover.

First I cut with my Cricut Expression machine the cupcakes at 2″.   For the icing of the cupcake I used pastel colored cardstock and for the bottom paper wrapper I used craft paper.

Now comes the really fun part.  I used three embossing folders with my Cuttlebug to add some dimension to these cupcakes.    For the bottom wrapper I used the forest branches embossing folder.  I put the craft cardstock that looks like the wrapper into the embossing folder sideways so the lines of the branches really looks like a cupcake.  For the icing I used the new polka dot embossing folder and also the spots & dots.

doodlecharmscricutcartridgecupcake

These were so much fun to make and are going to be fantastic Christmas stocking “stuffers” for our family and friends this holiday.

Make it a Great Day and don’t forget to leave time to Craft!

A Christmas Cricut Card Idea Using 3 Birds on Parade Cricut Cartridge

12 Days of Christmas with Joans Craft World

On the second day of Christmas…..

Some more handmade Christmas Cards.  This time made with my Cricut Expression machine and the 3 Birds on Parade Cricut cartridge.

3birdsonparadecricutcartridge

I used some greeting cards that I had purchased and didn’t know what to put on the front since it already had a cute saying  HAPPY FREEZIN’ SEASON! So what a cute idea to have a bird with a scarf and hat for this freezin’ season.  I cut this cute bird at 3″ and used paper that coordinated with the background of the card.  To finish this handmade Christmas card I add that special “bling” to his hat, scarf and boots with some Stickles.

Make it a Great Day and don’t forget to leave time to Craft!

Another Great Cricut Idea ~ A Cricut Tree

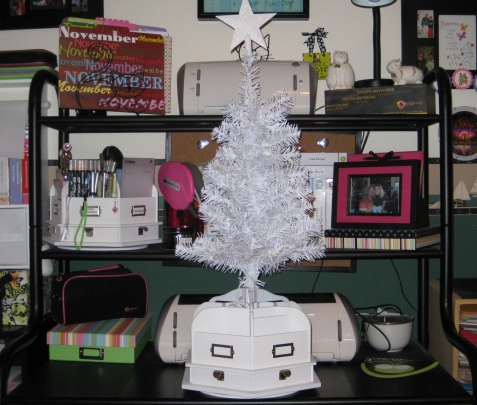
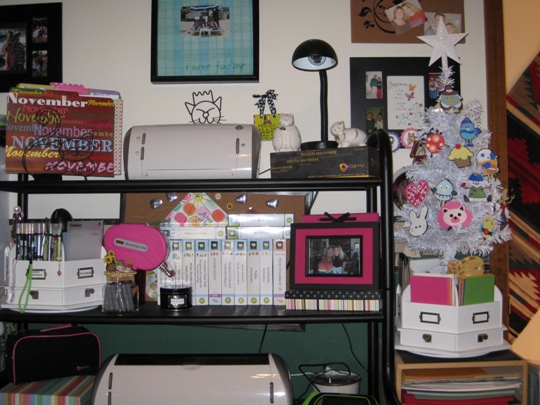
My two favorite things are decorated Christmas trees and anything Cricut.  So I had an idea.  Why not make a Cricut Tree that I can have displayed all year round.  That’s right an all year tree decorated with images that I have made using my Cricut Expression machine from various Cricut cartridges.

joanscraftworldcricuttree

I found a perfect white tree (that even has little white lights) at Walmart for under $10 and that included the star that I bought for the top.  When I got it home I wanted to give it a permanent place in my studio aka Joans Craft World.  So what I did was took my white Making Memories carousel that I keep my extra Cricut blades and other supplies in and cleaned it all out.  Then with crazy glue I glued the three legs of the tree stand onto the carousel so it will not fall down.

joanscraftworldcricuttree

I then put all of the supplies back in there place and since I’m not going to have the lights on, the cord fits great in the compartments that are in this carousel.  I placed my Cricut tree on top pf my 12×12 paper holder that is next to my Cricut workstation.  I decorated my tree with some Cricut images and voila the perfect Cricut Tree.  What is really cool is that since it is on the carousel, I will be able to turn it to see all of my Cricut images. I just love this cricut idea and hope that you like it too.

Make it a Great Day and don’t forget to leave time to Craft!

Page 6 of 13
1 4 5 6 7 8 13