How to Use Copic Markers Coloring a 3D Rubber Stamped Flower to Create a Handmade Greeting Card

I wanted to point out that many people have found this video by searching for things like use copic markers. using copic markers. copic marker tutorial. copic marker coloring. copic markers sketch. copics markers. and copic color markers. That’s because of what was entered into youtube when the video was uploaded. Becoming more familiar with this will allow you to expand your search query so you may be able to find more helpful videos and tips on other sites and blogs.

Here’s a list of the supplies you may have seen quickly flash by in my credits at the end of the video:

Copic Sketch Markers

Hero Arts Rubber Stamp Set

Memento Tuxedo Black Dye Ink Pad

EK Success Cutter Bee Scissors

Pop Up Glue Dots

White Blank Cards

Make it a Great Day and Don’t forget to Leave Time to Craft!

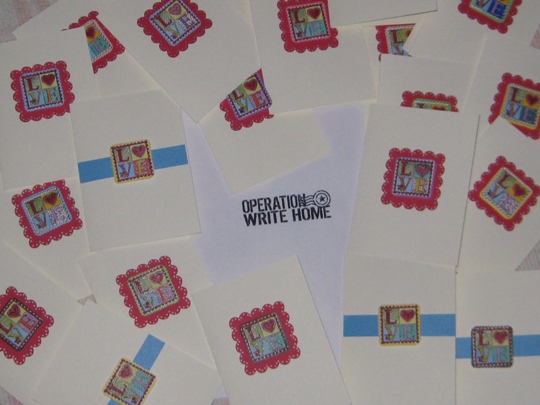
Handmade Valentines Day Cards for Operation Write Home

A Very Happy New Year to all of my Fellow Crafters.  2010 is going to be a lot of Fun.

I just finished making some Valentines Day Cards for Operation Write Home and got them in the mail.

valentinecardsforoperationwritehome

If any of you do not know about Operation Write Home, you are really missing out on great organization that you can be a part of.  Please check them out and if you are not a card maker maybe you can send a donation. I am so honored to be part of this organization.  While our soldiers are fighting for us and our freedom, they are away from their families and this is my small part in giving back and helping them be connected to their loved ones.  Just check out the web site and see for yourself.

Anyway, now I am making my first Joans Craft World video.  Some of our fellow crafty friends make it look so easy.  Well let me tell you I think, no I don’t think, I know that I really need to practice.  I thought I did a great take only to find out that all you could see on the screen was my hands and a white piece of paper, and not what I was doing.  Oh well, I guess that is the learning curve of making videos.  I just need to finish editing and then it will be up for all to see.

Make it a Great Day and don’t forget to leave time to Craft!

A Word Of Thanks To All Of My Crafting Friends at Joans Craft World

I wanted to take a minute and thank all of you for your wonderful support and encouragement you have given me throughout the year.  While Joans Craft Worlds blog is alot of fun, and a great way to share my handmade cards and scrapbooking creations with all of you, You my Crafting Friends are the ones that really make it all worthwhile.

I want you to know how much I appreciate each and every one of you that takes the time to visit Joans Craft World blog on a regular basis, and how I especially appreciate it when you take the time to leave a comment.  It always puts a smile on my face when I read your comments – let’s face it, it makes me feel good to know that you enjoy my creations and my crafting tips that I have learned along the way, and that you enjoy stopping by for a visit…so please keep it up, don’t stop.

I am planning some fun new things for the New Year.  I see videos in 2010 for Joans Craft World to make things more fun along with some other crafty things.  It’s going to be a great year for all of us.

Wishing all of you the Happiest Christmas and a Crafty New Year!

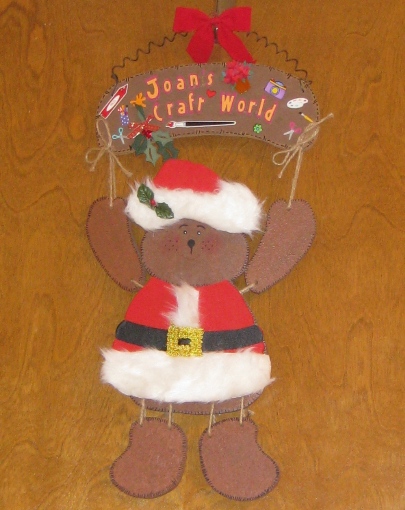
joanscraftworldsantabear


Joans Craft World 2009 Handmade Christmas Card

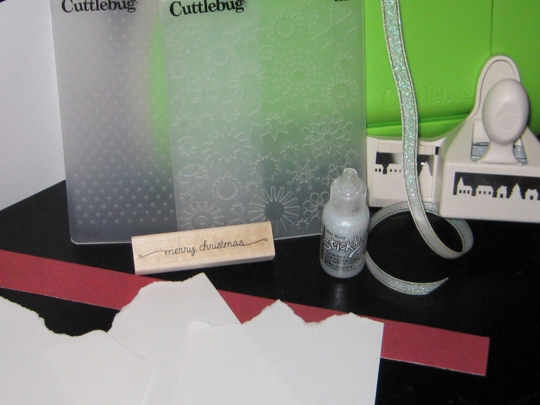
What do you get when you have a Cuttlebug, Cuttlebug Embossing Folders, Martha Stewart Paper Punch, Stickles, Ribbon, White Cardstock, Strip of colored cardstock and a rubber stamp?

2009handmadechristmascardsupplies

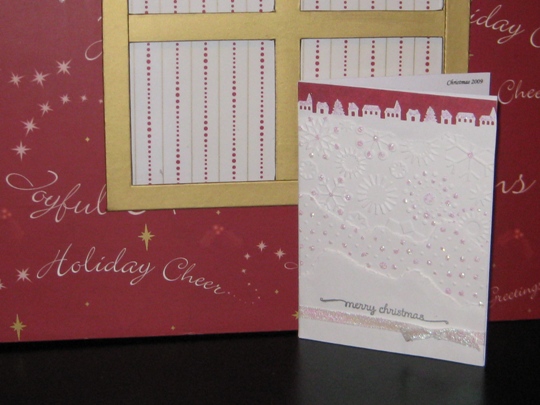
Our 2009 Handmade Christmas Card!

I can share our card with you because they are all out in the mail.  For my family and friends who follow JoansCraftWorld, hopefully they will have already received our Christmas card.

I have been making our Christmas Cards since for a few months now and since I make around 75-100 cards, I need to have a system.  Usually I make cards that are layered (of course, more work) but I love the way that they look.  So my card this year has 5 layers on the outside, a Christmas saying on the inside, and my holiday signature on the back.

One layer is a one inch cut piece of colored cardstock. (the Paper Studio)

One is a border punch (Martha Stewart Frosty Village Edge punch)

Two are embossed using my Cuttlebug (Swiss Dots and Snowflakes Embossing folders)

And the last one is rubber stamped with an added ribbon embellishment. (Hero Arts)

Oh I forgot to tell you that three of the layers are hand ripped or some people call it hand torn cardstock, for a really cool look.

And to finish each card I added stickles for that special “bling” (Stickles –  Star Dust & Diamonds)

2009handmadechristmascard

Wishing all of my Fellow Crafters a Very Merry Christmas and a Fantastic New Year!

Make it a Great Day and don’t forget to leave time to Craft!

A Helpful Tip to my Fellow Crafters about Handmade Address Labels for Christmas Cards

I did something yesterday that helped me out of a pinch.  I was writing out our Christmas cards and found out that I had no return address labels (or should I say ones that I would want to put on my really pretty cards), so I made my own.

I used plain white printer/copy paper. Then using my computer, Microsoft Word, along with the envelopes and labels feature I typed our return address.

Then I found a cute picture on clip art of a Christmas tree and added that to my labels.

They printed out on the piece of paper just as they would if I used a sheet of plain white labels (that I did not have)

Now here comes “let’s use stuff in your craft studio that you haven’t used in awhile.”

I trimmed each row of addresses so that there was no excess paper on either side. (Using my EK Success Cutterpede paper cutter)

Then I ran them through my XYRON 510 sticker maker using the permanent adhesive cartridge.

After taking off the top layer (clear plastic) I used my Mini Cutterpede (I could have used the big one but I have a mini and it was just was just easier) but this time using the perforation blade (I think this is the first time I every used this blade).  So that I would be able to just take one label at a time.

It worked great – looks great and the best part it was easy.

tipofthedayreturnaddresslabels

Make it a Great Day and don’t forget to leave time to Craft!

Page 41 of 53
1 39 40 41 42 43 53