Making Christmas Gift Tags Using the Christmas Cheer Cricut Cartridge

12 Days of Christmas with Joans Craft World

On the seventh day of Christmas…

Well I didn’t start wrapping presents yet, but when I do I am going to need some gift tags.  So today I am going to use my Cricut Expression Machine and make some Christmas gift tags.

The Cricut Cartridge that I picked is called Christmas Cheer.  I am going to first cut out a plain tag at 4 inches on plain white cardstock, and decorate that tag with the image of a Christmas bulb that will be cut at 2 inches and  make them in all different colors.

cricutcartridgechristmascheer

Now just to show you how long that I have been crafting, I used cute little round stamps with different faces on them from EK Success called Paperkins Faces.  All I know is that everything Paperkins and Punchkins are discontinued, well at least it is not on there website anymore.  These stamps were used to put faces on Paperkins and Punchkins paper dolls.  I think these faces look really cute on these Christmas light bulbs and gives them some character.

joanscraftworldpaperkins

I also used clear stamps to put the “to” and instead of from I put “love” onto the white tag.  I left enough room to write the name of the person who is getting the gift.

Then to finish them off I am using ribbon from Bobbin Ribbon that has strands of Christmas light.  How perfect is that?

I will put them all together using Zig 2 way glue.  Now all I have to do is add these to the gifts and I will be all ready for Christmas.

Make it a Great Day and don’t forget to leave time to Craft!

Another Great Cricut Idea ~ A Cricut Tree

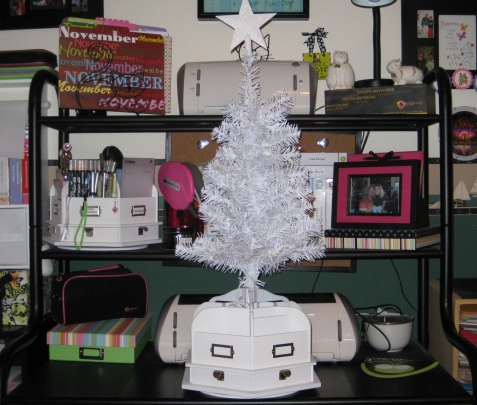
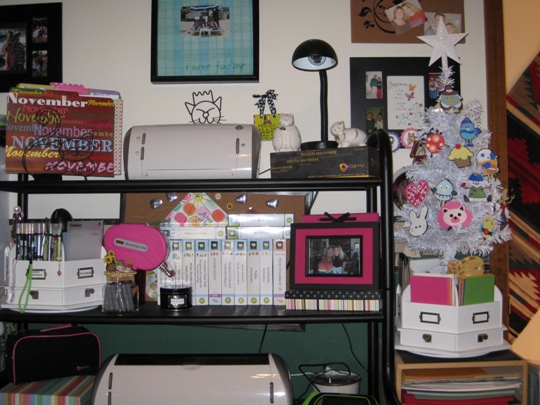
My two favorite things are decorated Christmas trees and anything Cricut.  So I had an idea.  Why not make a Cricut Tree that I can have displayed all year round.  That’s right an all year tree decorated with images that I have made using my Cricut Expression machine from various Cricut cartridges.

joanscraftworldcricuttree

I found a perfect white tree (that even has little white lights) at Walmart for under $10 and that included the star that I bought for the top.  When I got it home I wanted to give it a permanent place in my studio aka Joans Craft World.  So what I did was took my white Making Memories carousel that I keep my extra Cricut blades and other supplies in and cleaned it all out.  Then with crazy glue I glued the three legs of the tree stand onto the carousel so it will not fall down.

joanscraftworldcricuttree

I then put all of the supplies back in there place and since I’m not going to have the lights on, the cord fits great in the compartments that are in this carousel.  I placed my Cricut tree on top pf my 12×12 paper holder that is next to my Cricut workstation.  I decorated my tree with some Cricut images and voila the perfect Cricut Tree.  What is really cool is that since it is on the carousel, I will be able to turn it to see all of my Cricut images. I just love this cricut idea and hope that you like it too.

Make it a Great Day and don’t forget to leave time to Craft!

Stand and Salute Cricut Cartridge Is Perfect For A 4th of July Scrapbook Page

With the 4th of July just around the corner, I wanted to use the Stand and Salute Cricut cartridge to make a scrapbook page.  I have been rubber stamping for the past couple of weeks and it sure feel fantastic to use my Cricut Expression machine again.

We will be going to a friends house for a BBQ on the 4th and you know that I will be taking pictures to capture the fun.

The best part of the 4th for me is watching the firework display in the evening.  It’s funny, I am petrified of fireworks when I am close to them but from a distance, they are beautiful.

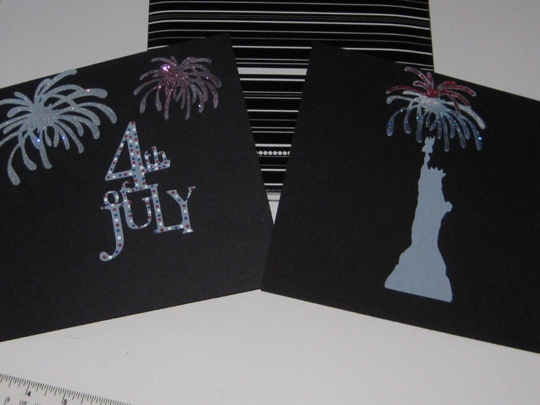
So using my Cricut Expression machine, I cut the fireworks image and made it in three different sizes and also cut the image of the Statue of Liberty.  Growing up in New Jersey the firework display was over the Hudson and watching it on television they always showed the Statue of Liberty in the distance with the fireworks above.  And seeing it in person was just unbelievable.  The roar of the crowds Ooooooooh’s &  Aaaaaaaah’s, bands playing music to go with the fireworks, great friends to share the evening with, what else could one ask for, it was fantastic!

I love those memories but let’s get back to the scrapbook page, so after cutting the fireworks, I added some glitter to each using Martha Stewart fine glitter, for that extra sparkle.  And for the wording I made polka dots using red and blue markers from ek success and for the white the Martha Stewart opaque marker.

When I print my pictures depending on how many, I will use either the small wallet photo size or maybe even the thumb print size to just put around the page.

standandsalutecricutcartridge4thofjulyscrapbook

I want to take this opportunity to thank all of the Military Men and Women all around the world who keep me and my family safe everyday.  I can’t thank you enough for all of your dedication and courage.  God Bless each and every one of you.

Another Cute Birthday Cricut Card Idea Made With The Celebrations And Designer Calendar Cricut Cartridges

Our niece Riley’s 11th birthday is next week and again I wanted to made a cute card using my cricut.  What 11 year old girl doesn’t like cake and presents?

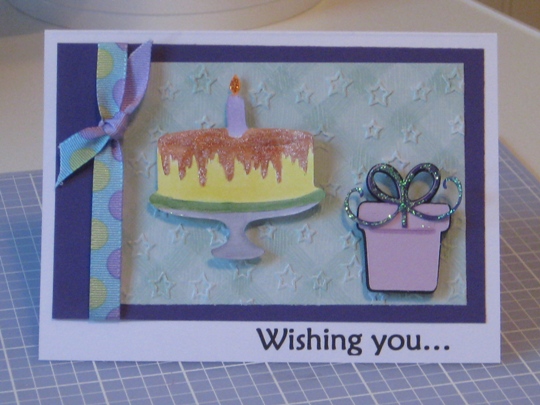
So I used those two things for the front of the card.  I cut out the cake  from the Designer’s Calendar Cricut cartridge and the present from the Celebrations Cricut cartridge, both using my Cricut Expression machine.

I cut the cake on plain white cardstock then colored in the image with Copic Sketch markers and then added some “bling” with stickles to the frosting of the cake and the flame of the candle.

The present I cut out on two different shades of purple but again added Stickles onto the bow to add a little sparkle to the present.

I then used my Cuttlebug and embossed a light green plaid piece of cardstock with a star embossing folder, layered that onto a solid piece of purple cardstock and finished with a polka dot bow, using American Craft ribbon.

I think this came out really cute and for the inside saying I printed on the computer:  Happy Cake and Presents Day!

Wishing Riley a Very Happy Birthday!

cricutcardidea

Make it a Great Day and don’t forget to leave time to Craft!

A Rubber Stamp And Some Copic Sketch Markers Make the Perfect Father’s Day Card

I wanted this years handmade Father’s Day card to have a special meaning.  My husbands parents have alot of bird feeders on there lake front property and they love to see all the beautiful birds that come to the feeders.  They also have bears that frequently help themselves to the bird food.

So for this years card I used the House Mouse rubber stamp and colored in the image with Copic Sketch markers.  I then layered the image onto a solid piece of cardstock and layered again onto a very soft piece of cardstock that brought all the colors together.

housemouserubberstampandcopicsketchmarkers

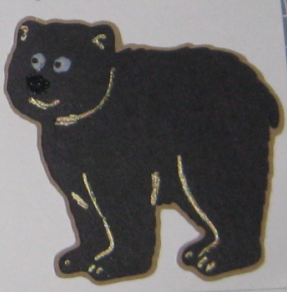
Now how does a bear come into this Fathers Day Card, well here is the inside of the card.  I computer generated the saying but then I cut out a bear with my Cricut Expression machine using the Animal Kingdom Cricut cartridge.  Well I had to crop the inside since when I took the picture it had our mushy sentiments inside but this is what is said:

wishing_you_a_beary_happy

animalkingdomcricutcartridgebear

Wishing the Best Poppa a Very Happy Father’s Day!

Make is a Great Day and don’t forget to leave time to Craft!

Page 4 of 5
1 2 3 4 5