A Christmas Cricut Card Idea Using 3 Birds on Parade Cricut Cartridge

12 Days of Christmas with Joans Craft World

On the second day of Christmas…..

Some more handmade Christmas Cards.  This time made with my Cricut Expression machine and the 3 Birds on Parade Cricut cartridge.

3birdsonparadecricutcartridge

I used some greeting cards that I had purchased and didn’t know what to put on the front since it already had a cute saying  HAPPY FREEZIN’ SEASON! So what a cute idea to have a bird with a scarf and hat for this freezin’ season.  I cut this cute bird at 3″ and used paper that coordinated with the background of the card.  To finish this handmade Christmas card I add that special “bling” to his hat, scarf and boots with some Stickles.

Make it a Great Day and don’t forget to leave time to Craft!

Christmas Cards Using Cuttlebug Embossing Folders & Stampin’Up Stamps

12 Days of Christmas with Joans Craft World

On the first Day of Christmas…

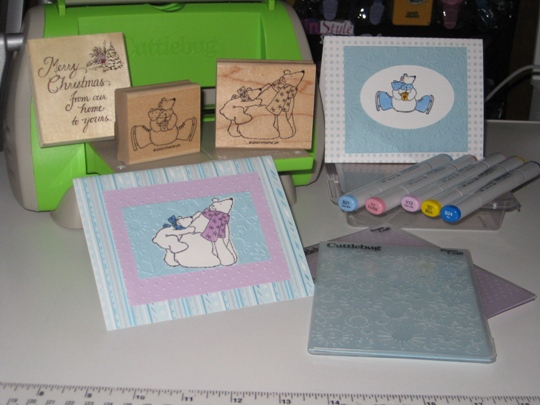
Making handmade Christmas Cards and Christmas Crafts while listening to Christmas Carols, does it getter better then this?  This year I wanted to make different kinds of Christmas Cards, what I mean is not all the same.  So for my first 12 cards I used a stamp set from Stampin’ Up that I got years ago.  I stamped the image using tuxedo black memento ink and colored in the design with Copic sketch markers.  I had some A2 cards that I purchased at Michaels that had such small wintry prints in soft blue and purple colors that I decided to use them.

For the inside sentiment I used a Merry Christmas stamp  from Uptown Rubber Stamp.

Of course that could have been all I needed to complete this Christmas card, but I had to add something else.  I decided what better then to layer cardstock.  I used my Cuttlebug with embossing folders. One layer was with a Snowflakes and the other layer with Swiss dots.  These embossing folders did the trick.  I then put them all together using my pink ATG adhesive gun.

Look how cute my first dozen Christmas Cards turned out.

christmascardscuttlebugstampinupcopic

Make it a Great Day and don’t forget to leave time to Craft!

Handmade Birthday Cards Are Fun To Make with a Cuttlebug, Copic Markers and a Rubber Stamp

Making handmade Birthday cards are so much fun.  My nephew is turning 14 tomorrow.  I can’t believe how fast that went and I am only the Aunt, I can’t imagine how my sister feels.  Well, I really didn’t know what kind of card to make.  I’m wasn’t sure if I want to use my Cricut Expression or to rubber stamp this card.  After a couple of days contemplating,  it turned out that rubber stamping won.

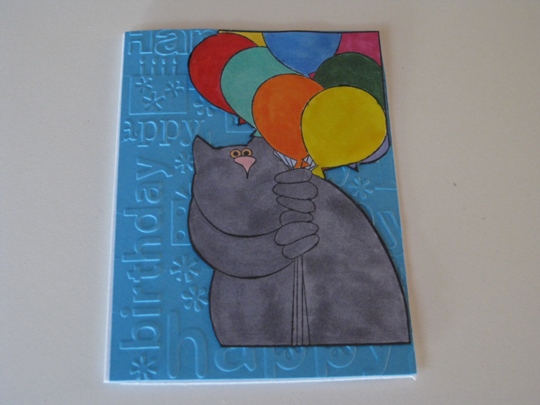
I found a stamp by Stamps Happen, Inc of a cat holding alot of balloons.  I stamped the image using Tuxedo Black Ink from Memento Ink and then colored with Copic Sketch Markers.  It looked a little “dull” so for a few of the balloons I added 3-D Crystal Lacquer for a cool effect.

It still wasn’t the look that I wanted so I decided to use my Cuttlebug with the Happy Birthday embossing folder.  I then cut the stamped image and glued it to the top of the embossed piece of cardstock with my new pink ATG gun (Advanced Tape Glider).  Now that’s what I wanted it to look like.

cuttlebugembossedbirthdaycard

I hope Ryan likes his handmade birthday card.  I know he will not get another one like it!  Happy Birthday Ryan, enjoy your Birthday.

Make it a Great Day and don’t forget to leave time to Craft!

A Halloween Cricut Card Idea Using The Designer’s Calendar Cartridge

Here is the quickest and cutest handmade Halloween greeting card. I used the Cricut Designer’s Calendar cartridge to cut out this hanging spider that was cut at 3 1/2 inches with my Cricut Expression machine and then attached it to a web that I cut with a Martha Stewart border punch.

This is a perfect “spooky” Cricut Card Idea that you can make using some of your paper scraps.  We all have that pile of scraps, whether they are in a basket, box, or organized by color in a large envelope.

I stamped the inside of the A2 card with the clear stamp set that I still can’t remember who it is from (you can see picture in the post from the other day), but this time I used tuxedo black memento ink.

cricutcardideaspiderdesignerscalendar

Now that I am looking at this picture, (and the card next to me) you may want to “bling” up your spider or the web with some stickles for a shimmery, sparkly effect.  I just might do that!

Make it a Great Day and don’t forget to leave time to Craft!

Two Cricut Cartridges Makes For One Perfect Pear Cricut Card Idea

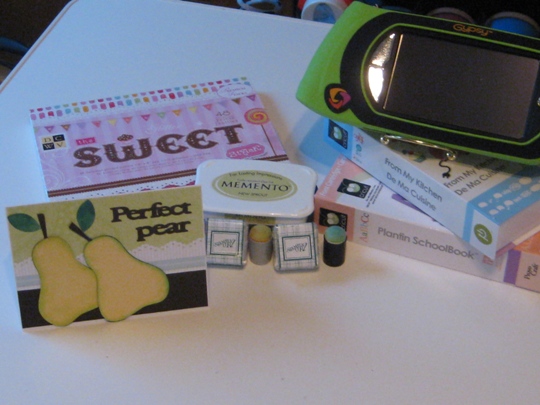
I just love these machines, that is my Cricut Expression and Gypsy.  If you have the smallest Cricut Card Idea, you can make it into the best card idea ever.

cricutcartridgesandsupplies usedperfectpearanniversarycard

If you are in the “crafty world” you have seen this pear before.  But when you actually make it yourself it is sooo perfect, cute and also quick.

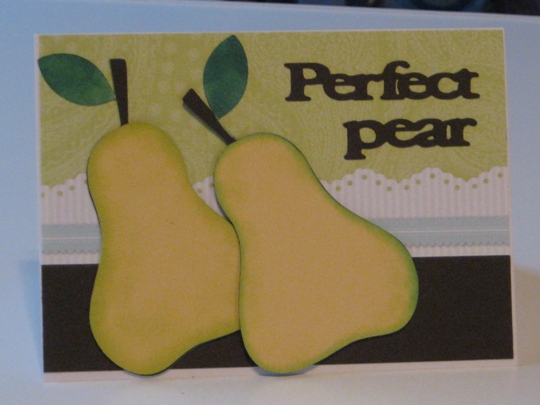
All I did was cut out two pears using the From My Kitchen Cricut Cartridge using the Cricut Expression machine. Then using my Gypsy and the Plantin Schoolbook Cricut cartridge I typed the words and also welded them together so that they would cut out in one piece instead of individual letters (makes it so much better when adhering to the card).

I then used some Memento Dye Ink color New Sprout and Stampin Up Dye Ink colors Glorious Green and Forest Foliage.  Using some  blenders to add some color to the edges of the pear for the soft real look.

For the background I choose paper from DCWV and also just a scrap piece of brown paper that I had left over from the shadow pieces that I used for the pear, for the bottom border of the card.

Look how great this card looks.  You will be able to send this to any perfect couple on your list for an Anniversary or just because they are a Perfect pear!

cricutcardideasanniversarycard

Make it a Great Day and don’t forget to leave time to Craft!

Page 21 of 31
1 19 20 21 22 23 31