It’s Never Too Early To Start Christmas Crafts

Hello My Fellow Crafters,

Well today is October 1st and I want to get an early start on Christmas ~ I should have started in August 🙂

So, as I was going though my Christmas Cardstock I found some that I knew I used a few years ago for our Christmas Cards so I couldn’t use it again this year so what to do with all this paper?  Maybe cut it into strips and make a wreath?  I remember seeing a wreath and I thought  looked great and of course now I can’t find it, so I am going to “wing it” from memory and see what I come up with.

Well after a few cuts of paper all different sizes I though the best was to cut the strips in 1/2″ or 1/4″ and 12″ long, only because it was easier to curl the paper at this width.  The bigger size didn’t curl and I was so afraid of getting a wicked paper cut.  I curled the paper just as you would with gift wrap ribbon and a scissor, but used a bone folder and paper/cardstock.

So after cutting and curling I have this  big pile of curled paper in front of me.

christmaswreathpaperstrips

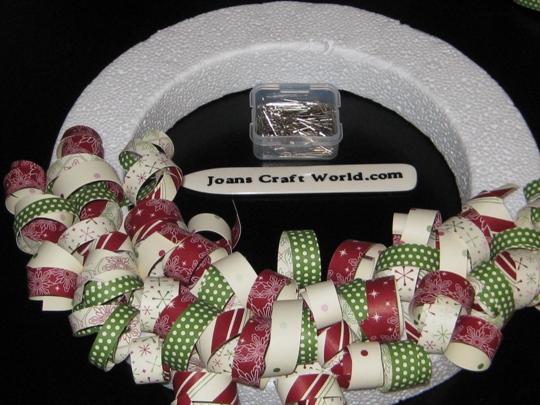
The next step is to get some sewing satin push pins and a Styrofoam wreath and start pushing the pins into the center of the strips of paper and then pushing the pin into the Styrofoam.

christmaswreathpushpin

Then keep doing it over and over again and it will start looking like this.  It will take awhile to do this so, put on your favorite radio station and start singing along OR this would be a great project if you don’t really like football but want to spend time in the same room with your family who do watch football all weekend 🙂

christmaswreathinprogress

I forgot to take a picture of this part, but while the white Styrofoam is still not totally covered up with the paper curls, I wrapped a piece of twine around the wreath so when it was done I could hang it up without messing up the paper.

completedpaperchristmaswreath

I just love the way it turned out!  And the best part is that I used cardstock that would have been sitting in my drawer collecting dust but instead, I used it in a way that I don’t think I ever would have.

Now that it’s done, I betcha I can make wreaths for every occasion with the right colors of cardstock, and maybe add some paper embellishments onto the paper curls with a glue dot. Like I always say,  the possibilities are endless when you create your own crafting projects.

Make It A Great Day and Don’t Forget To Leave Time To Craft!

Supplies:

A Handmade Greeting Card Sending Happy Birthday Wishes

Hello My Fellow Crafters,

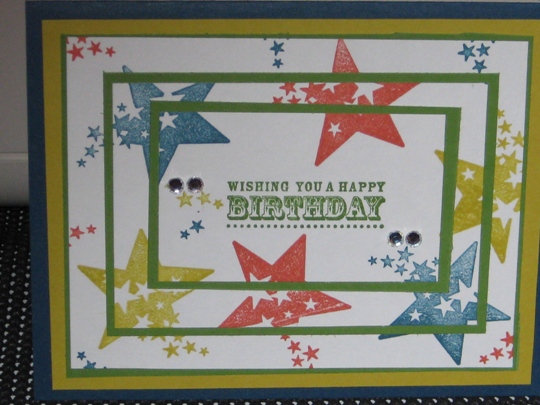
I want to share with you a handstamped birthday card that I just finished for my brother-in-law.  I don’t know who ever came up with the in-law part,  I feel that I gained more brothers and sisters once I got married (25 years ago)  Anyway, let’s get back to the card 🙂

handstampedbirthdaycardidea

Giving this handstamped birthday card alot of though, I decided to use the triple time stamping technique.  I didn’t take pictures of each step but here are the sizes for each layer.

White – three pieces cut into 2″  x 3  1/4″, 3″  x 4 1/4″ and 4″  x 5 1/4″

Bubble Gum Green – three pieces cut into 2 1/4″ x 3 1/2″, 3 1/4″ x 4 1/2″ and  5 1/2″

Then for the base of the card I used Midnight Muse cardstock cut 8 1/2″ x 6″

If you want to see all the steps you can reference post: Handstamped Greeting Card Using Triple Time Stamping Technique

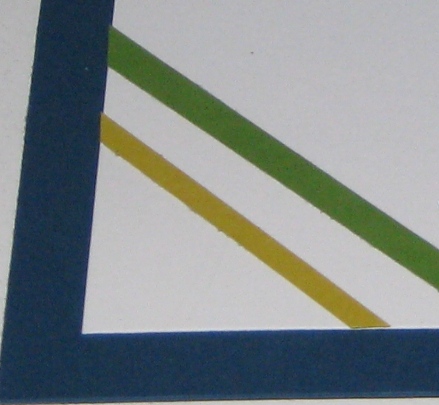
For the inside of the card I wanted to bring some of the great colors from the outside in, so I cut some strips of the cardstock and added to just the one corner.

The best part about making handmade cards is that you can keep adding fun embellishments until you slip the card into the envelope and put it into the mailbox.

handstampedbirthdaycardinside

All the rubber stamps and cardstock are from my stash of Stampin’ Up supplies.  What I love about all of the stamps, ink and cardstock is that they all coordinate perfectly.

~ Happy Birthday Bruce ~

Make It A Great Day and Don’t Forget To Leave Time To Craft!

Today is “Talk Like a Pirate Day” ~ Ahoy Mattey

Hello My Fellow Crafters,

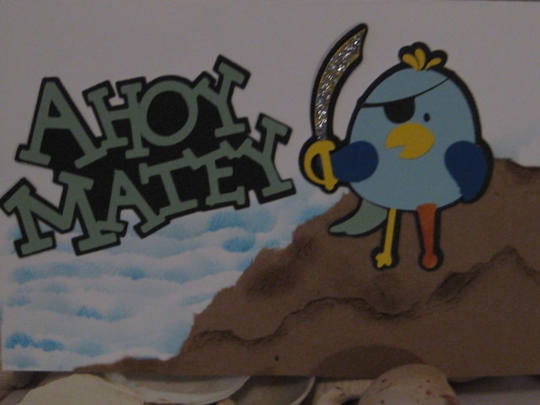
AHOY MATEY ~ Today is Talk Like A Pirate Day and I wanted to share with you a really fun Cricut Card Idea that I made to celebrate the occasion.

talk like a pirate day 2013

This little pirate was made with the 3 Birds on Parade Cricut Cartridge.  I think this cartridge is soooooo fun!

After cutting him all out and putting him together I decided that his sword needed some shine, so just added some silver stickles and  now it  looks great.

Then had some scrap Kraft paper and so I literally tore it up to look like land, sponged some Rich Cocoa (Brown) Memento ink onto the edges for more of a dimensional look.

For the background of the ocean all I did was take the other end of the scrap paper that I tore and used it as a stencil and lightly sponged Bahama Blue Memento ink onto the white card cardstock.

~ Enjoy Your Day Matey ~

Maybe you will find a Treasure  Chest filled with Craft Supplies 🙂

Make It A Great Day and Don’t Forget To Leave Time To Craft!


Card Supplies:

Climbing A Fence To Say Hello

Hello My Fellow Crafters,

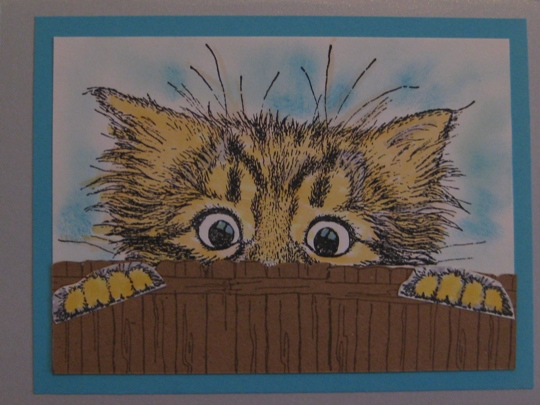
Today I want to share with you the cutest birthday card that just makes me smile, because I can see my cat looking like this if he was an outdoor cat 🙂

I was going through my stamps and came across this stamp (which was the paw) and I had no idea what it was.  So, as I continued looking the most adorable cat face rubber stamp jumped out and then I remembered this set from a rubber stamp convention that  I went to years ago.

The stamp set is from Biblical Impressions (not sure if they still make this stamp). I started with white cardstock and tuxedo black memento ink.  Then using copic markers I started coloring, and the entire time I couldn’t stop smiling at this face.  That’s why I really think that crafting is the best, because it puts you in such a happy place, watching yourself create your own original works of art.

iseeyouhandmadebirthdaycard

Then I found a stamp of a fence that is from Art Impressions.  I stamped it twice onto brown cardstock and using a scissor I cut the tops of the fence so it looked rigid and for a straight bottom I used a Fiskars paper cutter.

Once I put it all together it looked a little too white so I took a sponge dabber and using memento Bahama Blue ink I added some color for a background and decided to use the same color cardstock to mat onto a larger white card base.

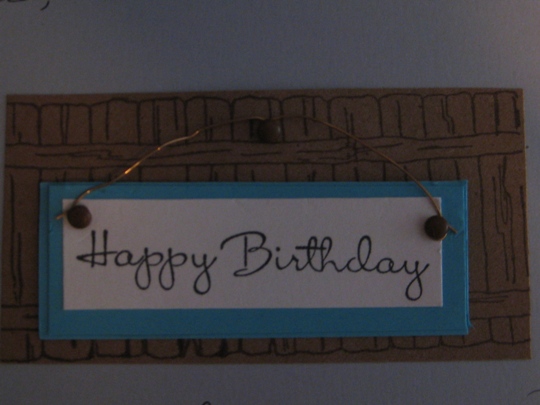
For the inside I wanted to keep the theme of the fence, so I used the same brown cardstock, fence stamp and black memento ink.  I thought it would be so fun to make a sign that could be hanging on the fence.  So,  I made a little sign with plain white cardstock, added some antique mini brads and so there were no sharp edges I layered the back onto the same colored cardstock I used on the front of the card. Then using some brass wire I made the happy birthday sign and attached it to the fence with another mini antique brad.  The part that I really like is that the sign moves from side to side since I didn’t permanently attach it to the fence. (I had to take a close up picture because I forgot to take the picture before I added all my handwritten message to the card)

iseeyouinsidehandmadebirthdaycard

I would suggest that you go thru some of your stamps and see what new/old ones you can dig up and create something fantastic.  I hope this card made you smile 🙂

~ Happy Birthday Poppa ~

Make It A Great Day and Don’t Forget To Leave Time To Craft!

Card Supplies:

A Handstamped Birthday Card With Some Fun Fiber Embellishments

Hello My Fellow Crafters,

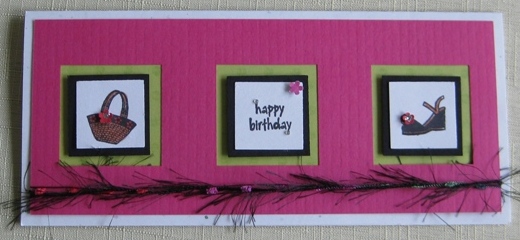
Today I want to share with you a handstamped birthday card with some fun fiber embellishments that I made for my mother-in-law.  I wanted to make this card bright and colorful.

I had so many ideas for this card and instead of choosing one stamp set and theme, I put them all onto one card.  What women does does not like shoes and a matching purse 🙂

handstampedhappybirthdaycard

Using some stamp sets that I have had from Hero Arts, I stamped the sandal, woven bag and the sentiment with tuxedo black memento ink onto plain white cardstock.  Then using a square paper punch cut out each image.

Next step was to color them using a copic marker (dark suntan) and that’s it! But I just had to add some kind of embellishment.  So I  punched a tiny flower and using a styles tool just pressed down in the middle and it made a small indent in the middle of the flower and then I added a drop of silver stickles.

Since I wanted a layered look to this card I punched  a larger square from black cardstock for each image and stuck them together using my ATG gun.  Also had a scrap piece of lime green cardstock so I put that in the back of the Pink cardstock that had three squares cut out already.  (I got these card kits a few years ago from The Paper Cut company who were at a rubber stamp convention), it would have been really easy to make if I didn’t have this already cut out just by using a larger square punch. For an extra “pop” I added pop dots on the back of the black cardstock before I put onto the lime green.   Then for the finishing touch on the outside of this card I added some funky fiber that I had from EK Success that I found in my stash of ribbons, raffia, bakers twine…

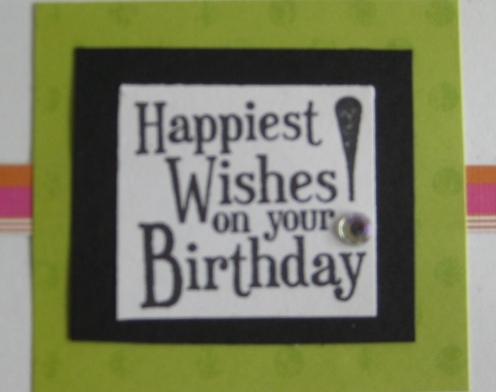
insidehandstampedhappybirthdaycard

For the inside I kept the same colors and layering look, and added a strip of striped paper behind the layers.  Then added a rhinestone for that extra bling!

~ Happy Birthday Mom ~

Make It A Great Day and Don’t Forget To Leave Time To Craft!

Card Supplies:

Page 2 of 5
1 2 3 4 5