Christmas Scrapbook Page Made With The From My Kitchen Cricut Cartridge

12 Days of Christmas with Joans Craft World

On the ninth day of Christmas….

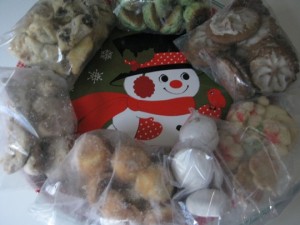
Well I just received a package in the mail, that puts a smile on my face every year at Christmas.  It is filled with lots of love and alot of sugar and flour.  You guessed it homemade COOKIES from my Mom and Dad.

12daysofchristmasjoanscraftworld

Mom gave me a Christmas cookie platter when we first got married and every year I just have to put the cookies that she sends on it.  I also have to leave the cookies in the bags that they were sent in, because if I don’t this platter would look really empty for this picture.

So, I decided to make a scrapbook page showing these beautiful delicious cookies.  To decorate this scrapbook page I will be using my Cricut Expression machine and two Cricut cartridges.  The From My Kitchen cricut cartridge, and Christmas Noel.

frommykitchencricutcartridge

Using the From My Kitchen cartridge I cut the cookies and rolling pin at 3 1/2″ and the word Cookie at at 2 1/2″.

The word Christmas I used the Christmas Noel Cricut cartridge and cut at 2 1/2″.

All I have to do now is print the picture of the cookies and add it to this years Christmas scrapbook page.  Oh I also have to go and get a glass of milk and eat some cookies.

Make it a Great Day and don’t forget to leave time to Craft!

Mom gave me a Christmas cookie platter when we first got married and every year I just have to put the cookies on it.  I have to leave the cookies in the bags that they were sent in, because if I even took them out for this photo, I would have eaten at least 5 cookies.

Stand and Salute Cricut Cartridge Is Perfect For A 4th of July Scrapbook Page

With the 4th of July just around the corner, I wanted to use the Stand and Salute Cricut cartridge to make a scrapbook page.  I have been rubber stamping for the past couple of weeks and it sure feel fantastic to use my Cricut Expression machine again.

We will be going to a friends house for a BBQ on the 4th and you know that I will be taking pictures to capture the fun.

The best part of the 4th for me is watching the firework display in the evening.  It’s funny, I am petrified of fireworks when I am close to them but from a distance, they are beautiful.

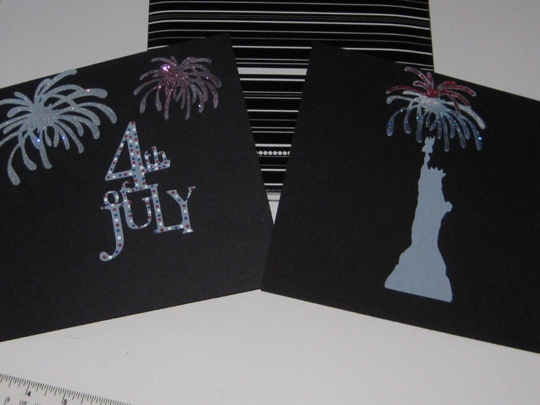
So using my Cricut Expression machine, I cut the fireworks image and made it in three different sizes and also cut the image of the Statue of Liberty.  Growing up in New Jersey the firework display was over the Hudson and watching it on television they always showed the Statue of Liberty in the distance with the fireworks above.  And seeing it in person was just unbelievable.  The roar of the crowds Ooooooooh’s &  Aaaaaaaah’s, bands playing music to go with the fireworks, great friends to share the evening with, what else could one ask for, it was fantastic!

I love those memories but let’s get back to the scrapbook page, so after cutting the fireworks, I added some glitter to each using Martha Stewart fine glitter, for that extra sparkle.  And for the wording I made polka dots using red and blue markers from ek success and for the white the Martha Stewart opaque marker.

When I print my pictures depending on how many, I will use either the small wallet photo size or maybe even the thumb print size to just put around the page.

standandsalutecricutcartridge4thofjulyscrapbook

I want to take this opportunity to thank all of the Military Men and Women all around the world who keep me and my family safe everyday.  I can’t thank you enough for all of your dedication and courage.  God Bless each and every one of you.

Using the Cricut Gypsy Wanderings Cartridge for a Great Scrapbook Page

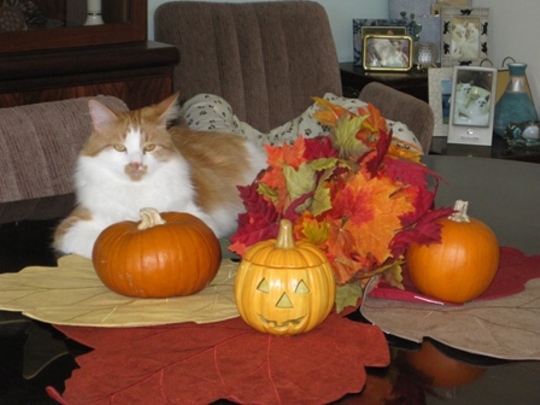
I want to share this picture with you.  As you may know, this is my favorite time of year.  I decorated my dining room table with some fall things and next thing I knew my really cute orange cat decided to be part of my table centerpiece.

cricutgypsywanderingscartride1

So besides decorating for the fall season, I just finished an order of Christmas cards.  They came out really good and I know that my friend who ordered them will be really pleased.  Now I need to continue on this path and get a lot more Christmas cards done.

But, today is Saturday, a day when others have a day off from work and want to “play”, well I wanted to play too, so I got out my Cricut Gypsy and I did just that.   This machine makes creating so fun & easy.  I just cut out some pumpkins and cool color leaves from the Cricut Gypsy Wandering cartridge, and am going to put together a quick scrapbook page and add this picture of my centerpiece.

Here is how I did it.

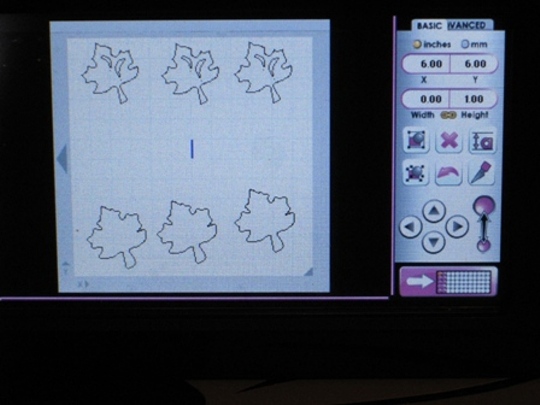
First I picked out the leaves that I wanted to cut and arranged them on the Gypsy screen.

cricutgypsywanderingscartridgescreen

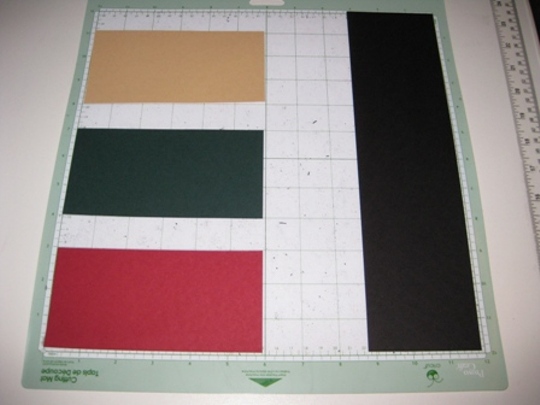
Then I arranged the paper onto the cutting mat in the same places as shown on the Gypsy screen.

cricutgypsywanderingscartridgepaperplacement

Followed the prompts on the Gypsy to load the paper, and to check all the pressure settings, and pressed cut and it started cutting out the images on my Cricut Expression.

cricutgypsywanderingscartridgeprinting

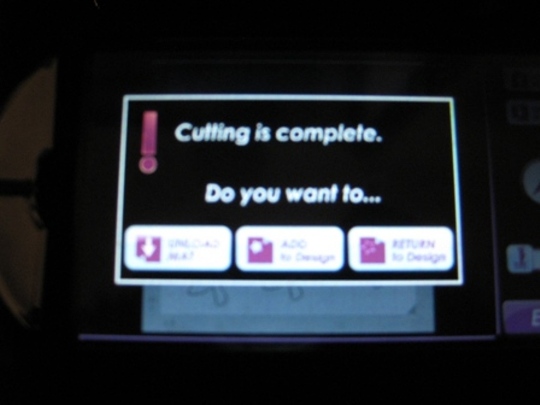
When it was done the Gypsy prompted me that it was done cutting and what would I like to do next.

cricutgypsywanderingscartridgecuttingusinggypsy

I unloaded the mat, took off the leaves, and as you can see one of the black shadow leaves had its top cut off since I didn’t have the image aligned correctly on the mat for the size paper that I loaded. Oh well, I’ll cover it up somehow.

cricutgypsywanderingscartridgecutleaves

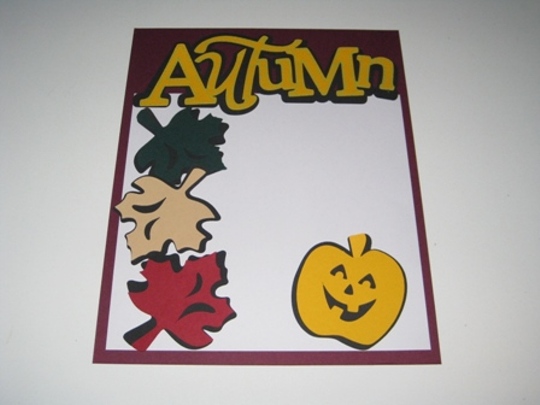
The final page looks pretty good ~ I just have to print my picture and add to this scrapbook  page.

cricutgypsywanderingscartridgescrapbookpage

This was so much fun to make ~ Thanks for letting me share this with you.

Make it a Great Day and don’t forget to leave time to Craft!

CORRECTING SCRAPBOOKING SCREWUPS

The Scrapping Screw-Up

Every Scrapbooker has done it, I know I have. I know that you will one day. I am talking about A Scrapping Screw-Up.

Picture this – You have just finished the most beautiful, totally awesome Scrapbook page, and you are sitting back thinking that this is the best one yet and all of a sudden you find “IT”, a sticker that ripped, a miss spelled word, a rub-on that has worn off, a finger print. Well do not worry about it; here are a few tips to fix up your “scrapping screwups” instead of starting over or the worst throwing out what you thought was your best ever scrapbook page

What happens though when you have a ripped or misplaced sticker?

There are many ways of fixing a misplaced sticker.

* If you didn’t place the sticker down too hard then carefully use any really sharp object like the tip of a craft knife or even a pair of tweezers to help peel up the sticker. You can place another sticker in the same place of where the sticker is you have duplicates or you may have to add a different embellishment where you took the sticker off.

* If your sticker is stuck to the page and you can’t get it off using the technique above, there is a product called UnDo which takes off the sicker and if used correctly you can re-use the sticker once it dries.

* If these techniques don’t work consider placing a small picture in its place or a larger sticker or another embellishment over the top to cover up the mistake.
Ever have a Rub-On that gets rubbed-off?

Everyone loves rub-ons now days since they come in so many different styles. The alphabets come in a variety of fonts and colors and now they even have sayings that you can use inside your Handmade Greeting Cards, but at times rub-ons don’t love us. I know I can’t tell you how many times I have had used a rub-on where only some of the rub-on goes on so I have to get it off. Here are some tips for when rub-ons go bad.

*Lets say that you were rubbing on a word create and you accidentally rubbed on some letters that should not be in that work, you can use the tip of your craft knife to scratch away the letters that are misplaced.

*If your rub-on is incomplete. I mean that if you are rubbing on the letter “T” and the line on the top is missing, you can use an acid free pen of the same color and fill in the missing spots.

Using rub-ons are going to be so much easier and worry free now that you know how to fix your mistakes.

Found a miss spelled word in your journaling?

No problem. There are a couple of ways to fix that. If you have typed the word or hand wrote it, all you need to do is re-type or re-write that word on either the same color paper or different and cut it out and place over the word. If it looks out of place, retype a couple of other words even though they are spelled correctly and it will look like you intended for some words or sentences to be on different kinds of paper. You can even adhere with a small brad or eyelet for a cool look.

So next time you find a mistake with your spelling, stickers, or rub-ons don’t worry. There is always a creative way to fix it and no one will ever know but you.

Have a Great Day and don’t forget to leave time to Craft!