Coffee Cup Cricut Card Idea

Hello My Friends,

Today I want to share with you a handmade coffee cup birthday card that I made for my brother-in-law.  I have seen lots of cards in the shape of a coffee cups like the ones you would see at your local coffee shop, and I thought that would be a fun idea for a birthday card.  Well after looking at all of my Cricut Cartridges, would you believe that I did not have that cartridge?    So here is where a little imagination and some creativity comes in.

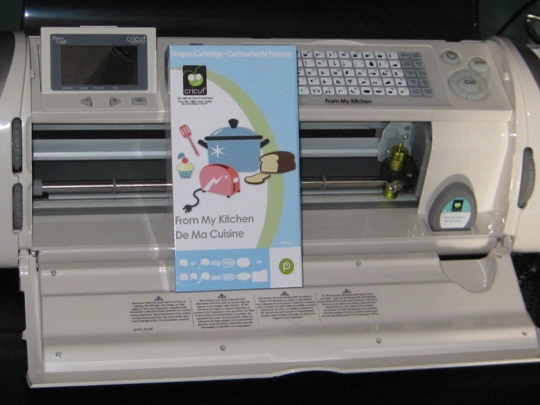
Using the From My Kitchen Cricut Cartridge, Gypsy and Cricut Expression machine,  I made a coffee cup card.

I cut the shape in blackout mode of the refrigerator, yup, you read that correctly the refrigerator.  All I did was cut the two small legs off the bottom and I had the shape of a coffee cup.  I was enclosing a gift card into this card so i just made sure when sizing this card that the card would fit inside without sticking out.  Using the Gypsy I welding the sides together which made a card.  All I needed to do is fold in the center.

coffeecupcricutcardidea

As I am writing this post and looking at the From My Kitchen Cricut Cartridge booklet and  I am laughing because I could have just used the shift function and I would have got the same image and wouldn’t have had to cut off the legs. 🙂

Anyway I increased the size and cut it out again but his time with a brown cardstock.  Then using a paper cutter (or you could use a scissor) just snipped off the top pf the refrigerator shape to make it look like a lid.  It looked good but seeing pictures of coffee cup lids they had some curve to it, so I took a small oval paper punch and with one punch on each side did the trick of looking like a lid.  Then added a piece of raffia for a little extra dimension.

For the bottom half of the coffee cup took the brown cardstock, cut a strip that would wrap around the entire card (just like the cup wrap you would get in a coffee shop so you don’t burn your hands on the hot cup)  ran that strip through the Cuttlebug with embossing folder.  Final touch was the circle birthday sentiment, circle punch then applied with a pop dot.

~ Happy Birthday Harry ~

Make It A Great Day and Don’t Forget To Leave Time To Craft!

Christmas Scrapbook Page Made With The From My Kitchen Cricut Cartridge

12 Days of Christmas with Joans Craft World

On the ninth day of Christmas….

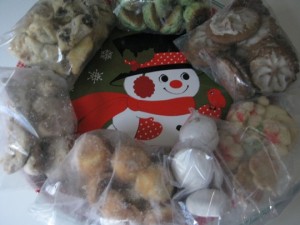
Well I just received a package in the mail, that puts a smile on my face every year at Christmas.  It is filled with lots of love and alot of sugar and flour.  You guessed it homemade COOKIES from my Mom and Dad.

12daysofchristmasjoanscraftworld

Mom gave me a Christmas cookie platter when we first got married and every year I just have to put the cookies that she sends on it.  I also have to leave the cookies in the bags that they were sent in, because if I don’t this platter would look really empty for this picture.

So, I decided to make a scrapbook page showing these beautiful delicious cookies.  To decorate this scrapbook page I will be using my Cricut Expression machine and two Cricut cartridges.  The From My Kitchen cricut cartridge, and Christmas Noel.

frommykitchencricutcartridge

Using the From My Kitchen cartridge I cut the cookies and rolling pin at 3 1/2″ and the word Cookie at at 2 1/2″.

The word Christmas I used the Christmas Noel Cricut cartridge and cut at 2 1/2″.

All I have to do now is print the picture of the cookies and add it to this years Christmas scrapbook page.  Oh I also have to go and get a glass of milk and eat some cookies.

Make it a Great Day and don’t forget to leave time to Craft!

Mom gave me a Christmas cookie platter when we first got married and every year I just have to put the cookies on it.  I have to leave the cookies in the bags that they were sent in, because if I even took them out for this photo, I would have eaten at least 5 cookies.

Two Cricut Cartridges Makes For One Perfect Pear Cricut Card Idea

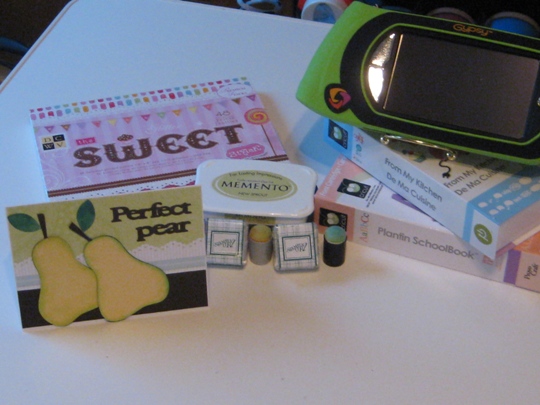
I just love these machines, that is my Cricut Expression and Gypsy.  If you have the smallest Cricut Card Idea, you can make it into the best card idea ever.

cricutcartridgesandsupplies usedperfectpearanniversarycard

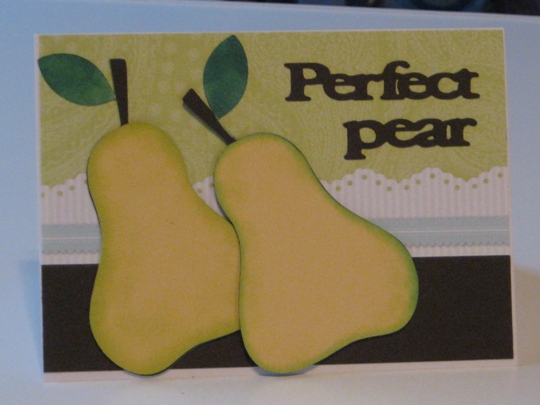
If you are in the “crafty world” you have seen this pear before.  But when you actually make it yourself it is sooo perfect, cute and also quick.

All I did was cut out two pears using the From My Kitchen Cricut Cartridge using the Cricut Expression machine. Then using my Gypsy and the Plantin Schoolbook Cricut cartridge I typed the words and also welded them together so that they would cut out in one piece instead of individual letters (makes it so much better when adhering to the card).

I then used some Memento Dye Ink color New Sprout and Stampin Up Dye Ink colors Glorious Green and Forest Foliage.  Using some  blenders to add some color to the edges of the pear for the soft real look.

For the background I choose paper from DCWV and also just a scrap piece of brown paper that I had left over from the shadow pieces that I used for the pear, for the bottom border of the card.

Look how great this card looks.  You will be able to send this to any perfect couple on your list for an Anniversary or just because they are a Perfect pear!

cricutcardideasanniversarycard

Make it a Great Day and don’t forget to leave time to Craft!