2015 Graduation Cricut Card Idea

Hello My Fellow Crafters,

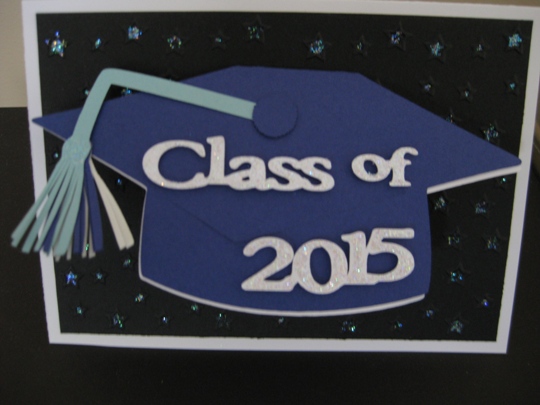
WOW!  I can’t believe that I just made this card.  My nephew Ryan graduated high school and will be leaving for college in 2 months.   Where did the time go?  And if I am feeling like this I can’t imagine how my sister feels 🙂

cricutcardidea2015graduation

I used the Cricut Expression and the Wild Card Cartridge to make the graduation cap and tassel.  Also cut the tassel out 3 times so that the school colors were all there. For the lettering I used the Plantin Schoolbook Cricut Cartridge.  Also embossed a piece of black cardstock with the Cuttlebug and a Star embossing folder from Bringing Crafts-Too You.  I just had to add stickles to the stars and also to the class of 2015.

~ Congratulations Ryan~

Make It A Great Day and Don’t Forget To Leave Time To Craft!


More Birthday Step-Up Card Ideas

Hello My Fellow Crafters,

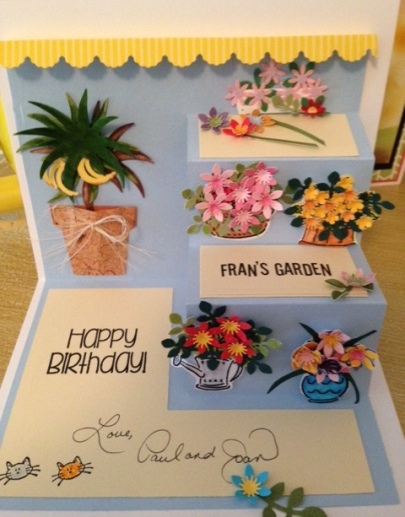
I am having so much fun with this Sizzix  Basic Step-Ups framelits die.  And, I am so happy I need to make a birthday card for my sister-in-law.  She loves flowers and I was thinking what a colorful flower/garden shop card I could create.

So using the Sizzix framelits die, along with my Cuttlebug and a lot of different paper flower punches I went to work and this is the finished card.

stepupcardbasicflowers

Here is a close up of the flowers, it amazing how much fun you can have creating with craft supplies that are just hanging around in your craft space .  I used numerous flower paper punches, scrap pieces of cardstock, foam to shape the flower with a stylis tool and some glue 🙂

close up step card

For the flower pots I used rubber stamps that I had from Stampin Up and just covered up the flower images with my handmade flowers.

~ Happy Birthday Fran ~

Make It A Great Day and Don’t Forget To Leave Time To Craft!

Supplies Used:

Cuttlebug Birthday Card

Hello My Fellow Crafters,

This is a busy month for Birthdays in our family and I have to also make some cards for birthdays that were last month (sorry Luke and Riley)  So I really have to be creative and not make the same card over and over.  I am loving this bakers twine, it adds such a perfect accent to all kinds of creations 🙂

2014 rileys birthday card

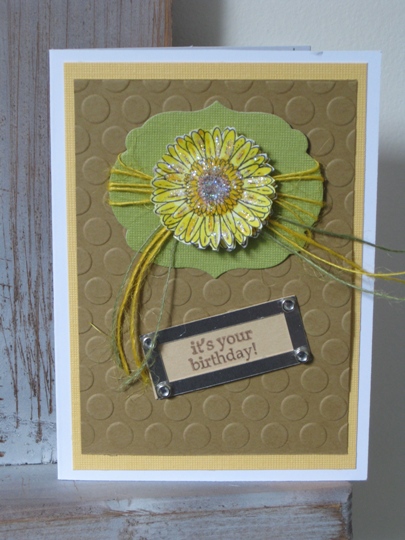
Using Memento tuxedo place ink I stamped the image of the flower twice, since I wanted to use a pop dot for a layered look.  Colored the flower with Copic sketch markers, and added some Stickles for the extra shimmer.

Then took out the Cuttlebug and cut the green cardstock using a Framelit Labels die from Sizzix.   Added some bakers twine by just wrapping around the paper and tied a knot.  Put the pop dot on top of the knot and added the stamped flower.

The card just needed more, so again I used the Cuttlebug but this time used an embossing folder of Big Dots, and craft cardstock.  I still needed to stamp happy birthday someplace, and I found some metal frames in a container with some rhinestone brads. This wound be perfect.  Since the brads went in the back of the Big Dot embossed cardstock I put another layer of cardstock behind so it wouldn’t tear the white base card.

The great thing about using a Cuttlebug is that you can cut images with thin metal dies (Framelits) and also emboss with all of the embossing folders on the market.

Thanks for stopping by today.  Hope this birthday card gives you some good ideas when you are making your own handmade greeting card.

~ Happy Birthday Riley ~

Make It A Great Day and Don’t Forget To Leave Time To Craft!

Coffee Cup Cricut Card Idea

Hello My Friends,

Today I want to share with you a handmade coffee cup birthday card that I made for my brother-in-law.  I have seen lots of cards in the shape of a coffee cups like the ones you would see at your local coffee shop, and I thought that would be a fun idea for a birthday card.  Well after looking at all of my Cricut Cartridges, would you believe that I did not have that cartridge?    So here is where a little imagination and some creativity comes in.

Using the From My Kitchen Cricut Cartridge, Gypsy and Cricut Expression machine,  I made a coffee cup card.

I cut the shape in blackout mode of the refrigerator, yup, you read that correctly the refrigerator.  All I did was cut the two small legs off the bottom and I had the shape of a coffee cup.  I was enclosing a gift card into this card so i just made sure when sizing this card that the card would fit inside without sticking out.  Using the Gypsy I welding the sides together which made a card.  All I needed to do is fold in the center.

coffeecupcricutcardidea

As I am writing this post and looking at the From My Kitchen Cricut Cartridge booklet and  I am laughing because I could have just used the shift function and I would have got the same image and wouldn’t have had to cut off the legs. 🙂

Anyway I increased the size and cut it out again but his time with a brown cardstock.  Then using a paper cutter (or you could use a scissor) just snipped off the top pf the refrigerator shape to make it look like a lid.  It looked good but seeing pictures of coffee cup lids they had some curve to it, so I took a small oval paper punch and with one punch on each side did the trick of looking like a lid.  Then added a piece of raffia for a little extra dimension.

For the bottom half of the coffee cup took the brown cardstock, cut a strip that would wrap around the entire card (just like the cup wrap you would get in a coffee shop so you don’t burn your hands on the hot cup)  ran that strip through the Cuttlebug with embossing folder.  Final touch was the circle birthday sentiment, circle punch then applied with a pop dot.

~ Happy Birthday Harry ~

Make It A Great Day and Don’t Forget To Leave Time To Craft!

Oreo Cookie Cricut Card Idea

Hello My Friends,

My Godson’s birthday is this month and I wanted to make him a special card.  He loves cookies and we sent him a big box of Oreo cookies as part of his present.  As I was looking the box it gave me a great idea.  Make a Oreo cookie card.

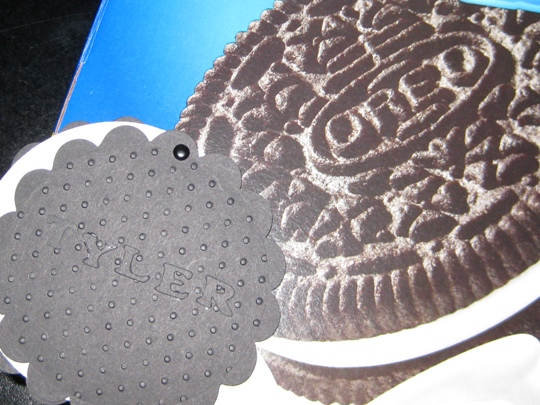
The Picture didn’t come out that good but the card looked great!

cricutcardideacookie

I made the cookie using the Cricut Expression along with the Mini Monograms Cricut Cartridge.  The circle scallop shape was great  for the cookie top and bottom and just a circle for the cream.  Also using the Cuttlebug I embossed the top with the polka dot embossing folder.

Then to make it a personal cookie instead of cutting out the letters for Oreo I used the Plantin SchoolBook Cricut Cartridge and cut out Tyler’s name for the top of the cookie.  Attached the top and bottom with a mini brad.

Looking at this picture as I am writing this post is making me want a big glass of milk and some cookies 🙂

Wishing Tyler A Very Happy Birthday!

Make It A Great Day and Don’t Forget to Leave Time To Craft!

Card Supplies:


Page 1 of 4
1 2 3 4