Christmas Scrapbook Page Made With The From My Kitchen Cricut Cartridge

12 Days of Christmas with Joans Craft World

On the ninth day of Christmas….

Well I just received a package in the mail, that puts a smile on my face every year at Christmas.  It is filled with lots of love and alot of sugar and flour.  You guessed it homemade COOKIES from my Mom and Dad.

12daysofchristmasjoanscraftworld

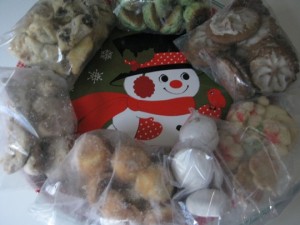
Mom gave me a Christmas cookie platter when we first got married and every year I just have to put the cookies that she sends on it.  I also have to leave the cookies in the bags that they were sent in, because if I don’t this platter would look really empty for this picture.

So, I decided to make a scrapbook page showing these beautiful delicious cookies.  To decorate this scrapbook page I will be using my Cricut Expression machine and two Cricut cartridges.  The From My Kitchen cricut cartridge, and Christmas Noel.

frommykitchencricutcartridge

Using the From My Kitchen cartridge I cut the cookies and rolling pin at 3 1/2″ and the word Cookie at at 2 1/2″.

The word Christmas I used the Christmas Noel Cricut cartridge and cut at 2 1/2″.

All I have to do now is print the picture of the cookies and add it to this years Christmas scrapbook page.  Oh I also have to go and get a glass of milk and eat some cookies.

Make it a Great Day and don’t forget to leave time to Craft!

Mom gave me a Christmas cookie platter when we first got married and every year I just have to put the cookies on it.  I have to leave the cookies in the bags that they were sent in, because if I even took them out for this photo, I would have eaten at least 5 cookies.

Cricut Christmas Crafts ~ Making A Family Snowflake Wreath

12 Days of Christmas with Joans Craft World

On the eight day of Christmas…

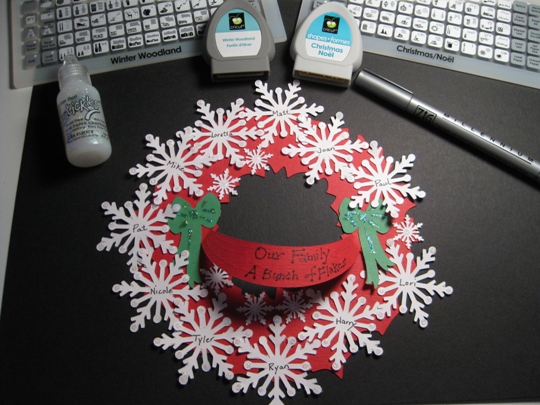
We are at the final stretch until Christmas and today I am making a Family Snowflake Wreath.  I will be using two Cricut cartridges and my Cricut Expression machine.

For the base of the wreath, garland and bows I used the Christmas Noel Cricut solutions cartridge .  I cut the wreath at 6″ using the shadow function key.  Then for the garland and bows I cut them out at 2 1/4″.

I then decorated the wreath with Snowflakes.  I used the Winter Woodland Cricut cartridge.  There are a few snowflakes on this cartridge but I really liked the one that is called Snowflk4.  I used the layers function key and cut this snowflake at 2 1/2″ on white cardstock.  I also cut some out at 1″ to fill in the blank spaces on the wreath.

Now for the really fun part.  I want this snowflake wreath to be my family wreath, so I wrote the names of each family member on a snowflake.  Then on the garland I decided to write Our Family ~ A Bunch of Flakes.  I wrote this with a Zig 05 Millennium black marker.

I glued each flake onto the wreath with a Zig 2 way glue and finished it all off with some Stickles at the end of each Snowflake for that special shimmer.

cricutcardprojectschristmascrafts

I Love the way this Christmas Snowflake Wreath turned out, and I don’t mind being a flake as long as my family is with me.

Make it a Great Day and don’t forget to leave time to Craft!

Making Christmas Gift Tags Using the Christmas Cheer Cricut Cartridge

12 Days of Christmas with Joans Craft World

On the seventh day of Christmas…

Well I didn’t start wrapping presents yet, but when I do I am going to need some gift tags.  So today I am going to use my Cricut Expression Machine and make some Christmas gift tags.

The Cricut Cartridge that I picked is called Christmas Cheer.  I am going to first cut out a plain tag at 4 inches on plain white cardstock, and decorate that tag with the image of a Christmas bulb that will be cut at 2 inches and  make them in all different colors.

cricutcartridgechristmascheer

Now just to show you how long that I have been crafting, I used cute little round stamps with different faces on them from EK Success called Paperkins Faces.  All I know is that everything Paperkins and Punchkins are discontinued, well at least it is not on there website anymore.  These stamps were used to put faces on Paperkins and Punchkins paper dolls.  I think these faces look really cute on these Christmas light bulbs and gives them some character.

joanscraftworldpaperkins

I also used clear stamps to put the “to” and instead of from I put “love” onto the white tag.  I left enough room to write the name of the person who is getting the gift.

Then to finish them off I am using ribbon from Bobbin Ribbon that has strands of Christmas light.  How perfect is that?

I will put them all together using Zig 2 way glue.  Now all I have to do is add these to the gifts and I will be all ready for Christmas.

Make it a Great Day and don’t forget to leave time to Craft!

The Cricut Gypsy Smiley Card Cartridge Is The Cutest One Yet!

12 Days of Christmas with Joans Craft World

On the sixth day of Christmas…

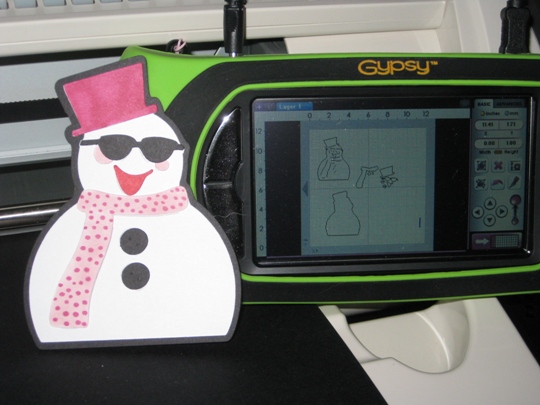
Hope everyone is having a great Saturday so far.  I just had to share with you the coolest image that I made with the new Smiley Card cartridge that I received when I updated my Gypsy back in October.

It can be a little tricky since there is no manual to compare your image too, but thank goodness for two fellow crafters Robyn and Tammy who work very closely with Provo Craft made samples of each image to share.

The name of this downloaded Gypsy cartridge is perfect, since when you cut out the images using your Cricut Expression or any of the Cricut machines and you start putting them together, you will have a Smile on your face. That is how cute they are.

So to keep in the theme of Christmas I decided to make a really happy Smiley Snowman.  I just love the sunglasses too!  When I was done cutting him out and putting him together I added some polka dots to his scarf using a copic sketch marker.

cricutgypsysmileycardcartridge

Make it a Great Day and don’t forget to leave time to Craft!

Quickutz Nativity 2×2 Dies vs Cricut Cutting Machine

12 Days of Christmas with Joans Craft World

On the fifth day of Christmas…

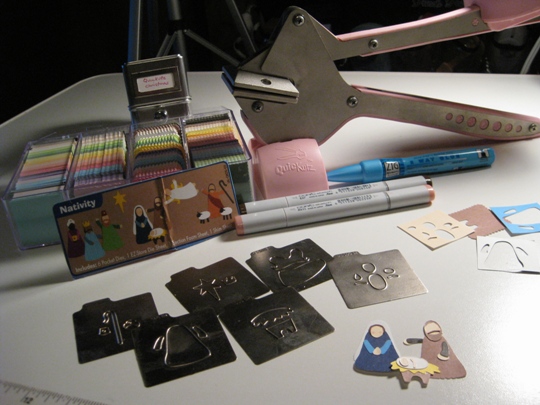
Many years ago, before I got my first original Cricut machine, I had (and still do have) a Quickutz Squeeze.  I started with the original blue one then of course upgraded to the pink (easier to use) one.  Anyway, I was going through all of the 2×2 metal dies that I have and came across the set of the Nativity.

So I decided for this Christmas craft that I would put this Nativity scene together.

I need to tell you all something I LOVE MY CRICUT EXPRESSION MACHINE!!!!!!!!!!!!!

I cut each image out by using the pink squeeze and my hand hurts already.  I know that I could use the Cuttlebug with the A, B and C plates to cut with these dies, but I want to make the entire Quickutz project with the Quickutz.  I have these small pieces of paper that fit perfectly over the metal dies so I’ going to use them and save paper.

The cutting part worked out OK, but holy cow, it’s really hard putting this all together since it is sooo small, and you have to figure out what piece to use over and over again for different parts of the scene.  If I didn’t save the piece of cardboard with the picture on it of what each image is suppose to look like, I would never have been able to put this together.  Well I gave up and only made Mary, Joseph and the baby Jesus.  I don’t even think that I put them together correctly.

quickutznativitypinksqueeze

That is why I love the Cricut Expression machine because you can make the shapes any size that you want.  Also the images are so much easier to put together.  Cricut takes the guess work out of how to put images together.

I’m not saying that the 2×2 Quickutz shapes are bad, I’m just saying the the Cricut cartridges are the best!

Make it a Great Day and don’t forget to leave time to Craft!

Page 3 of 4
1 2 3 4