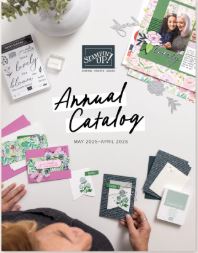
Scrapbookers in their effort to embellish their craft are turning to rubber stamping embossing as a great tool. And, on the other side of things, more and more stampers are taking up scrapbooking as an additional hobby. Most hobbies have several things in common, don’t they? Have you ever visited a stamping store? If yes, you would be amazed by the choices and possibilities. We will now look at some of the tips on what to buy (craft supplies) to make beginning with this wonderful hobby as much fun as possible. Some of the items you will need are going to be free, because you have them laying around the house. Some of the other product you are going to have to purchase.
Rubber Stamping and Embossing, Items You Will Need
The most essential tools required for these crafts are a good paper cutter or trimmer, a good pair of scissors and a good supply of card stock. Decorative scissors too can be a very useful tool, particularly when you are looking at greeting cards or similar stamped projects. The circle and oval cutters seem to be on their way out at least from this segment of the business. Templates and the X-acto knife are the preferred replacement for these cutters now. Similarly a paper crimper is something that you may not need because most of the card stock is sold as “pre-crimper”. Another useful tool can be make up sponges to help you apply dye-based ink on to an image for a soft look. A hammer will come in handy for working with eyelets , while a variety of pliers will be useful for working with wire. To store your tools and afford easy portability, you can think of a tool box too. A mouse pad or a desktop blotter under your card stock before stamping will provide the necessary cushion for you to stamp against.
Then you will need a top quality permanent dye-based inkpad in black. The pads should allow you to color in with markers, should be fast drying and versatile. A reinker to keep your pad juicy at all times will be a top necessity. A reinker will also help you to prolong the life of your pad. If you are careful not to allow your pad to get dry, it will remain juicy and juicy pads tend to last longer.
Don’t forget your heat gun
A heat gun and a variety of rubber stamping embossing powders are the next items in the list. To melt your embossing powders you will need the heat gun. The embossed stamps provide the raised finish and an archival quality. A clear embossing powder can be preferred over most pigment inks. When using metallic inks, using a metallic colored embossing powder will be advantageous. If clear embossing powder is used over metallic inks, the sparkle will be lost. Detail embossing powder will be handy for use in very detailed stamps, particularly because they melt to a finer line.
When you are doing embossing in your scrapbook, remember to always emboss your layouts before you attach your pictures to either side of your page. Your photographs can be damaged since the temperature of the heat gun is very high. The ideal way will be to emboss and then allow the page to cool before you put your pictures in.
When it is all said and done
In conclusion, don’t throw away scraps of paper. Stampers can find great value from the scraps of paper which can be converted into many designs. Your mistakes today can be the making of your greatest blessing tomorrow. A piece of work which you did not like today could pop up as excellent piece in a different setting tomorrow. Dare to experiment, don’t be intimidated by fancy projects and know that simple tamped cards and projects can be equally lovely. Rubber stamping embossing can give your project that extra flair that you always look for.
Have a Great Day and don’t forget to leave time to Craft!
Other ways that people will search for information on rubber stamping embossing are:
rubber stamping crafts
rubber stamping craft supplies
rubber stamping cards ideas
rubber stamping projects
best rubber stamping
Back to the top: Rubber Stamping Embossing


Great post, and great comments too.
Pingback: ORGANIZING YOUR CRAFT SUPPLIES - Part 3 of 3
Pingback: ORGANIZING YOUR CRAFT SUPPLIES - Part 2 of 3
Pingback: ORGANIZING YOUR CRAFT SUPPLIES - Part 1 of 3