Another Great Cricut Card Idea using the Paisley Cricut Cartridge for a Really Fun Birthday Card

I just got a new cell phone, a cute little Jest from Verizon.  My previous phone was really old and it was just a phone, no keyboard or any of the cool things that a cell phone has now a days.  So this new phone has a keyboard for text messaging and a pretty large screen so that I can see what I’m typing and most importantly what is being sent to me.  Now that I am all up to date with my new phone,  my niece and nephews are “texting” me, and it’s really great to be in touch with them.

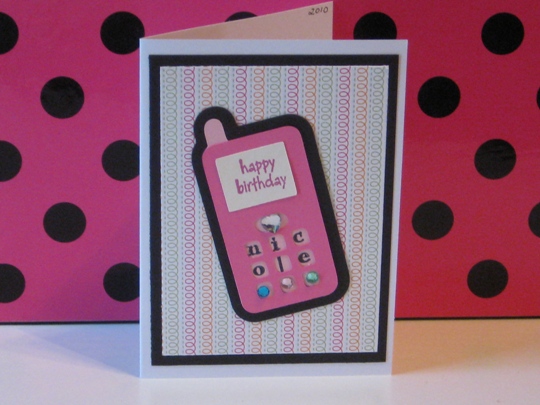
I thought that this Cricut card idea of a cell phone would be just perfect.  So using the Paisley Cricut cartridge, and my Cricut Expression machine, I cut everything at 3 1/2″.  Then for a personal touch to this great birthday card I decided to also use some rubber stamps.  I stamped happy birthday using a hero arts stamp on a plain white piece of cardstock that is the screen of the cell phone.  Instead of numbers on the keypad, I stamped the birthday girls name Nicole,  using studio G stamps.  Then filling in the empty spaces with some rhinestones added that special “bling” that every card needs.   I also used the Glitter Sweet stack paper from DCWV for layering the background.

I can think of so many Cricut Card Ideas, and hopefully you can too.  So get busy and start creating your own special Cricut Cards.

cricutcardideausingcricutpaisleycartridge

Wishing Nicole a Fantastic 10th Birthday!

Make it a Great Day and don’t forget to leave time to Craft!

Another Cute Birthday Cricut Card Idea Made With The Celebrations And Designer Calendar Cricut Cartridges

Our niece Riley’s 11th birthday is next week and again I wanted to made a cute card using my cricut.  What 11 year old girl doesn’t like cake and presents?

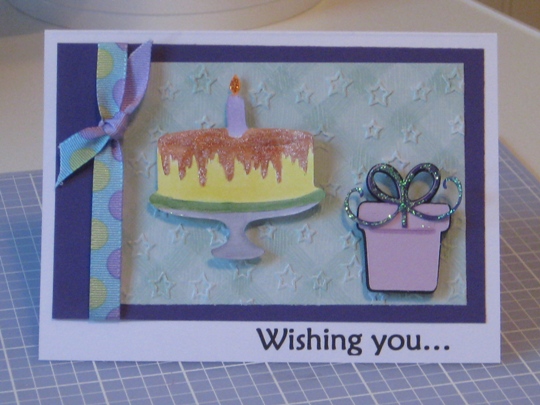
So I used those two things for the front of the card.  I cut out the cake  from the Designer’s Calendar Cricut cartridge and the present from the Celebrations Cricut cartridge, both using my Cricut Expression machine.

I cut the cake on plain white cardstock then colored in the image with Copic Sketch markers and then added some “bling” with stickles to the frosting of the cake and the flame of the candle.

The present I cut out on two different shades of purple but again added Stickles onto the bow to add a little sparkle to the present.

I then used my Cuttlebug and embossed a light green plaid piece of cardstock with a star embossing folder, layered that onto a solid piece of purple cardstock and finished with a polka dot bow, using American Craft ribbon.

I think this came out really cute and for the inside saying I printed on the computer:  Happy Cake and Presents Day!

Wishing Riley a Very Happy Birthday!

cricutcardidea

Make it a Great Day and don’t forget to leave time to Craft!

Handmade Birthday Cards Are So Much Fun To Make When You Have A Cricut Expression Machine And A Great Cricut Card Idea

I always loved to make handmade cards, but it is so much fun with a Cricut Expression machine.  My nephew is turning 13 and I needed to make a “cool” card.  When Luke was out visiting us a few years ago, we were always laughing so I wanted his card to make him laugh.

So using the Animal Kingdom Cricut cartridge I cut out the cow and all of the layers.  Added some stickles to give him (the cow) a little “pizazz”.  Then using the Cricut Gypsy, I welded together the phrase for the front of the card using Plantin Schoolbook and before I added it to the front of the card with pop dots, I used a white opaque Martha Stewart marker and added some polka dots.  Oops I almost forgot the grass is also from Plantin Schoolbook grass border.

animalkingdomcricutcartridge

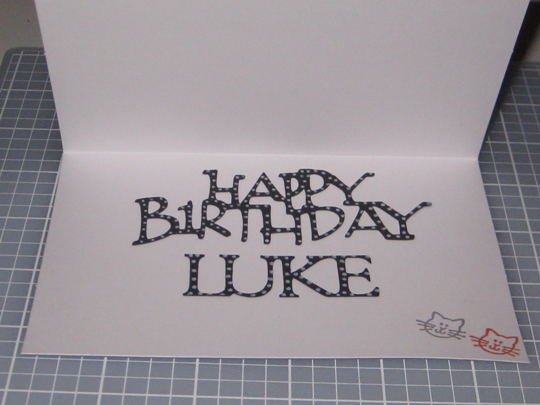
For the inside of the card I used the Beyond Birthdays Cricut cartridge for the phrase Happy Birthday and then I found a similar font for the birthday boys name.

beyondbirthdayscricutcartridge

Hope you enjoyed my birthday card, and my funny sense of humor.  Wishing Luke a Fantastic 13th Birthday!

Make it a Great Day and don’t forget to leave time to Craft!

A Great Cricut Card Idea for a Get Well Card Using Life’s A Beach Cartridge

Happy Tuesday Everyone ~ Hope you are all having a Wonderful Day

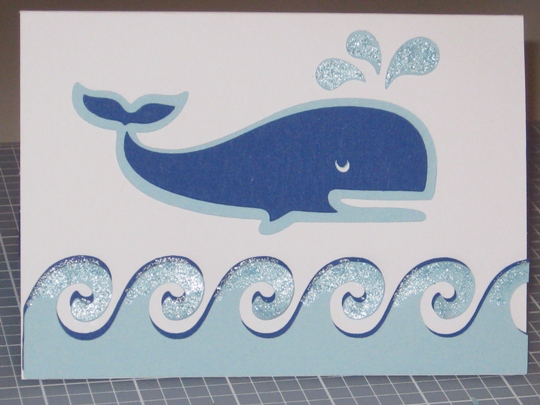
Today I needed to make a get well card for a dear friend who is going through a rough patch with his health.  I’m sure that he is receiving alot of cards with your typical message inside.  I on the other hand wanted to make him a handmade get well card to definitely put a smile on his face, so I decided to make a Get Whale Soon Card.

cricut card idea get whale soon

get well cricut card idea

I cut the whale with my Cricut Expression machine using the Life’s A Beach Cricut cartridge, along with the border of waves.

Then I used my Cricut Gypsy for the inside message using the Plantin Schoolbook cartridge for the font and the welding function to attach the letters together.

I had to give this card some “bling” so I used Baby Blue Stickles to add to the waves, and also made some polka dots on the letters with my Zig writer marker.

I hope that this card is what the doctor ordered to put a smile on his face.  Hope you like it too!

Make it a Great Day and don’t forget to leave time to Craft!

Many Fun Cricut Card Ideas Using the Animal Kingdom Cricut Cartridge

Today I am making a Cricut Card, a birthday card to be exact, for my Godson Tyler who is turning 11 years old this month.  I have so many great Cricut card ideas, but I want this birthday card to be really special and fun.

So, I got myself comfy on my sofa with my Gypsy for awhile and went through my cartridges and even some cartridges that I didn’t have, (you can view and also design with all the available cartridges with your Gypsy, you just can only cut with the cartridges that you own) to find something different, not just your ordinary birthday card look and I found it.  I have such a great Cricut Card Idea!

Using the Animal Kingdom Cricut Cartridge, I found a fish bowl with some really cute fish and plants to put inside.

animalkingdomcricutcartridgebirthdaycard

I cut the fish bowl using my Cricut Expression cutting machine at 3 inches, the fish at 1½ inches and the plant at 2 inches.  I attached all the pieces to a 4×5½ white card with my glue glider pro and for the “bubbles” I used pop dots for dimension.  I then added some stickles, funky fibers and a real star fish for the finishing touch.  I wanted the Happy Birthday Tyler to look like bubbles coming out of the fishes’ mouth.

There are so many shapes in each cartridge, you just have to put your “creative hat” on and get crafting.  You never know how it’s going to turn out, just wish for the best and remember “You Made it Yourself” , this is a handmade greeting card, which makes it even more special for the person who is receiving it!

~ Happy Birthday to my Fantastic Godson Tyler ~

Wish I could be there with you to celebrate and to give you a Big Hug & Kiss!

Make it a Great Day and don’t forget to leave time to Craft!

Page 5 of 6
1 3 4 5 6