A Rubber Stamp And Some Copic Sketch Markers Make the Perfect Father’s Day Card

I wanted this years handmade Father’s Day card to have a special meaning.  My husbands parents have alot of bird feeders on there lake front property and they love to see all the beautiful birds that come to the feeders.  They also have bears that frequently help themselves to the bird food.

So for this years card I used the House Mouse rubber stamp and colored in the image with Copic Sketch markers.  I then layered the image onto a solid piece of cardstock and layered again onto a very soft piece of cardstock that brought all the colors together.

housemouserubberstampandcopicsketchmarkers

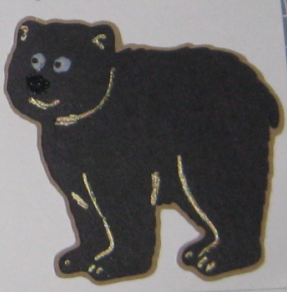
Now how does a bear come into this Fathers Day Card, well here is the inside of the card.  I computer generated the saying but then I cut out a bear with my Cricut Expression machine using the Animal Kingdom Cricut cartridge.  Well I had to crop the inside since when I took the picture it had our mushy sentiments inside but this is what is said:

wishing_you_a_beary_happy

animalkingdomcricutcartridgebear

Wishing the Best Poppa a Very Happy Father’s Day!

Make is a Great Day and don’t forget to leave time to Craft!

Making A Father’s Day Card With The Cricut Expression And The Animal Kingdom Cricut Cartridge

With Father’s Day just around the corner, I wanted to make a fun Cricut card for my Dad.  Last month when I was visiting my family, we were getting silly one afternoon and were all making fish faces.  I even got my Dad to make one.  Anyway, I wanted his card to have a memory of that silly afternoon.

I went through my Cricut Cartridges and the Animal Kingdom was the winner again.  There is a Fishy Kisses saying along with a fish face.  It was so simple to make with just three layers, but ohhhhhhh so cute.

Happy Father’s Day Dad ~ You’re the Best!

animalkingdomcricutcartridgefishykisses

Make it a Great Day and don’t forget to leave time to Craft!

Handmade Birthday Cards Are So Much Fun To Make When You Have A Cricut Expression Machine And A Great Cricut Card Idea

I always loved to make handmade cards, but it is so much fun with a Cricut Expression machine.  My nephew is turning 13 and I needed to make a “cool” card.  When Luke was out visiting us a few years ago, we were always laughing so I wanted his card to make him laugh.

So using the Animal Kingdom Cricut cartridge I cut out the cow and all of the layers.  Added some stickles to give him (the cow) a little “pizazz”.  Then using the Cricut Gypsy, I welded together the phrase for the front of the card using Plantin Schoolbook and before I added it to the front of the card with pop dots, I used a white opaque Martha Stewart marker and added some polka dots.  Oops I almost forgot the grass is also from Plantin Schoolbook grass border.

animalkingdomcricutcartridge

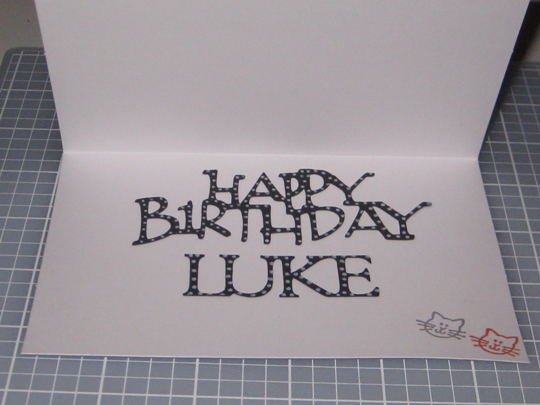
For the inside of the card I used the Beyond Birthdays Cricut cartridge for the phrase Happy Birthday and then I found a similar font for the birthday boys name.

beyondbirthdayscricutcartridge

Hope you enjoyed my birthday card, and my funny sense of humor.  Wishing Luke a Fantastic 13th Birthday!

Make it a Great Day and don’t forget to leave time to Craft!

Many Fun Cricut Card Ideas Using the Animal Kingdom Cricut Cartridge

Today I am making a Cricut Card, a birthday card to be exact, for my Godson Tyler who is turning 11 years old this month.  I have so many great Cricut card ideas, but I want this birthday card to be really special and fun.

So, I got myself comfy on my sofa with my Gypsy for awhile and went through my cartridges and even some cartridges that I didn’t have, (you can view and also design with all the available cartridges with your Gypsy, you just can only cut with the cartridges that you own) to find something different, not just your ordinary birthday card look and I found it.  I have such a great Cricut Card Idea!

Using the Animal Kingdom Cricut Cartridge, I found a fish bowl with some really cute fish and plants to put inside.

animalkingdomcricutcartridgebirthdaycard

I cut the fish bowl using my Cricut Expression cutting machine at 3 inches, the fish at 1½ inches and the plant at 2 inches.  I attached all the pieces to a 4×5½ white card with my glue glider pro and for the “bubbles” I used pop dots for dimension.  I then added some stickles, funky fibers and a real star fish for the finishing touch.  I wanted the Happy Birthday Tyler to look like bubbles coming out of the fishes’ mouth.

There are so many shapes in each cartridge, you just have to put your “creative hat” on and get crafting.  You never know how it’s going to turn out, just wish for the best and remember “You Made it Yourself” , this is a handmade greeting card, which makes it even more special for the person who is receiving it!

~ Happy Birthday to my Fantastic Godson Tyler ~

Wish I could be there with you to celebrate and to give you a Big Hug & Kiss!

Make it a Great Day and don’t forget to leave time to Craft!

Using the Cricut Expression Machine with the Animal Kingdom Cricut Cartridge

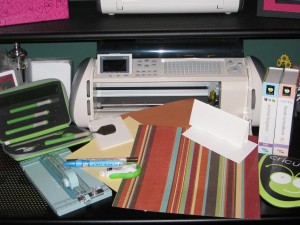
I needed to make a birthday card for a friend who is turning 60. I wanted to create a custom handmade card that would be fairly special. I was determined to use my cricut expression to help me do this. As I went through the various cricut cartridges I had in my supplies, I came across the animal kingdom cricut cartridge and thought that would work just fine for me. Let me share with you what I ended up doing.

What you’ll need:

cardstepssupplies2Cardstock: Hobby Lobby patterned paper and solid brown and beige paper from World Win Papers, Die cut machine: Cricut Expression, Cricut cartridge: Animal Kingdom Cricut Cartridge for Owls and the word Whooo,: Plantin Schoolbook for the numbers 6, 0 and the letter’s, Little Greetings from hero Arts 3×6 card with envelope, All Night Media mini Pop Dots, Zig 2 way glue, K&Company permanent tape runner, Zig Memory System chocolate colored marker, and Rhinestones that I had in a jar.

How to make it:

I started with a neutral card base. Cut a strip of the patterned paper and adhered to the card with tape runner.

cardsteps2

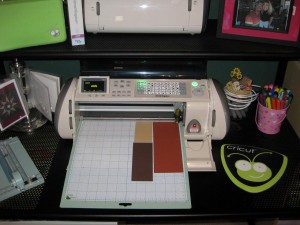
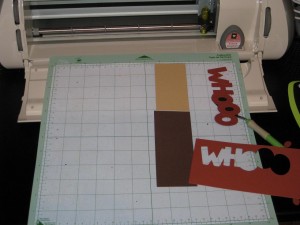
Placed the paper on the Cricut cutting mat as shown in the picture and loaded paper into my Cricut Expression. I selected the size that I wanted to cut out the images. For the words and numbers I used size 1 ¼”, Owls were cut to 1 ¾” and 1 ¼”. Pressed the image that I wanted on the keypad and then the Cut button to start cutting.

cardsteps3

When the cutting has stopped, press the unload paper key. Using my spatula tool I removed the images from the cricut cutting mat.

cardsteps4

Wanting a stitched look I used my Zig marker and went around the letters and numbers making little dashes, then using my pop dots and glue stick, I put the images to the patterned paper, and then added rhinestones for the eyes.

cardsteps61

I was pleased the way it turned out and I know that he will not be getting a duplicate of this card. It is a one-of-a-kind Joan’s Craft World creation.

Make it a Great Day and don’t forget to leave time to Craft!